I am a country girl, born and raised on a farm in Central Iowa. I am the youngest of three children by 9 and 14 years….I was the OOPS! Being younger had its advantages in that I was an Aunt at age 7 and grew up with my niece and nephews. My Father died from a farm injury when I was 12, which forever changed my life and strengthened my bond with my Mother. I tagged along with my Mother to visit older people in our community and learned about their lives in the early 1900s, enjoying the many wonderful traditional foods and family stories.
I graduated from a class of 25, which gave me the advantage of being involved in sports and clubs that would not have been possible in a large High School. At that time, Home Ec was still an elective and I loved the cooking lessons (not so hot on the sewing classes). While at the University of Northern Iowa, I began to collect and read cookbooks. Perhaps it was the absence of Mom’s home cooking that drew me to dream about cooking (and eating) wonderful food. After college I moved to St. Joseph, MO and then to Scottsdale, AZ and began to experiment with traditional recipes and discovering those of my own. It was such an adventure to discover new dishes and restaurants in historic St. Joseph, Kansas City, then Scottsdale, Phoenix, San Diego…and the list goes on.
In the early ‘80s, I moved to Denver, got married, started my telecommunications sales career and discovered the fabulous restaurants in Denver and Aspen. My career took me to cities never before experienced and the seafood in San Francisco, Cajun fare in New Orleans, Tex-Mex in Dallas, Italian in New Jersey, etc. are experiences I will cherish. In 1986 our first daughter, Megan, was born and then Sarah in 1988. Instead of indulging in dinners out, we were cooking more at home and seeking ways to have good meals with limited time. Dinners went from adult gourmet to more kid friendly meals. Megan’s tastes were more basic while Sarah adopted a gourmet palate at an early age. At age 6 her favorite meal was steamed artichokes and crab legs with drawn butter…still her favorite. Megan’s tastes expanded rapidly when she went to college and started cooking for her roommates and now loves to whip up gourmet dishes.
I am blessed to have many gal pals that also share my passion for good food. I love to try new restaurants and look forward to the ‘pot luck’ feasts at our book club meetings and other gatherings. It isn’t just the good food that brings us to together, but the great love and admiration we all have for each other.
We are addicted foodies…but we try to remember our 12-step foodie program is needed.
God grant me the serenity to only eat the food that I LOVE,
the courage to walk away from junk food,
and the wisdom to recognize the difference. Oh YEAH!
Broccoli with Garlic Egg Sauce is a family favorite and served with holiday meals or gatherings. Now I know it sounds somewhat disgusting, but, trust me, it’s delicious. I came across this recipe several years ago in the cookbook from popular Denver restaurants. The cookbook is long gone but the memory of the recipe is still with me. If anyone knows of the origin of the recipe at a Denver establishment, please comment.
Broccoli with Garlic Egg Sauce
INGREDIENTS:
1 pound fresh broccoli, washed and cut into flowerettes
3 hard-boiled eggs, shelled and diced
3-4 T. olive oil
1-2 garlic cloves, minced
bread crumbs, about 1/2-1 cup
salt and pepper to taste
DIRECTIONS:
Steam the broccoli until tender.
Heat olive oil in pan. Add minced garlic and saute. Add chopped eggs, salt and pepper. Stir in bread crumbs.
Place broccoli in a serving dish and top with the garlic egg sauce.
Shrimp Scampi is a favorite for our family and daughter, Sarah, made this delicious dish. It was so yummy and the kids devoured it, too. Definitely worth a place in the recipe box (or in today’s term, digital file).
Cheesecake Factory Shrimp Scampi
INGREDIENTS:
1-2 lbs fresh shrimp, cleaned and deveined
Angel Hair Pasta
1 diced tomato
6-8 whole cloves of garlic
1 diced shallot
1 pint heavy cream
1 cup dry white wine
Olive oil
Fresh basil
Parsley
For the Shrimp:
Milk
Parmesan cheese
1/2 cup all-purpose flour
1/4 teaspoon salt
1/2 teaspoon freshly ground black pepper
1/4 teaspoon cayenne pepper
DIRECTIONS:
Pour enough olive oil in a large sauce pan to cover the bottom, turn to medium high heat. This is the only pot you’ll need for the sauce so it should be big.
Soak the shrimp in milk and combine the dry ingredients (flour, cheese, salt, pepper). Coat the shrimp with the dry ingredients and let them fry in the olive oil, About 2 minutes per side until golden brown. The flour that falls off the shrimp will add great flavor and consistency to the sauce. Add more oil as necessary, between batches of shrimp. Dab the shrimp with a paper towel and put aside.
Add the garlic to the oil, stir for a few minutes, then turn the heat to medium low.Taste the food and spice accordingly, you’ll definitely need some salt. Now add the wine and bring it to a boil. Then turn the heat to low and cover, let the wine reduce, about 10-15 minutes.
COOK ANGEL HAIR PASTA in a separate pot.
Add the cream, and bring it back to a boil, turn heat to low and simmer for 10 more minutes. Now add the fried shrimp, Basil, diced tomato, and parmesan cheese. The sauce will thicken as it cools.
To plate pour some sauce on a arange the shrimp around the bottom (10 or so), then take a ball of the pasta and plate that above the shrimp. garnish with a little parsley.
Crispy Parmesan Cauliflower Bites are absolutely delicious. This recipe is easy to prepare and great as an appetizer or as a side dish. I haven’t tried this with my grandkids buy I think they would eat it, too. I do love a roasted vegetable, and this one is over the top!
Crispy Parmesan Cauliflower Bites with Creamy Onion Dip
INGREDIENTS:
1 small head cauliflower, cut into thinly sliced florets (about 1/2″ thick)
3/4 cup freshly grated parmesan cheese
2 1/2 to 3 tbps unsalted butter
1/2 tsp dried oregano
1/2 tsp garlic powder
3/4 tsp salt
1/2 tsp pepper, divided
1 tbsp olive oil
2 tbsp chopped parsley (I used dried parsley)
For the dip:
1/2 cup sour cream or Greek yogurt
2 tbsp chopped parsley (I used dried parsley)
2 tbsp chopped chives
1/2 tsp onion powder
1/4 tsp salt
pinch of black pepper
Toppings (optional): fresh chopped parsley
DIRECTIONS:
Preheat over to 400 degrees Fahrenheit.
Add the butter to a large casserole dish or cookie sheet and place in the oven while it preheats to melt.
Add the parmesan cheese, oregano, garlic powder, 1/4 tsp salt and 1/4 tsp pepper to a small bowl. Mix to combine. Set aside.
Add the cauliflower to a large bowl, then add the olive oil, remaining salt and pepper, and parsley. Toss to combine.
Remove the casserole dish from the oven, add the parmesan cheese mixture to the bottom of the dish and spread evenly.
Place the cauliflower florets into the dish, flat down. Sprinkle any of the remaining parsley or cauliflower bits over the top, then sprinkle a little bit more parmesan cheese.
Place in the oven for 30-35 minutes until the parmesan on the bottom has browned. Remove the dish from the oven and allow to cool for a few minutes.
While the cauliflower roasts, make the dip. Add the sour cream or yogurt to a small dish, then add salt, onion powder, parsley, chives and pepper. Mix to combine.
Place the cauliflower on a plate, top with parsley and serve with the dip.
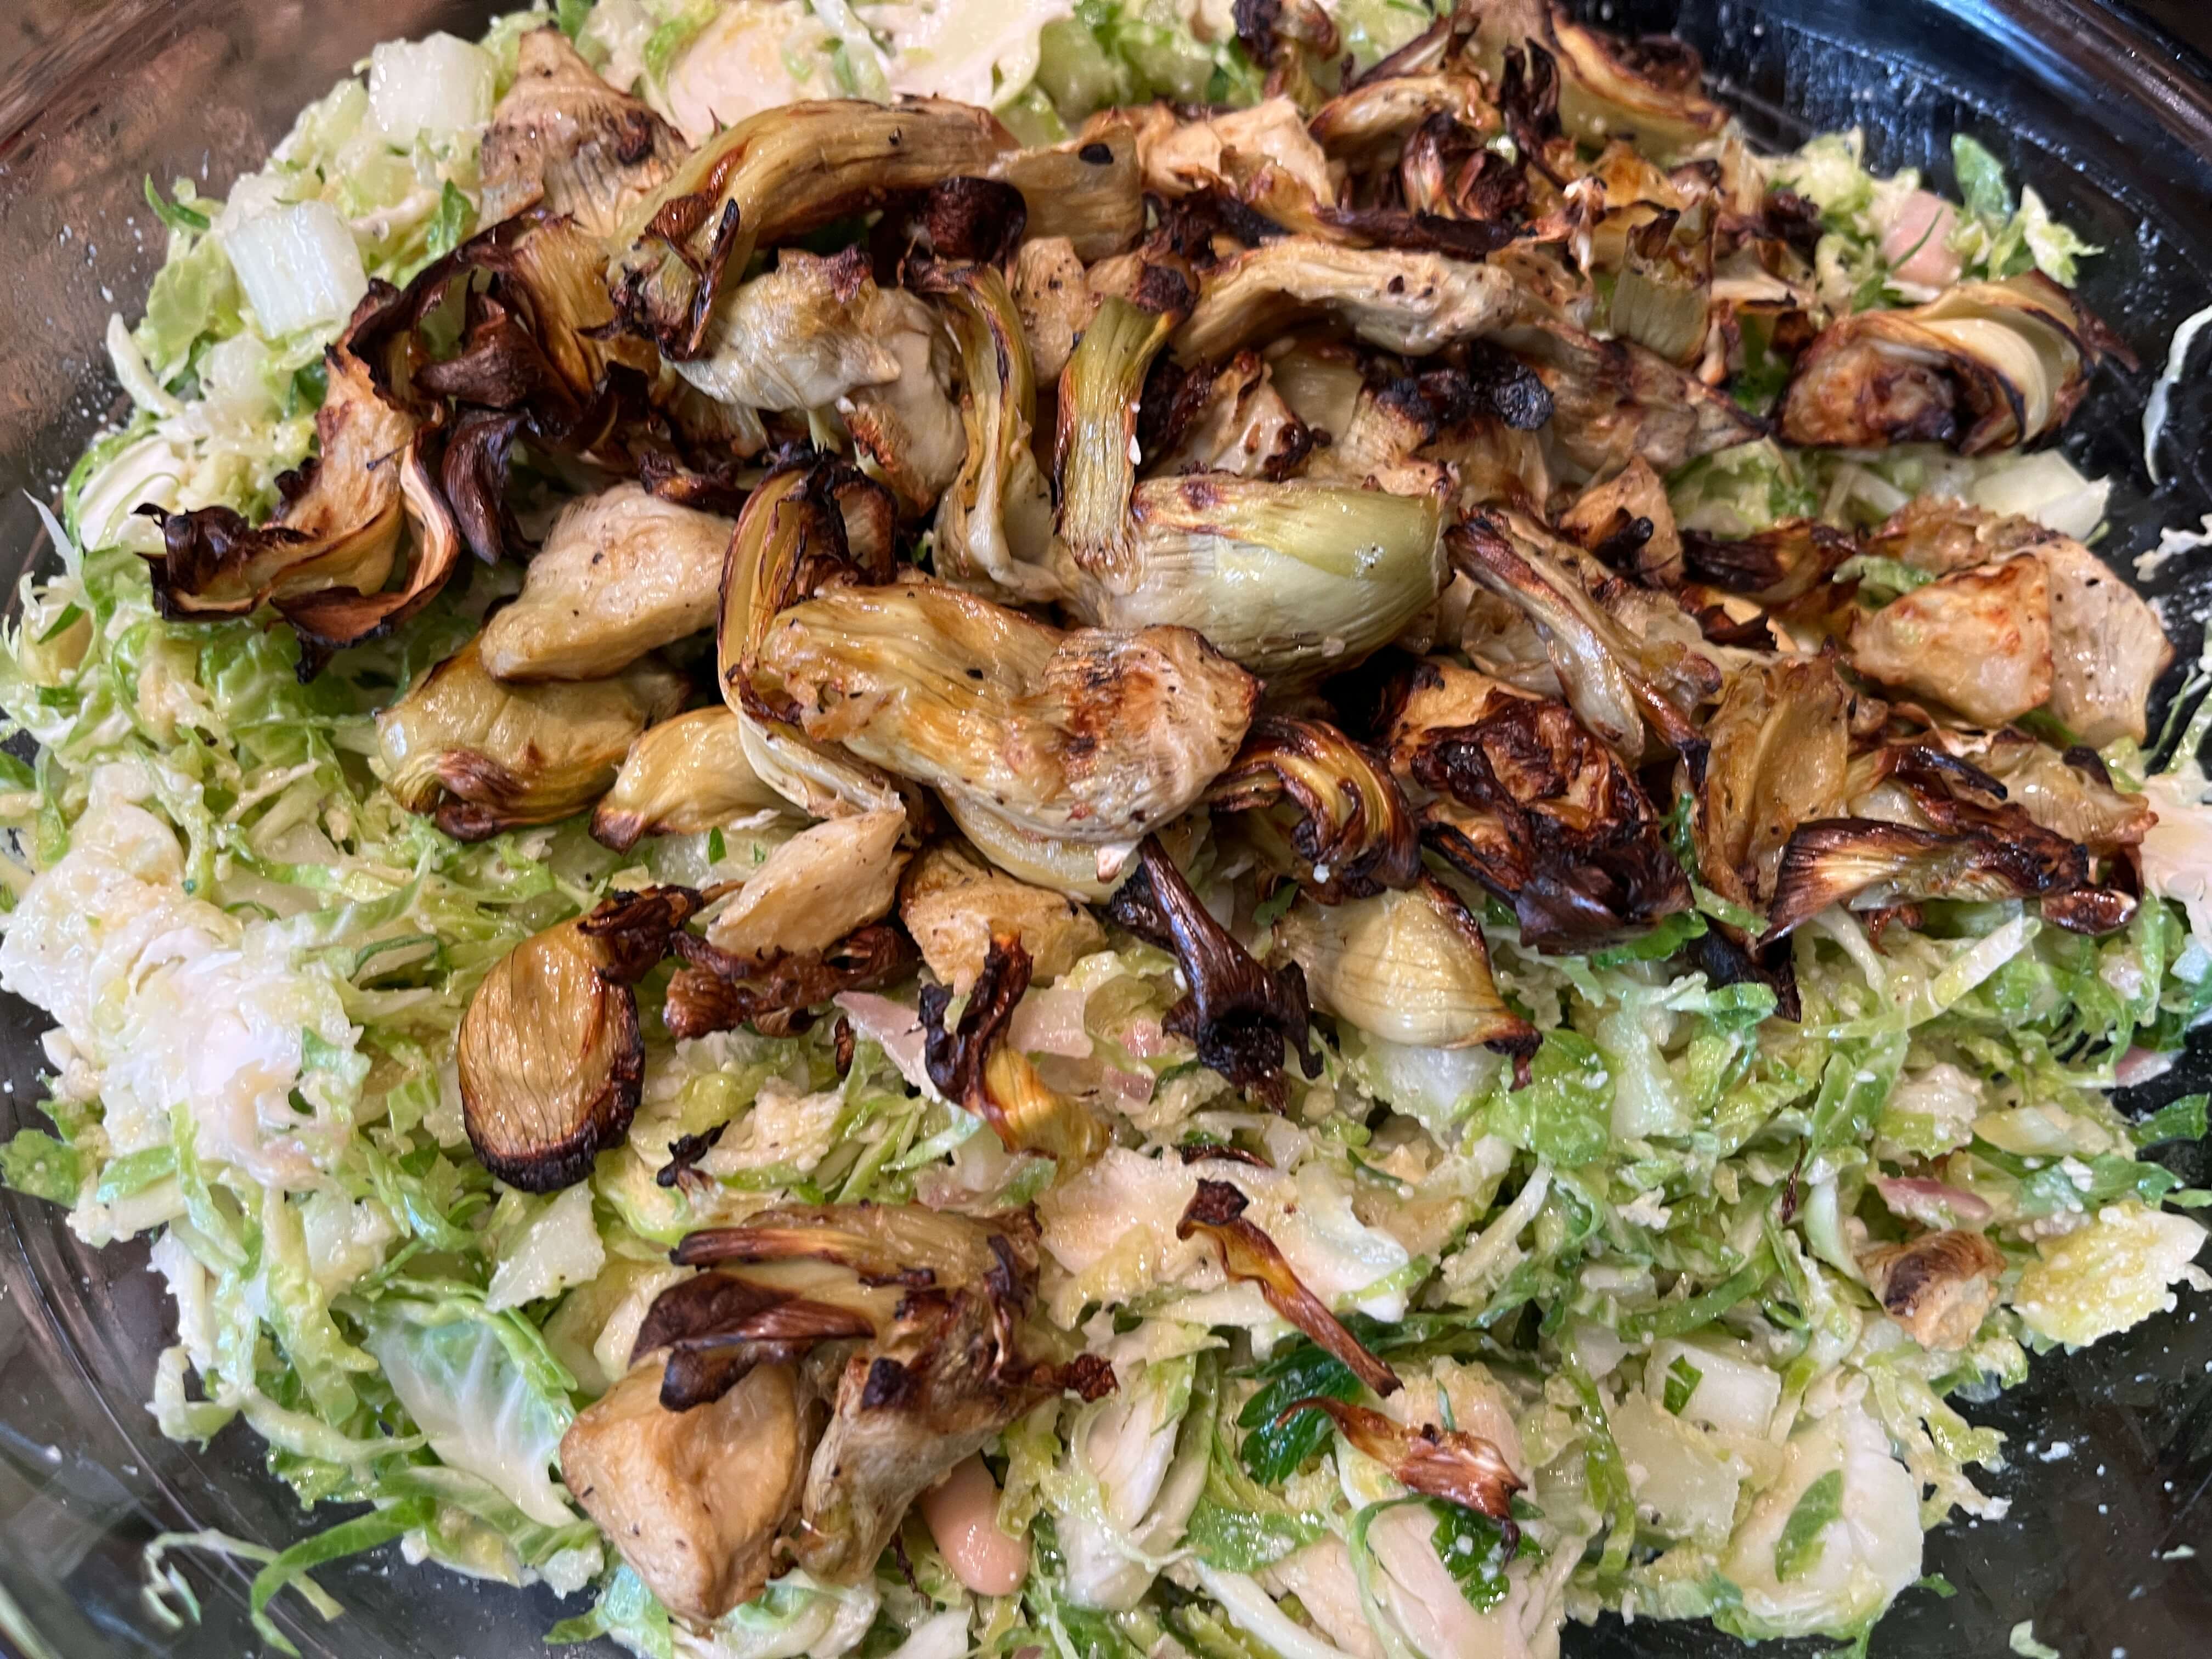
My Air Fryer was calling to me to please try this recipe. I love artichokes, I love salad with parmesan, so what’s to lose! The air fried artichokes were delicious, just to start, but the crunch of the brussel sprouts and celery with the flavorful lemon Parmesan dressing was delicious. I served the dressing separately so I could enjoy the leftovers the next day. It’s a delicious salad that I’ll be making again soon!
Air Fried Artichoke Salad with Lemon Parmesan Dressing
INGREDIENTS:
2 cans artichokes in water, drained
2 cloves garlic, minced
extra virgin olive oil
Kosher salt
Fresh cracked black pepper
6 cups Brussels sprouts
4 stalks of celery, diced
1 can white beans, drained
1/2 cup fresh parsley, chopped
1 small shallot, minced
2 tsp Dijon mustard
1 lemon, juiced
1/2 cup Parmesan cheese, grated plus more for topping, if desired
DIRECTIONS:
To make the Air Fryer Artichokes:
Pat drained artichokes well with a tea towel, then transfer to a bowl.
Toss artichokes with minced garlic, one tablespoon of the olive oil, 1/4 teaspoon salt and a few cracks of black pepper.
Transfer them to an air fryer basket and air fry for at 400 degrees F for 15 minutes.
Once they are crispy and browned, let them cool for a couple of minutes, then slice in half. Reserve.
To Make the Dressing and Salad:
In a glass jar or bowl, combine the minced shallot, Dijon mustard, Parmesan cheese, lemon juice, 1/2 cup extra virgin olive oil, 1/2 teaspoon Kosher salt, and 1/4 teaspoon black pepper.
Whisk or shake to combine.
Shave the Brussels sprouts thinly on a mandoline, or using a very sharp knife.
Add these to a large serving bowl along with the white beans, celery, artichokes and parsley.
Pour the dressing over the salad and toss to combine.
Top with a little bit more Parmesan, if desired, and serve.
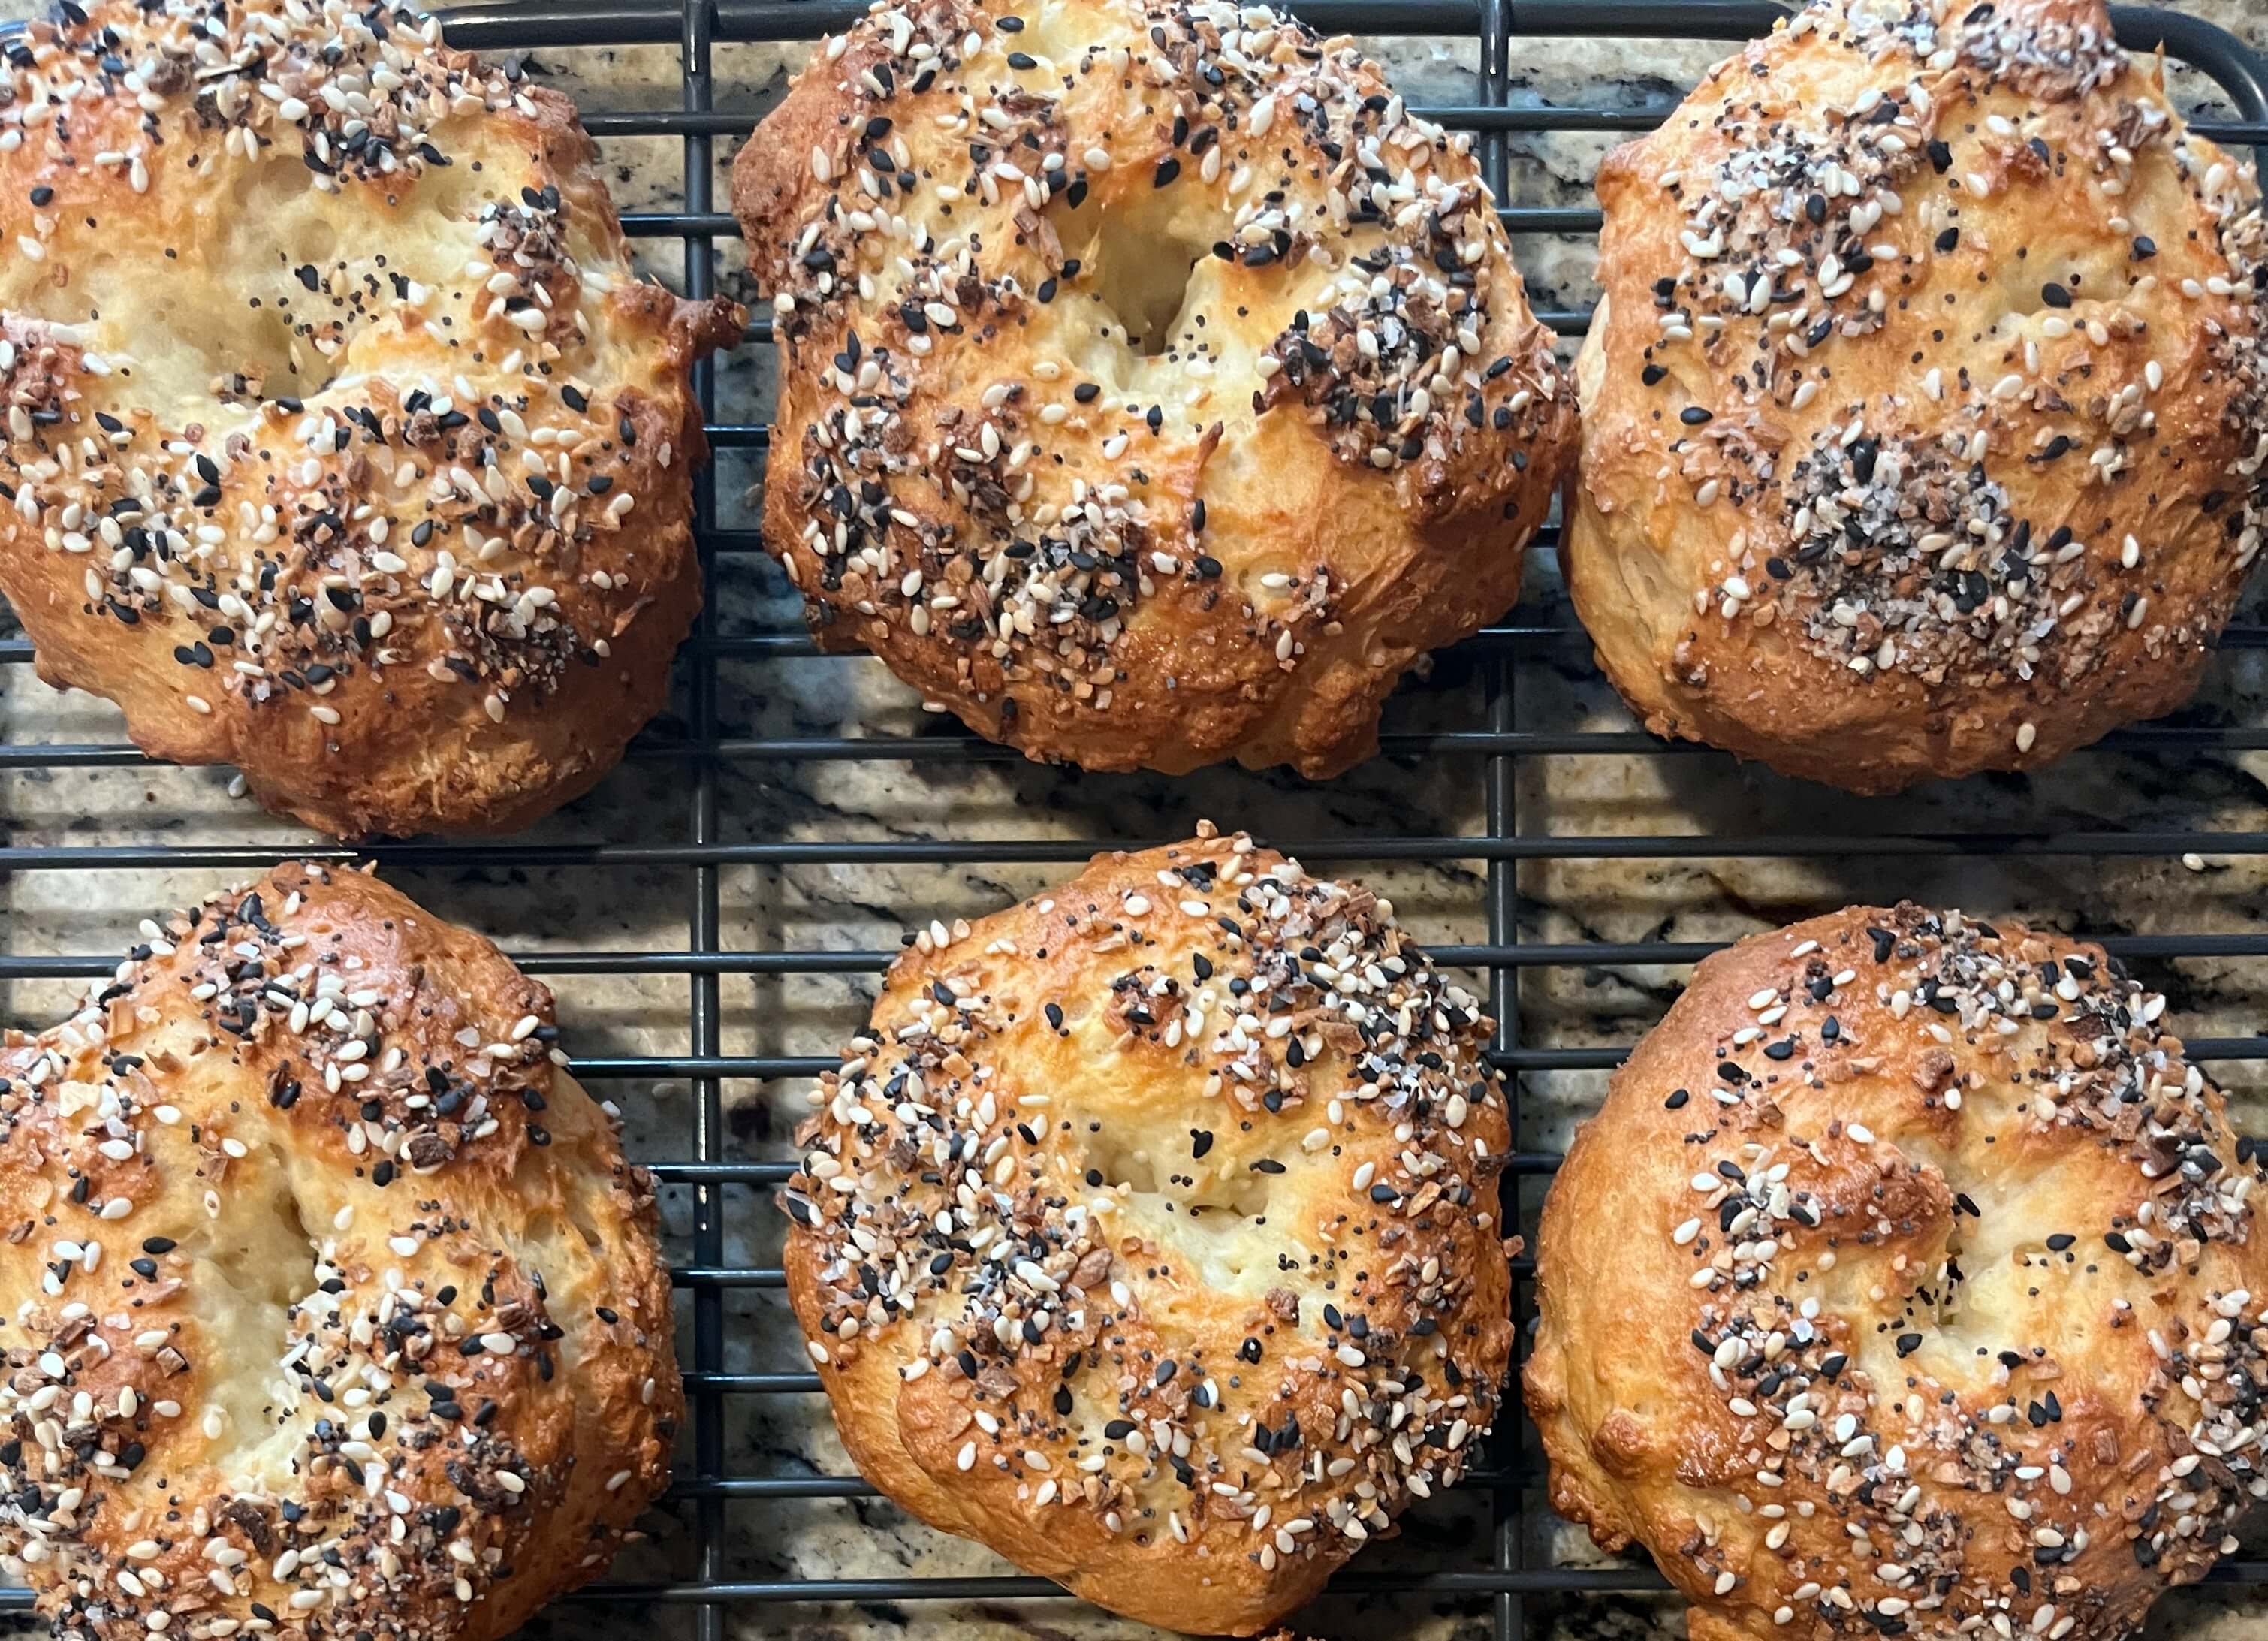
Who ever heard of such an easy recipe for bagels? I had to try this recipe and I was so surprised at how delicious they were. I ate one fresh from the oven with cream cheese and the next day I toasted one and also served with cream cheese. Delish! I shared with the family and they agreed that they were delicious. I only dipped the egg-washed dough in Everything But the Bagel seasoning but additional salt could be added.
Easy 3 Ingredient Bagels
INGREDIENTS:
3 cups All purpose flour
3 cups Greek yogurt
4 1/2 tbs Baking powder
1 1/2 cups
Everything bagel spice
Salt (optional)
1 large Egg
DIRECTIONS:
Preheat over to 400F and line a baking sheet with parchment paper.
Into a bowl pour in flour, greek yogurt, salt, baking powder, and salt. Using a wooden spoon mix together until a shaggy dough forms. Pour out onto a lightly floured surface and knead the dough with your hands for about 2 minutes.
Divide the dough into 9-12 equal sized balls. Using your thumb and index finger pinch through the middle to form a hole in the middle of each ball. Gently stretch them and then place on a parchment lined baking sheet.
Brush on egg wash and them gently drop the egg washed side of the bagel into the everything bagel seasoning. Feel free to use any flavouring you like.
Place the bagels on the baking sheet and bake for 30 minutes. Remove from the oven and allow to cool. Toast and enjoy.
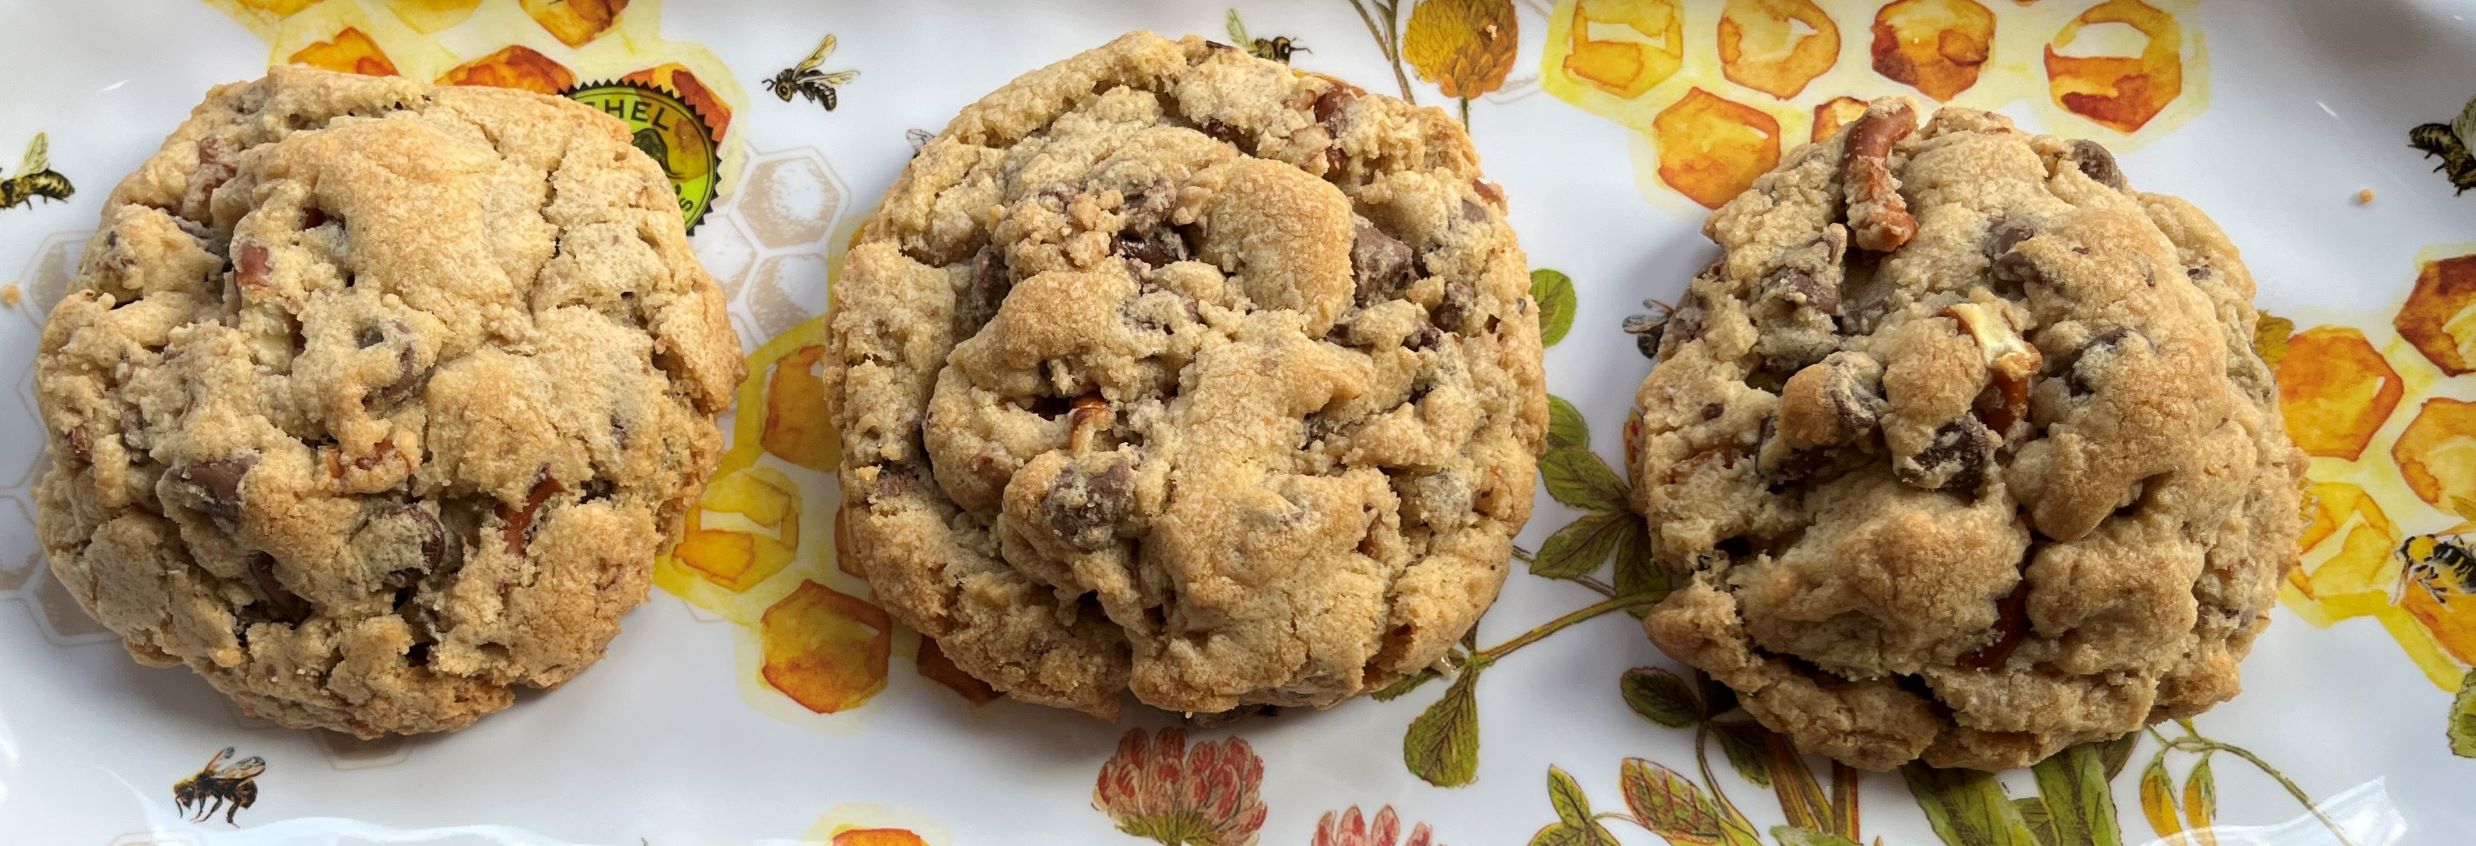
These cookies are amazing! I’m not familiar with Crave’s cookies, but this recipe was intriguing with the addition of crushed pretzels. I’ve never made cookies this big but follow the recipe for the best results. I baked for the full 15 minutes and would stop at 13 minutes next time. They do continue to book on the sheet and you don’t want them to cook too long and dry out. Make sure you let them rest for the full 20 minutes to set up. Then grab a glass of milk or a cup of coffee and enjoy!
Crave’s Rockstar Cookie Recipe
INGREDIENTS:
1 cup milk chocolate chips
1 cup semi sweet chocolate chunks
3/4 cup crushed pretzels
3/4 cup toffee bits
1 cup salted butter
1 cup brown sugar
1/2 cup granulated sugar
1 egg
1 tsp vanilla
2 1/4 cup all purpose flour
1 tsp baking soda
1/2 tsp salt
sea salt for garnish
DIRECTIONS:
Preheat the oven to 350°.
Measure out the milk chocolate chips, semi sweet chunks, pretzels and toffee bits into a bowl. Set aside.
In the bowl of a stand mixer, cream together the butter and sugars until smooth, light in color and fluffy. This will take a few mintues.
Scrape the sides of the bowl and mix in the egg add vanilla.
Once completely combined, stop the mixer and add in the flour, baking soda and salt.
Start mixing slowly, once the flour mixture is about half way incorporated into the dough, pour the chocolate chips, pretzels and toffee bits into the mixer and allow everything to mix together.
Stop the mixer as soon as the flour is completely incorporated. Avoid over mixing.
Measure out the dough into generous 1/3 cup portions or weigh out 6 oz of cookie dough for each cookie. Loosely gather the dough together in a tall ‘ball’ leaving the top jagged, for texture. Avoid packing the dough together tightly.
Repeat this with all of the cookie dough.
Bake at 350° for 13-15 minutes, or until the cookie dough has spread and the edges are turning golden brown.
Immediately after taking the cookies out of the oven, use the back of a metal spoon and push the edges of the cookie towards the center, creating a perfect circle.
Allow the cookies to cool on the pan for 20 minutes.*
Serve warm.
*The cookies will continue to bake on the hot pan, so it is okay if the center of the cookies still look slightly underbaked when you take them out of the oven.
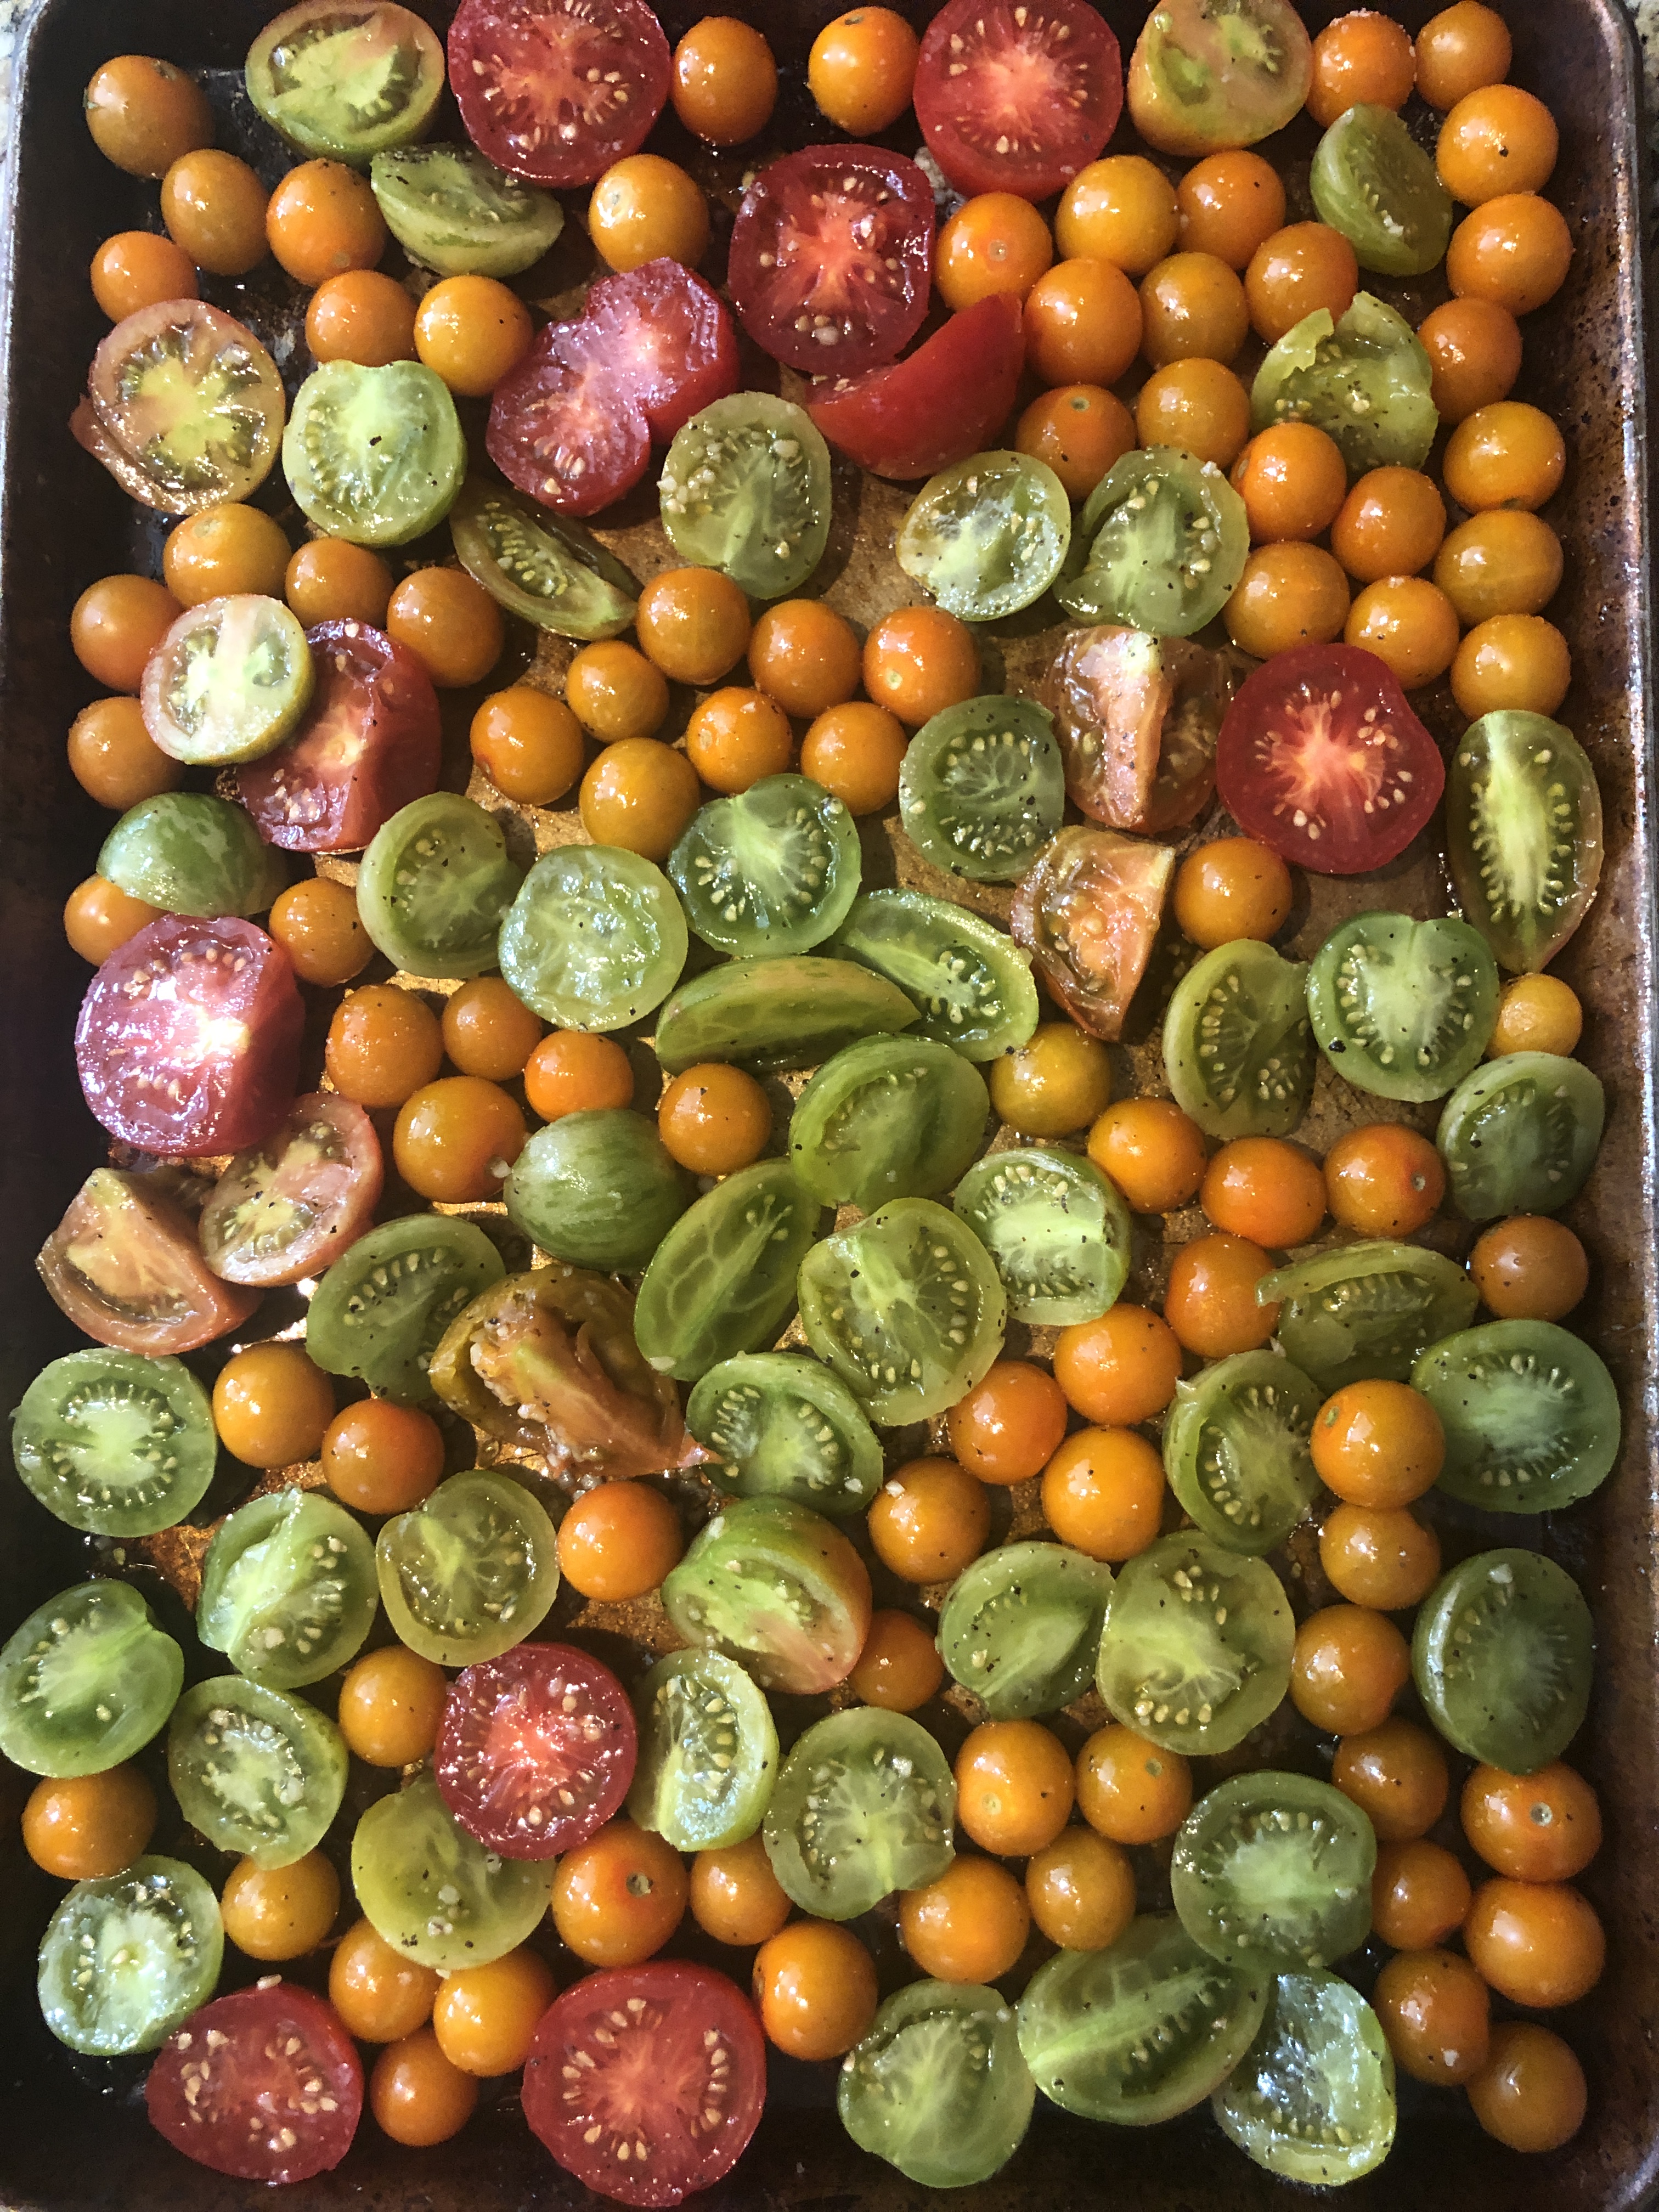
Roasted Tomatoes are a family favorite and are delicious served in a variety of ways. When my garden tomatoes are overwhelming, I turn to roasting them. Sometimes I roast them without the balsamic vinegar, with just olive oil, garlic and occasionally strips of anaheim peppers. The tomatoes are delicious by themselves or served with cream cheese, feta or goat cheese as an appetizer. Try them on a pizza or in egg cups. I’ve frozen the roasted tomatoes with good success and find them to be quite a treat in the winter
Balsamic Roasted Tomatoes
INGREDIENTS:
12 plum tomatoes, halved lengthwise, cores and seeds removed (I used a variety of tomatoes from my garden, halved and not seeded)
4 tablespoons good olive oil
1 1/2 tablespoons balsamic vinegar
2 large garlic cloves, minced
2 teaspoon sugar
1 1/2 teaspoons kosher salt
1/2 teaspoon freshly ground pepper
DIRECTIONS:
Preheat the oven to 450 degrees F.
Arrange the tomatoes on a sheet pan, cut sides up, in a single layer. Drizzle with olive oil and balsamic vinegar. Sprinkle the garlic, sugar, salt, and pepper over the tomatoes. Roast for 25 to 30 minutes, until the tomatoes are concentrated and beginning to caramelize. (I had to roast mine for 10-15 minutes longer). Serve warm or at room temperature.
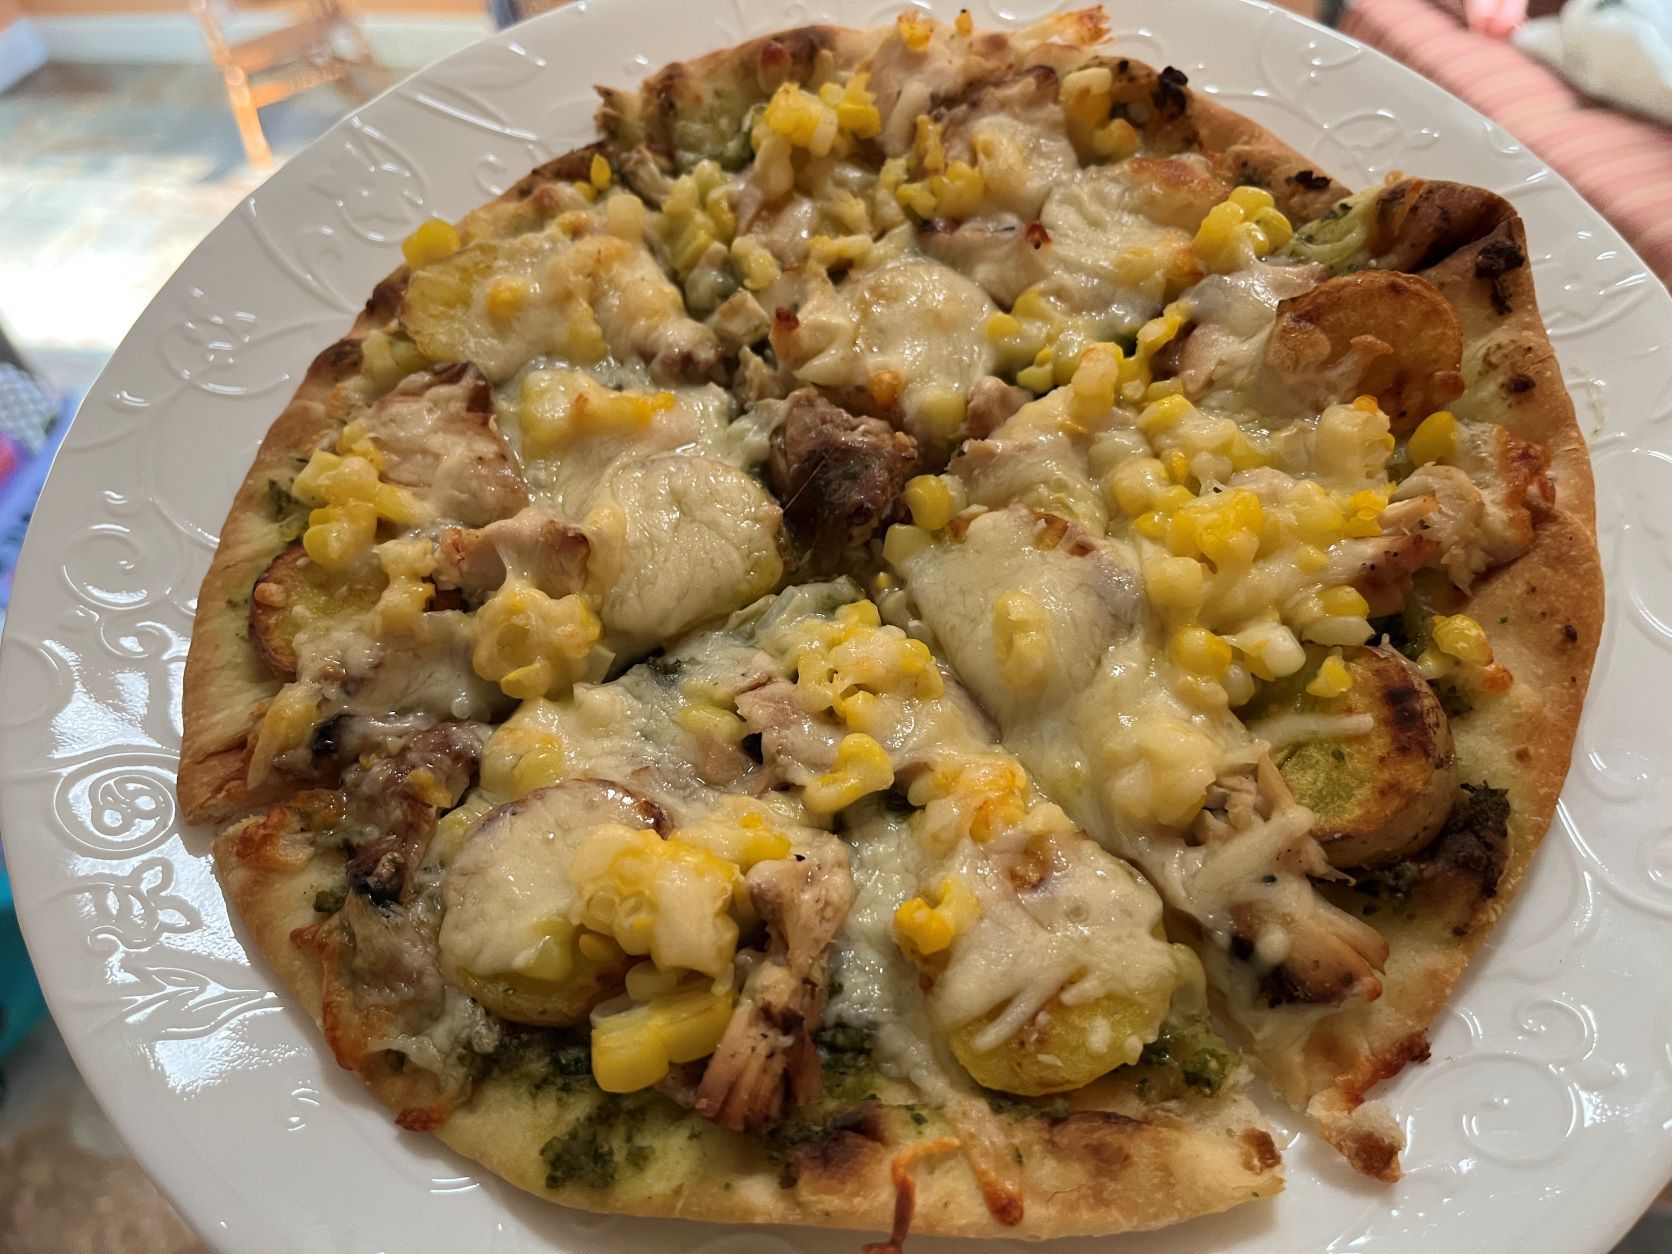
What do you make when you have leftovers and want to shake it up a bit. Make a custom pizza! I had leftover steamed, baby potatoes, fresh corn cooked and cut off the cob and a BBQ chicken breast. A batch of pesto from the basil in my garden was calling my name, so let’s go!
Pesto Pizza with Fried Potatoes, Corn & BBQ Chicken
INGREDIENTS:
Stonefire Artisan Thin Pizza Crust (or crust of your liking)
Pesto
Baby potatoes, steamed, sliced and fried until brown
Sweet Corn (mine was freshly cooked and cut off the cob)
Diced BBQ chicken breast (or try bacon, or pork or ?)
Shredded mozzarella cheese
DIRECTIONS:
Preheat the oven to 425 degrees.
Spread pesto on pizza crust. Top with sliced baby potatoes, sprinkle of fresh corn, diced BBQ chicken. Sprinkle with mozzarella cheese.
Bake for about 10 minutes or until crust is crispy and cheese is melted and brown.
Fall is just around the corner and peaches are about gone. This recipe was the perfect addition to a late summer meal outdoors. While this salad is best when it is fresh, the leftovers are quite tasty! I served the salad on a few leaves of mixed greens.
Peach and Roasted Beet Salad
INGREDIENTS:
4 beets, peeled and cut into wedges or sliced (I used lovebeets already roasted from the grocery store)
2 medium-sized peaches, peeled and cut into wedges or sliced
1 shallot or 1/2 small onion, finely chopped (I used red onion)
about 1/4 cup sweet bell pepper, finely chopped
2 tablespoons olive oil
juice of 1 lemon
salt and pepper to taste
handful of fresh basil leaves, chopped
DIRECTIONS:
If roasting fresh beets: Preheat oven to 375 degrees. Wash each beet and remove any long strands. Wrap individually in foil and place on an oven-safe tray. Roast approximately 30-40 minutes (depending on the size of the beets). Remove from oven, unwrap the foil, and let cool completely. Once cool enough to handle, peel the skins off (they should slip off easily). Cut into quarter or eighth wedges (or slice).
In a large bowl, toss the onion and pepper with olive oil, lemon juice, salt and pepper to taste. Carefully cut peaches into wedges and discard the pits. Gently ross in the beet and peach wedges, and add the basil leaves for garnish just before serving.
Recipe originally from grantfarms.com but recipe has been removed.
Napa Sweet Corn Salad is an end of summer treat! The tomatoes from my garden, the fresh local sweet corn, crispy red apple, avocado, basil, onions, etc. What’s not to like! I would recommend eating this within a day or two and is definitely best when made fresh!
Napa Sweet Corn Salad
INGREDIENTS:
2 cups sweet corn kernels, raw (~3 ears)
1 cup cherry or grape tomatoes, halved or quartered if large
3 small or 2 large green onions, chopped
1 small avocado, chopped
1 red apple, chopped
1/3 cup sliced or chopped almonds
For the Honey-Dijon Vinaigrette:
1/2 cup extra virgin olive oil
1/4 cup apple cider vinegar
1 Tablespoon honey
1 Tablespoon Dijon mustard
salt and pepper
DIRECTIONS:
Combine ingredients for the Honey-Dijon Vinaigrette in a jar or bowl then shake or whisk to combine. Taste then add up to an additional 1/2 Tablespoon honey if desired – remember that the sweet corn and apple will add natural sweetness to the salad. Set dressing aside.
Combine remaining ingredients in a large bowl then drizzle over desired amount of Honey-Dijon Vinaigrette and stir to combine. Serve immediately