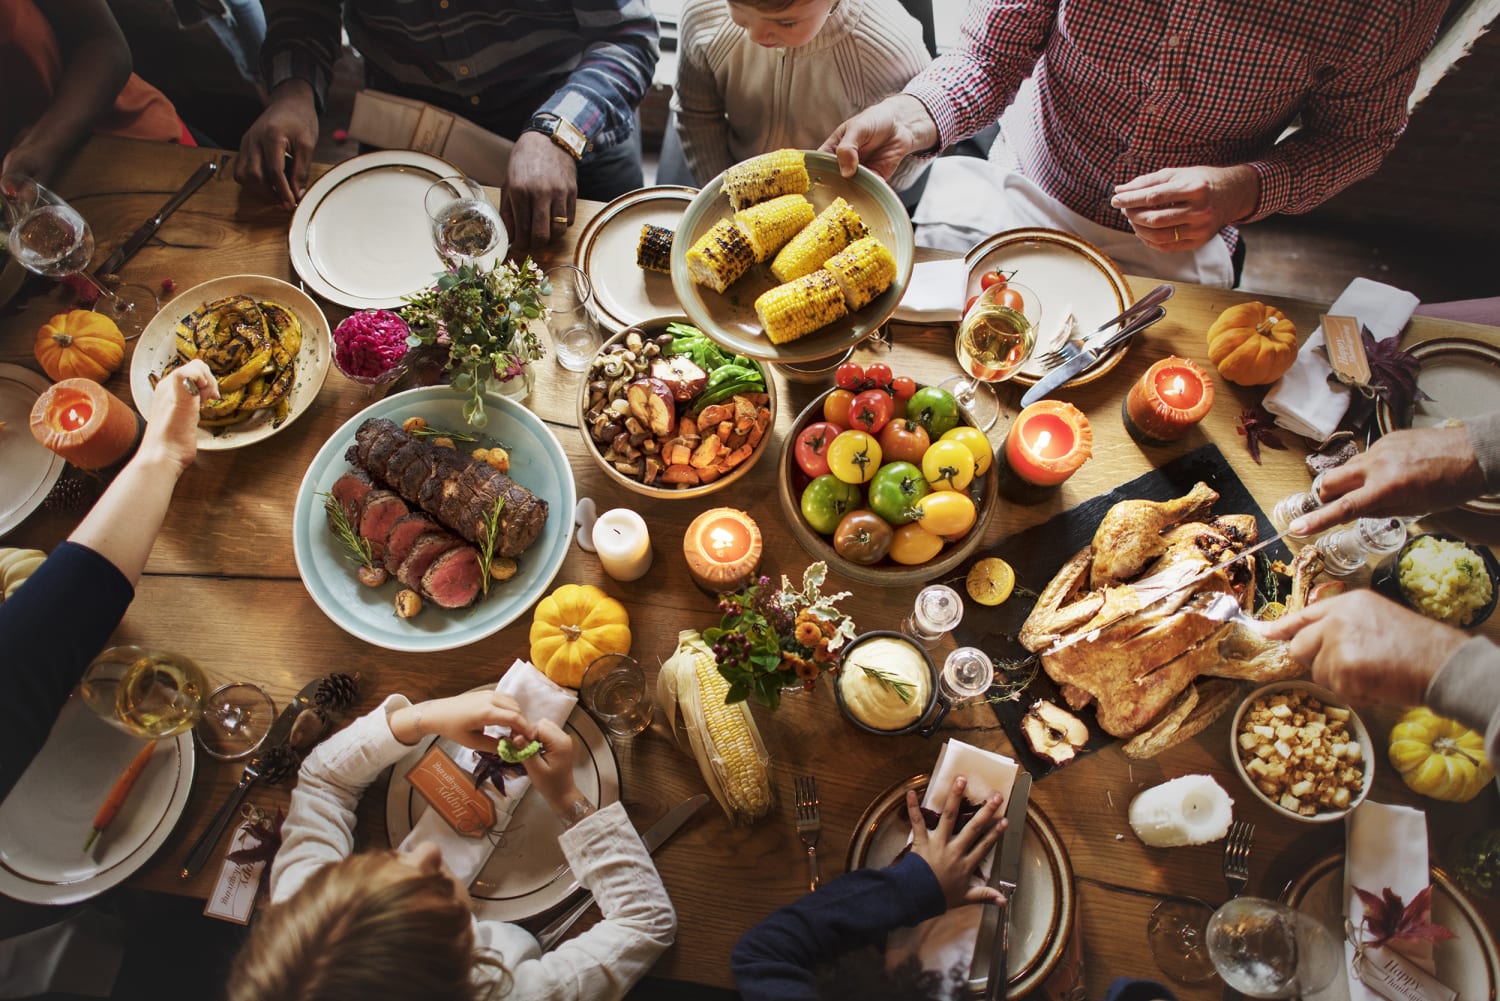
• A bit about me…

Fork Lore

~ Tales from my kitchen.

Fork Lore

Category Archives: New Traditions

Hungarian Goulash Soup

15 Friday Jan 2021

Posted by cathysmaha in New Favorite, New Traditions

≈ Leave a comment

Tags

beef, Budapest, carrots, celery, Goulash, Hungarian, potatoes, stew, tour

Hungarian Goulash is different from the Midwest Goulash I grew up with.  The Midwest version was always elbow macaroni, hamburger, tomatoes and sometimes, cheese. I experienced the traditional version in a Hungarian restaurant in Denver and again in Eastern Europe.  Goulash (Gulyasleves) is one of the national dishes of Hungary.  It reminds me of our traditional Beef Stew, although not as thick as stew and uses different spices.

This recipe is an adapted version of the recipe from a tour guide, Food Tour Budapest.  We had a marvelous tour of wonderful restaurants, meandering the streets of Budapest experiencing traditional food and drink in historic and unique restaurants.  How I wish I could travel again and experience such a tour.  Some day… In the meantime, I can recreate the food memories in my own kitchen.

HUNGARIAN GOULASH

2 tablespoons lard or cooking oil (I used Olive Oil)
2 medium onions, finely chopped
1-2 tablespoons Hungarian sweet paprika; add a bit of spicy paprika if desired
1 pound cubed beef stew meat or pork shoulder
1 teaspoon salt
1-2 teaspoons caraway seed
4 cups water (I added a bit more as the goulash cooked)
1 whole red pepper, chopped
1 whole tomato, peeled and chopped (or a can of tomatoes)
2 potatoes, peeled and cubed
2 carrots, halved and sliced
1/2 cup chopped celery
Optional:  small bits of pasta

  • Add the lard or oil to the stew pot.
  • Add onions to the hot lard or oil.  Cook the onions until they are glossy and saucy.
  • Remove from the fire and add the paprika.  Mix with the onion.  Add a bit of water, to prevent from burning.
  • Add the meat cubes and put back on the fire.  Sprinkle with salt and caraway seed.  Add more or less, depending on your tastes
  • Add the chopped carrots and celery.
  • Once the meat has a bit of color, add water, chopped pepper and tomatoes. Lower heat to simmer and cover. Stir occasionally to prevent burning.
  • After one and a half or two hours, check the meat. Add the chopped potatoes and cook through, about 20 minutes.
  • Add the pasta pieced (optional) when the potatoes are almost done.
  • Taste the broth and adjust seasoning as desired.

Serve with bread (white or rye).  Optional: add freshly ground paprika or spicy green pepper.

Recipe adapted from FoodTour Budapest and Hungarian Cooking Goulash Soup.


Rate this:

Share this:

  • Print
  • Tweet
  • Email
  • Share on Tumblr

Like this:

Like Loading...

Hamburger Soup

20 Wednesday Mar 2019

Posted by cathysmaha in New Traditions

≈ Leave a comment

Tags

delicious, Hamburger soup, quick, simple, tomatoes

Hamburger Soup is quick, simple and delicious.  Enough said.

HAMBURGER SOUP

1 lb. lean ground beef
1 onion , diced
2 cloves garlic , minced
2 medium potatoes, peeled and diced
4 cups beef broth
1 can (28 oz) diced tomatoes with juice
1 can condensed tomato soup
2 teaspoons Worcestershire sauce
1 teaspoon Italian seasoning
1 bay leaf
salt and pepper to taste
3 cups mixed vegetables, fresh or frozen (I used carrots, celery, corn & peas)

  • Brown onion, ground beef and garlic until no pink remains. Drain any fat.
  • Add potatoes, broth, tomatoes, tomato soup, Worcestershire sauce, seasoning and bay leaves. Simmer covered 10 minutes.
  • Stir in vegetables. Simmer 15-20 minutes or until potatoes are tender.

Recipe slightly adapted from Spendwithpennies

Rate this:

Share this:

  • Print
  • Tweet
  • Email
  • Share on Tumblr

Like this:

Like Loading...

Lemon Raspberry Streusel Bars

01 Friday Mar 2019

Posted by cathysmaha in New Traditions

≈ Leave a comment

Tags

bars, blueberry, crumble, delicious, last dinner, lemon, nutmeg, raspberry

Raspberries may very well be my favorite fruit and would certainly be on my ‘last dinner’ list.  This recipe started out to be Lemon Blueberry Bars as the original recipe stated.  Midway through making the bars, I realized the frozen blueberries were off, so quickly switched to raspberries that I had in the freezer.  Frankly, I love the results.  Even the nutmeg called for in the original recipe suited the raspberries.

Another new favorite!

LEMON RASPBERRY STREUSEL BARS

yield: 24 BARS

CRUST:
2 cups all-purpose flour
2 tablespoons granulated white sugar
2 teaspoons grated lemon zest
pinch of salt
1/2 cup (1 stick) butter, chilled and cut into small pieces
1 large egg
1 teaspoon vanilla extract

FILLING:
2 cups fresh raspberries (I thawed frozen raspberries)
1/4 cup granulated white sugar
1/8 teaspoon ground nutmeg

TOPPING:
5 Tablespoons butter, at room temperature
1/2 cup (packed) brown sugar
3/4 cup all-purpose flour

  • Preheat oven to 400°F. Spray a 9×13-inch pyrex pan with nonstick spray.
  • Prepare the crust: In a medium bowl, stir together the flour, sugar, zest and salt. Cut in the butter until the mixture resembles coarse crumbs.
  • In a separate bowl, beat the egg and vanilla together; stir into the crumb mixture until a dough forms. Press into the bottom of the prepared pan. Bake 12 to 15 minutes until golden. Remove from oven and set aside to cool slightly. (Keep the oven on)
  • Sprinkle raspberries over the crust. In a small bowl, combine the 1/4 cup sugar and nutmeg; sprinkle over the raspberries.
  • Prepare the topping: In a medium bowl, use a rubber spatula to cream together the 5 tablespoons butter and brown sugar until smooth. Mix in the flour, so that the mixture is crumbly, like streusel. Sprinkle over the raspberry layer.
  • Bake for 20 to 25 minutes until browned. Cool.

Recipe adapted from RecipeGirl.com


Rate this:

Share this:

  • Print
  • Tweet
  • Email
  • Share on Tumblr

Like this:

Like Loading...

Turkey Green Chile

21 Thursday Feb 2019

Posted by cathysmaha in New Traditions

≈ 2 Comments

Tags

green chile, mild, tortillas, Turkey, warm, winter

Green Chile was a novel concept to me until I moved from the midwest to Arizona and then to Colorado.  My Iowa roots only knew Chile as red, in Chile Con Carne.  I’ve grown to love green chile but I prefer mine mild.  This Green Chile was a favorite of mine made at a local office building cafeteria many moons ago.  It’s been years since I have made the turkey (vs. pork) green chile and I was happy to experience it once again.  The original recipe made a much heavier roux but I prefer it on the lighter side.

Warm flour tortillas to serve with the chile to warm you on these cold winter nights!

TURKEY GREEN CHILE

3 quarts (96 oz.) chicken stock (remove 1 cup for roux)
1/2 cup olive oil
2/3 cup diced onion
1/2 bunch chopped cilantro
12 ounces diced green chiles
2 pounds ground turkey
1 teaspoon crushed garlic
1/2 teaspoon oregano
1/2 teaspoon jalapenos
4 tablespoons flour (or more if you want the chile to be thicker)
16 ounces chopped tomatoes
2 to 3 chopped green onions
salt, cayenne or tabasco to taste

  • Prepare chicken stock. Simmer while preparing other ingredients.
  • Heat olive oil; add onion, cilantro, 8 ounces green chiles, turkey, garlic, oregano and jalapenos until turkey is cooked. Lower heat.
  • Combine flour with the 1 cup of reserved stock to make roux. Mix thoroughly. Add to stock and stir. Add sautéed mixture.
  • Add 4 ounces green chiles, chopped tomatoes and additional green onions. Season to taste.
  • Serve with warm tortillas.

Rate this:

Share this:

  • Print
  • Tweet
  • Email
  • Share on Tumblr

Like this:

Like Loading...

Cherry Bars

06 Friday Oct 2017

Posted by cathysmaha in Family, My Roots, New Favorite, New Traditions

≈ Leave a comment

Tags

almond, aunt, bars, cherry, dessert, recipe card, tradition

Cherry desserts are one of my favorites and I had to try this Cherry Bars recipe from my late Aunt Joyce’s recipe box.  While I don’t recall ever having these, they are wonderful. The combination of almond and cherry…yum!

Leafing through old, handwritten recipe cards is such a treasure…a lost tradition in today’s world.

CHERRY BARS

1 cup butter, softened
1 3/4 cups sugar
4 eggs, beat after addition of each egg
3 cups flour
1/8 tsp. salt
1 1/2 tsp. baking powder
1 tsp. vanilla
1 tsp. almond extract
1 can cherry pie filling

  • Preheat over to 350 degrees. Grease 10×15″ pan.
  • Cream together butter and sugar.  Add eggs one at a time and beat after each addition.
  • Sift together flour, salt and baking powder.
  • Slowly add flour mixture to batter.  Then add vanilla and almond extract.
  • Spread 1/2 of batter into pan.  Spool filling on top and spread to cover. Drop the remaining batter by spoonfuls over the top.
  • Bake for about 40 minutes.  Watch it to just golden brown.
  • Drizzle with glaze of 1 cup powdered sugar, 4 or more tsp. milk, a few drops of almond extract.  Add milk until the drizzle consistency is reached.

Rate this:

Share this:

  • Print
  • Tweet
  • Email
  • Share on Tumblr

Like this:

Like Loading...

Big Country Breakfast Bread Pudding

24 Friday Mar 2017

Posted by cathysmaha in Family Favorites, New Traditions

≈ Leave a comment

Tags

bacon, Bread, bread pudding, breakfast, Casserole, cream cheese, easy, eggs, overnight, sausage, shredded cheese

Breakfast casseroles are always a treat and easy peasy when you make it the night before.  This casserole has a wonderful cream cheese surprise in many bites.  Why have I never thought of that?

Serve this dish with a wonderful fruit bowl, a cup of hot coffee (or tea), and great conversation.

BIG COUNTRY BREAKFAST BREAD PUDDING

1 loaf Brioche bread, cubed (I used French Bread)
1 cup heavy cream (I used half & half)
1 /2 cup milk
9 eggs
4 oz. can chopped green chiles
2 c. + 1 c. shredded sharp white cheddar (or any shredded cheese of your liking)
4 oz. cream cheese, cubed
10 oz. browned breakfast sausage (optional)
5 strips of applewood smoked bacon, cooked until crisp, chopped (optional)
1/2 teaspoon salt & 1/2 teaspoon pepper (or 1 tsp. McCormick’s Montreal Steak Seasoning)

  • Spray a 9×13″ extra deep baking dish and place 1/2 to 2/3 of the bread cubes in the dish.
  • Crack eggs into a large mixing bowl, add cream, milk, salt and pepper. Whisk until smooth.  Reserve 1 to 1.5 cups of mixture and pour remaining over the bread cubes.
  • Spread green chiles on top of bread. Sprinkle with 2 cups of shredded cheese.  Lightly press the bread down to aid in absorption of the egg mixture.  Top with cream cheese, sausage and bacon, if desired.
  • Top with remaining bread and pour reserved egg mixture over the bread. Sprinkle with remaining cheese. Sprinkle with a bit more salt and pepper, if desired.
  • The next morning, preheat oven to 375 degrees.
  • Bake on middle rack for 45-55 minutes or until the center is firm. Cover the bread pudding with foil about halfway through the cooking time and remove for the last 5 minutes or so.
  • Serves 12.

Recipe adapted from foodforayear.com


Rate this:

Share this:

  • Print
  • Tweet
  • Email
  • Share on Tumblr

Like this:

Like Loading...

Sugar Cookies for Valentine’s Day

12 Sunday Feb 2017

Posted by cathysmaha in Family Favorites, Holidays, New Traditions

≈ Leave a comment

Tags

cookie, family, frosted, tradition, valentine

Sugar cookies for Valentine’s Day is such a treat. I’m usually not a big fan of actually making them (but always a fan of eating them) because of the work involved.  This year, however, I was motivated and found the process fun…walk down memory lane. The cookie recipe came from my sister, Carolyn.  She made these when her kids were younger and I loved them.


My kids and I started a tradition last year of gathering around Valentine’s Day for a group dinner and, this year, the cookies will be our dessert.  I loved cutting out the smaller hearts for the little ones.  We need to enjoy it because who knows when I’ll be motivated once again!

SUGAR COOKIES

3 cup sifted flour
2 teaspoons baking powder
1 scant teaspoon baking soda
1/2 teaspoon nutmeg
1 cup shortening (butter, Crisco, etc.)
2 eggs
1 cup sugar
4 tablespoons milk
1 teaspoon vanilla

  • Sift flour, baking powder, baking soda, and nutmeg in a bowl.  Cut in shortening.
  • In a separate bowl beat eggs.  Add sugar, milk and vanilla.  Beat well.
  • Pour egg mixture into flour mixture and mix well.
  • Chill dough for at least one hour (I chilled overnight).
  • Roll out 1/2 dough on floured surface and return remaining dough to refrigerator until ready to roll out.  (I found the dough a bit sticky so used quite a bit of flour while rolling out).  Cut into desired shapes.
  • Optional:  At this point you can sprinkle with decorative colored sugar if you don’t want to ice the cookies. I did this for half of the recipe.
  • Bake cookies on ungreased baking sheet at 375 degrees for about 7 minutes or until a light brown on the edges.

CREAMY ICING:

3 cups powdered sugar
1/2 teaspoon vanilla
4-6 tablespoons cream (or half and half)
drop or two of red food coloring (to reach the desired color of pink or red)

  • Blend ingredients together to make an icing with a thin consistency.  This will be enough icing for the entire cookie recipe.  I made half of the icing recipe and iced half of the batch.


Rate this:

Share this:

  • Print
  • Tweet
  • Email
  • Share on Tumblr

Like this:

Like Loading...

Quinoa with Roasted Butternut Squash, Pine Nuts, Feta

20 Friday Nov 2015

Posted by cathysmaha in Book Club, New Traditions

≈ 1 Comment

Tags

carmelized onions, goat cheese, pine nuts, quinoa, roasted, salad, Side dish, squash

Quinoa with roasted butternut squash, caramelized onions, pine nuts and feta…what’s not to like! I often try new recipes to share with others so my Book Club buddies were once again Guinea Pigs.  This recipe takes a while to prepare but well worth the effort!

QUINOA WITH ROASTED BUTTERNUT SQUASH, PINE NUTS & FETA

2 1/2 cups cooked quinoa
2 large onions, sliced
2 pounds cubed butternut squash
3 tablespoons olive oil
1 T. balsamic vinegar
salt
French Vinaigrette salad dressing (add generous amounts of dressing to individual portions)
1/2 cup Feta cheese
1/2 cup pine nuts, toasted

  • Preheat the oven to 400 F. Line the baking sheet with aluminum foil and grease with 1 tablespoon of olive oil.
  • Peel the squash and slice it into 3/4 inch cubes, about 2 pounds. Toss the squash cubes in a large bowl with 2 tablespoons olive oil and generously sprinkle with salt.
  • Put butternut squash on the greased baking sheet and roast for about 30 minutes, until soft. Flip the squash cubes over midway through baking. Cool slightly before adding to the salad.
Caramelize the Onions:  
  • Heat 2 tablespoons olive oil on high heat in a large skillet.  When oil is heated, add onions and cook on high heat for about 10 minutes, constantly string with wooden spoon. The onions will start to brown, but not brown.
  • Reduce heat to medium and continue cooking for 10 additional minutes, continuing to stir as onions brown even more. Add a pinch of salt over the onions.
  • Continue cooking the onions for 10 more minutes on medium to low heat, stirring occasionally to make sure the onions don’t stick to the pan.  Add a bit of water if the onions begin o stick.  Total cooking time is 30 minutes.
  • Remove the onions from the heat and sprinkle onions with a small amount of balsamic vinegar to deglaze the pan. Using the wooden spoon, mix the onions scraping the bottom of the pan and coating onions with 1 tablespoon balsamic vinegar.
Assembling the salad:
  • In a large bowl, combine cooked quinoa, roasted butternut squash, caramelized onions, and mix with the dressing. Add the dressing only before the serving, and add as much as you want to individual portions, as both quinoa and butternut squash tend to be on a dry side, and this dressing (when generously applied) fixes this beautifully!
  • Top each individual serving with Feta cheese and toasted pine nuts.

Note: This salad keeps very well refrigerated for up to a week, but only without dressing. Add the dressing before serving.

Rate this:

Share this:

  • Print
  • Tweet
  • Email
  • Share on Tumblr

Like this:

Like Loading...

Roasted Stuffed Kobacha Squash (or Pumpkin)

06 Friday Nov 2015

Posted by cathysmaha in New Favorite, New Traditions

≈ Leave a comment

Tags

bacon, cheese, kobacha, Pumpkin, roasted, squash, stuffed, tradition, yummy

Stuffed pumpkin (or in my case Kobacha Squash) was a novel idea I heard about from friends. I found this wonderful recipe and adapted it to use the Kobacha squash I’d recently purchased from Trader Joe’s.

It was a fun, and delicious, experiment and one I’ll try again, shaking it up with different ingredients. This is a great way to use leftover pumpkins from Halloween or Thanksgiving. A new tradition perhaps.

IMG_7582

ROASTED STUFFED KOBACHA (OR PUMPKIN)

1 pumpkin (I used Kobacha squash), about 3 pounds
Salt and freshly ground pepper
1/4 pound stale bread, thinly sliced and cut into 1/2-inch chunks
1/4 pound cheese, such as Gruyère, Emmenthal, cheddar, shredded
2-4 garlic cloves (to taste) coarsely chopped
4 slices bacon, cooked until crisp, drained, and chopped
About 1/4 cup snipped fresh chives or sliced scallions
1 tablespoon minced fresh thyme
1/3 cup heavy cream
Pinch of freshly grated nutmeg

  • Center a rack in the oven and preheat the oven to 350 degrees F.
  • Line a baking sheet with a silicone baking mat or parchment, or find a Dutch oven with a diameter that’s just a tiny bit larger than your pumpkin. If you bake the pumpkin in a casserole, it will keep its shape, but it might stick to the casserole, so you’ll have to serve it from the pot—which is an appealingly homey way to serve it. If you bake it on a baking sheet, you can present it freestanding, but maneuvering a heavy stuffed pumpkin with a softened shell isn’t so easy. However, since I love the way the unencumbered pumpkin looks in the center of the table, I’ve always taken my chances with the baked-on-a-sheet method, and so far, I’ve been lucky. (Note: I baked my squash in a round Pyrex casserole lined with parchment paper)

IMG_7561

  • Using a very sturdy knife—and caution—cut a cap out of the top of the pumpkin (think Halloween Jack-o-Lantern). It’s easiest to work your knife around the top of the pumpkin at a 45-degree angle. You want to cut off enough of the top to make it easy for you to work inside the pumpkin. Clear away the seeds and strings from the cap and from inside the pumpkin. Season the inside of the pumpkin generously with salt and pepper, and put it on the baking sheet or in the pot.
  • Toss the bread, cheese, garlic, bacon, and herbs together in a bowl. Season with pepper—you probably have enough salt from the bacon and cheese, but taste to be sure—and pack the mix into the pumpkin. The pumpkin should be well filled—you might have a little too much filling, or you might need to add to it. Stir the cream with the nutmeg and some salt and pepper and pour it into the pumpkin. Again, you might have too much or too little—you don’t want the ingredients to swim in cream, but you do want them nicely moistened. (It’s hard to go wrong here.)

IMG_7567

  • Put the cap in place and bake the pumpkin for about 2 hours—check after 90 minutes—or until everything inside the pumpkin is bubbling and the flesh of the pumpkin is tender enough to be pierced easily with the tip of a knife. Because the pumpkin will have exuded liquid, I like to remove the cap during the last 20 minutes or so, so that the liquid can bake away and the top of the stuffing can brown a little.
  • When the pumpkin is ready, carefully, very carefully—it’s heavy, hot, and wobbly—bring it to the table or transfer it to a platter that you’ll bring to the table.

IMG_7579

  • You have a choice—you can either spoon out portions of the filling, making sure to get a generous amount of pumpkin into the spoonful, or you can dig into the pumpkin with a big spoon, pull the pumpkin meat into the filling, and then mix everything up. I’m a fan of the pull-and-mix option. Served in hearty portions followed by a salad, the pumpkin is a perfect cold-weather main course; served in generous spoonfuls, it’s just right alongside the Thanksgiving turkey.
  • It’s really best to eat this as soon as it’s ready. However, if you’ve got leftovers, you can scoop them out of the pumpkin, mix them up, cover, and chill them; reheat them the next day.

Recipe Adapted from Epicurious.com

Rate this:

Share this:

  • Print
  • Tweet
  • Email
  • Share on Tumblr

Like this:

Like Loading...

Tomatillo Salsa Fresh from the Garden

04 Friday Sep 2015

Posted by cathysmaha in Family Favorites, Garden, Gluten Free, New Traditions, Vegan, Vegetarian

≈ Leave a comment

Tags

garden, onion, recipes, salsa, salsa verde, tomatillo

Last year was the first time I ever planted tomatillos plants in my garden. While my tomatoes struggled last year, the tomatillos went crazy and they are even crazier this year given all of the summer rain in Colorado.

My first try at tomatillos salsa went the easy – route and it was delicious. I froze a few bags for winter enjoyment, too! I plan to branch out this year and try a few other recipes, too!

GREEN TOMATILLO SALSA

8 ounces (5-6 medium) tomatillos, husked and rinsed
1 jalapeno (or 2 serranos), stemmed
5-6 sprigs fresh cilantro (thick stemmed removed), roughly chopped
1/4 cup water
1/4 cup finely chopped onion
salt to taste

  • Chop the tomatillos and the jalapeño.
  • In a blender or food processor, combine the tomatillos, jalapeño, cilantro and 1/4 cup water. Process to puree, then scrape into a serving dish.
  • Stir in the chopped onion and salt.

Rate this:

Share this:

  • Print
  • Tweet
  • Email
  • Share on Tumblr

Like this:

Like Loading...
← Older posts

Enter your email address to follow this blog and receive notifications of new posts by email.

Join 207 other followers

Follow Me On Pinterest!

Follow Me on Pinterest

Recent Posts

  • Hungarian Goulash Soup
  • Czech Garlic Soup
  • January 1, 2021
  • Christmas 2020
  • Cranberry Orange Bread with Orange Glaze

Categories

  • Book Club
  • Czech Heritage
  • DIY
  • Family
  • Family Favorites
  • Garden
  • Gluten Free
  • Health
  • Holidays
  • Home
  • Home
  • Humor
  • Kitchen
  • Losers!
  • My Roots
  • New Favorite
  • New Traditions
  • Nicaragua
  • Rheumatoid Arthritis
  • Skinny
  • South Beach
  • Uncategorized
  • Vegan
  • Vegetarian
  • Yoga

Meta

  • Register
  • Log in
  • Entries feed
  • Comments feed
  • WordPress.com

Fork-Lore Calendar

January 2021
S M T W T F S
 12
3456789
10111213141516
17181920212223
24252627282930
31  
« Dec    

Enter your email address to follow this blog and receive notifications of new posts by email.

Join 207 other followers

Search Fork-Lore.com

Blog at WordPress.com.

Cancel
loading Cancel
Post was not sent - check your email addresses!
Email check failed, please try again
Sorry, your blog cannot share posts by email.
%d bloggers like this: