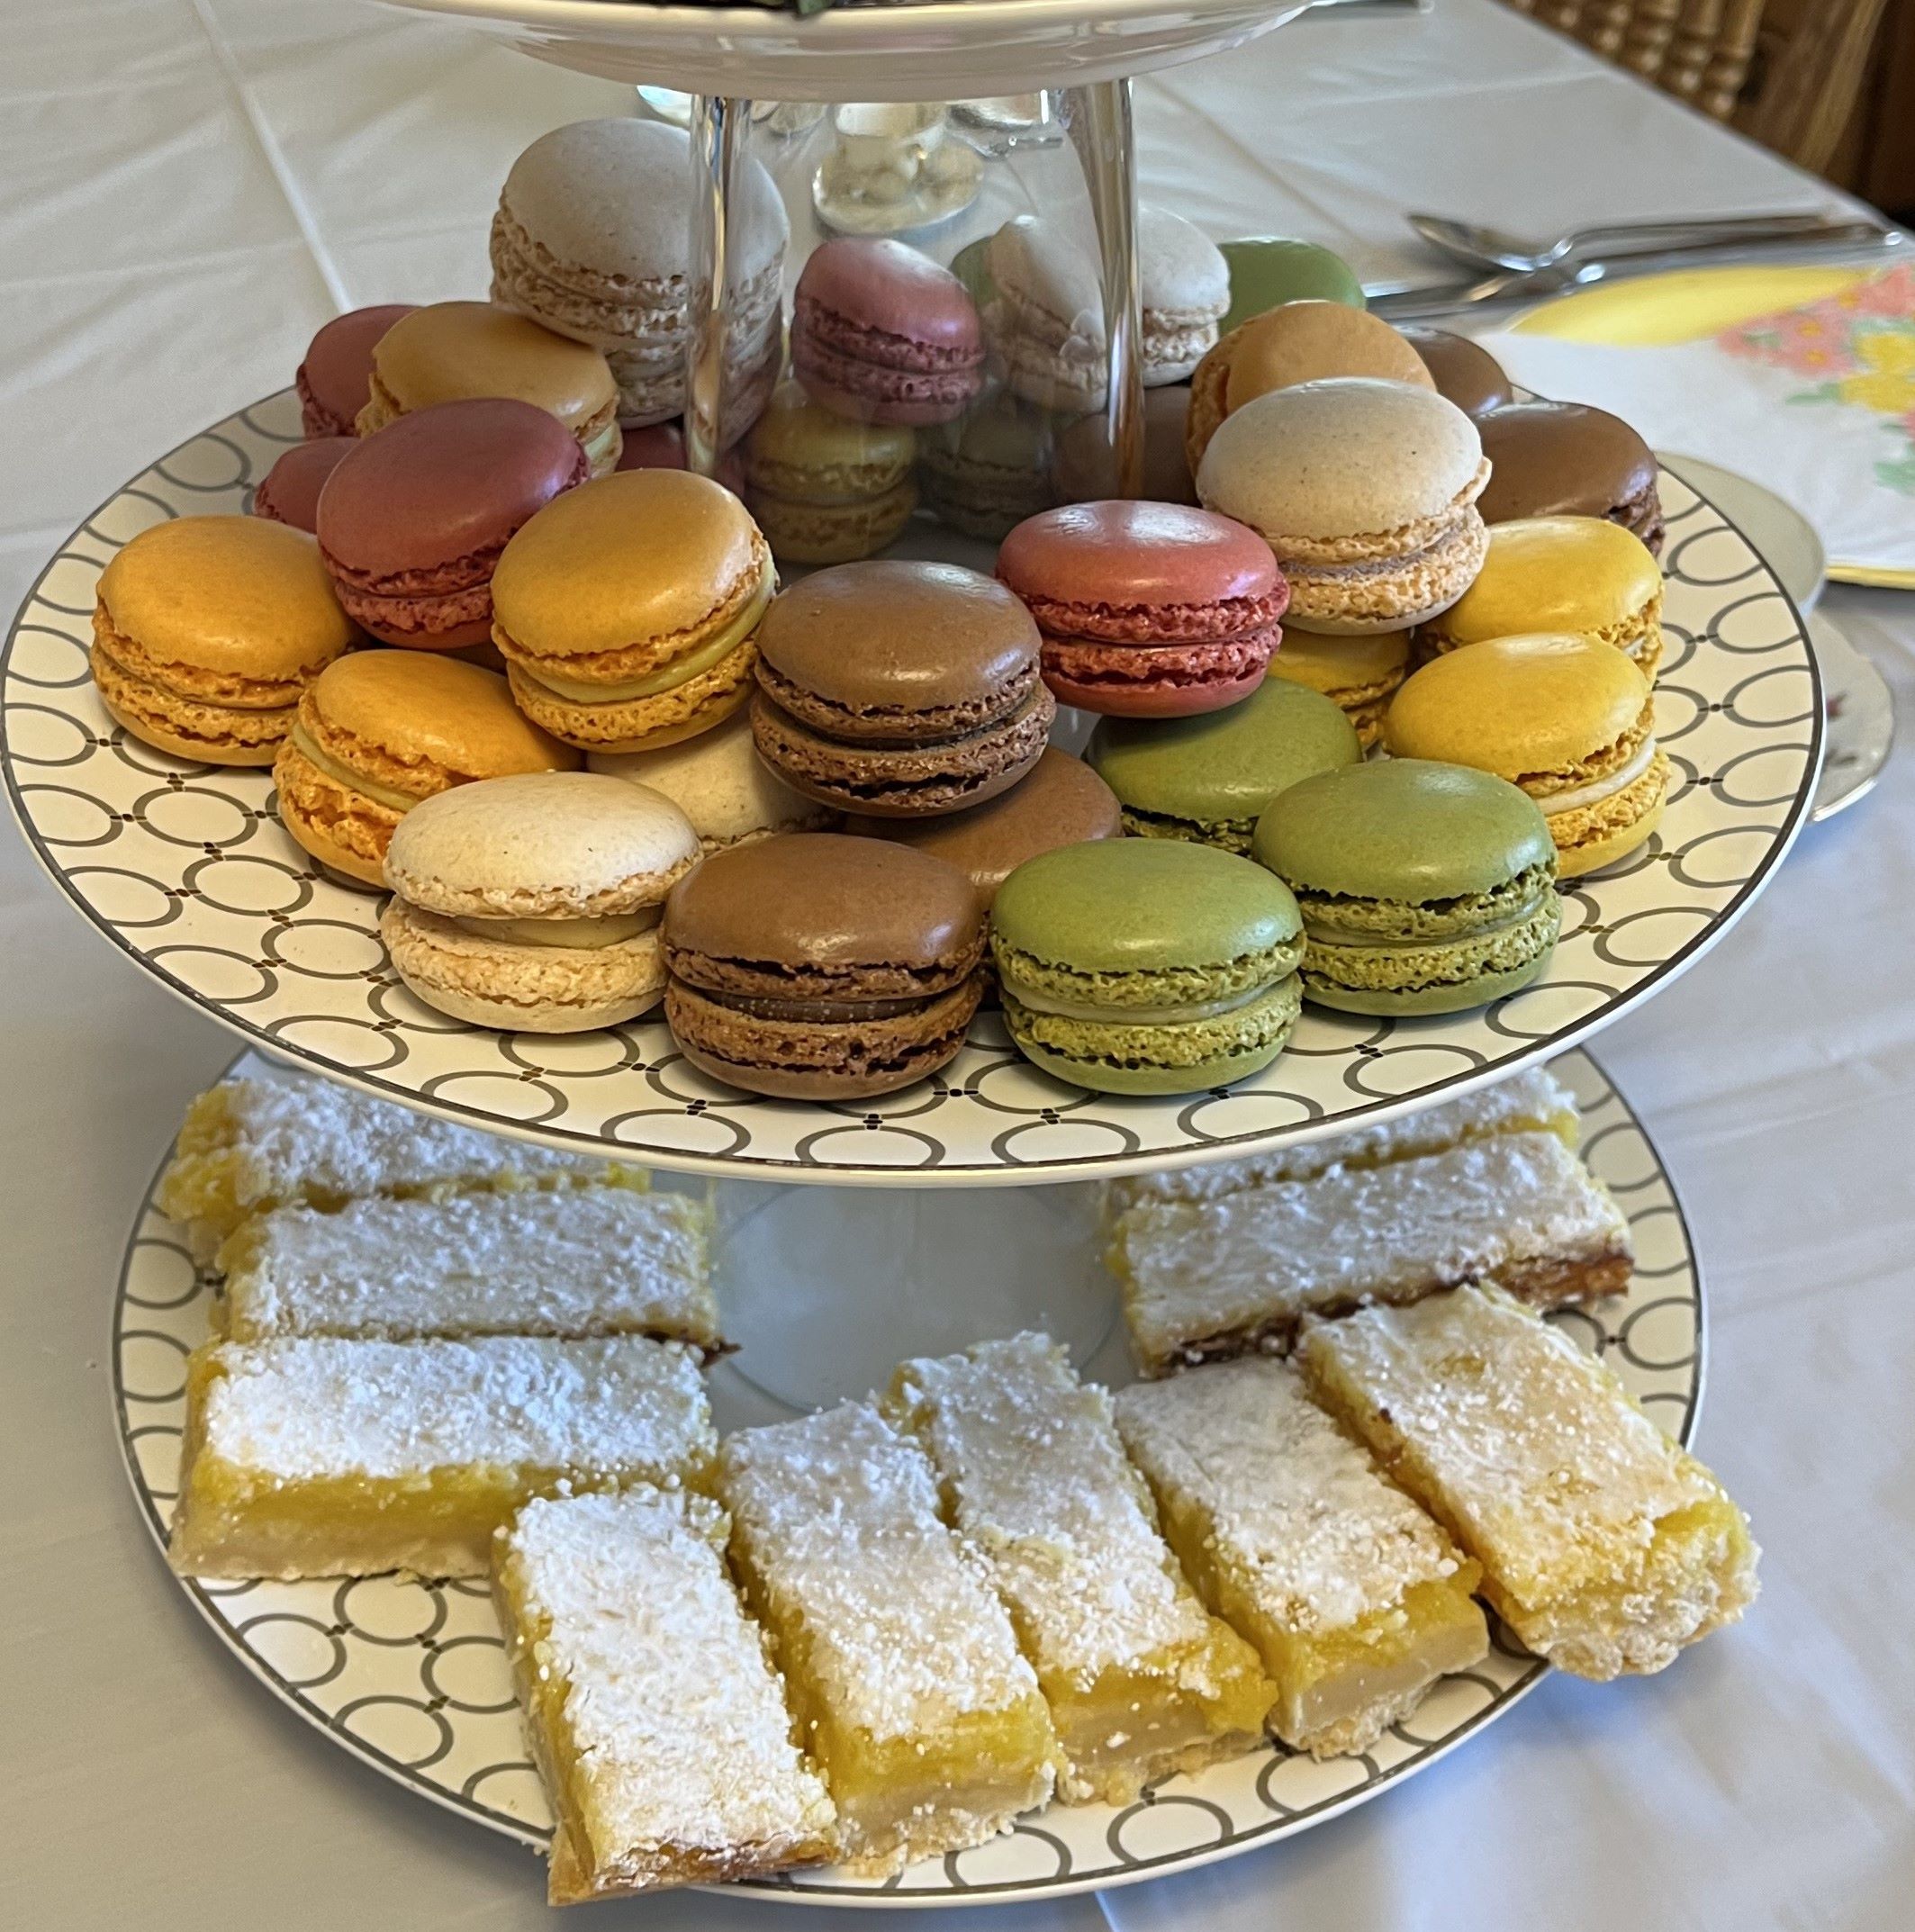
Uncategorized

Soft Gingerbread Cookies with Maple Glaze

Gingerbread cookies are a staple of the holidays this version, is soft, sweet and delicious. The Maple Glaze makes it extra sweet. You will also enjoy these delicious cookies without the icing as well. Feel free to decorate for the season/holidays. My granddaughters enjoyed adding their special sprinkles to their cookies.

Soft Gingerbread Cookies with Maple Glaze

INGREDIENTS:

Gingerbread Cookies

  • 3/4 cup salted butter, softened (1 1/2 sticks)
  • 1 cup white sugar
  • 1 large egg
  • 1/3 cup molasses
  • 2 1/4 cups all-purpose flour (10.75 ounces)
  • 2 teaspoons baking soda
  • 1/2 teaspoon salt
  • 1–2 teaspoons ground ginger
  • granulated sugar for rolling

Maple Glaze

  • 2 tablespoons melted butter
  • 1/4 cup pure maple syrup
  • 3/4 to 1 cup confectioners’ sugar
  • pinch of salt, to taste
DIRECTIONS:
  1. Preheat oven to 350 degrees.
  2. Cream butter and sugar in the bowl of a stand mixer until light and fluffy. Add egg and molasses; mix until incorporated.
  3. Add flour, baking soda, salt, and ginger. Mix until a soft dough forms.
  4. Scoop into small balls (a little smaller than the size of a golf ball) and roll in sugar. Bake for 8-10 minutes; remove from pan so the cookies can sink / flatten slightly as they cool. 
  5. Allow the cookies to cool fully. Whisk maple glaze ingredients together until smooth. Dip one side of the cooled cookies into the maple glaze, set on a piece of wax paper, and add a few festive sprinkles before the glaze sets! So fun

Recipe from PinchofYum

Fish · Pastas · Uncategorized

Cheesecake Factory Shrimp Scampi

Shrimp Scampi is a favorite for our family and daughter, Sarah, made this delicious dish. It was so yummy and the kids devoured it, too. Definitely worth a place in the recipe box (or in today’s term, digital file).

Cheesecake Factory Shrimp Scampi

INGREDIENTS:
  • 1-2 lbs fresh shrimp, cleaned and deveined
  • Angel Hair Pasta
  • 1 diced tomato
  • 6-8 whole cloves of garlic
  • 1 diced shallot
  • 1 pint heavy cream
  • 1 cup dry white wine
  • Olive oil
  • Fresh basil
  • Parsley

For the Shrimp:

  • Milk
  • Parmesan cheese
  • 1/2 cup all-purpose flour
  • 1/4 teaspoon salt
  • 1/2 teaspoon freshly ground black pepper
  • 1/4 teaspoon cayenne pepper
DIRECTIONS:
  • Pour enough olive oil in a large sauce pan to cover the bottom, turn to medium high heat. This is the only pot you’ll need for the sauce so it should be big.
  • Soak the shrimp in milk and combine the dry ingredients (flour, cheese, salt, pepper). Coat the shrimp with the dry ingredients and let them fry in the olive oil, About 2 minutes per side until golden brown. The flour that falls off the shrimp will add great flavor and consistency to the sauce. Add more oil as necessary, between batches of shrimp. Dab the shrimp with a paper towel and put aside.
  • Add the garlic to the oil, stir for a few minutes, then turn the heat to medium low.Taste the food and spice accordingly, you’ll definitely need some salt. Now add the wine and bring it to a boil. Then turn the heat to low and cover, let the wine reduce, about 10-15 minutes.
  • COOK ANGEL HAIR PASTA in a separate pot.
  • Add the cream, and bring it back to a boil, turn heat to low and simmer for 10 more minutes. Now add the fried shrimp, Basil, diced tomato, and parmesan cheese. The sauce will thicken as it cools.
  • To plate pour some sauce on a arange the shrimp around the bottom (10 or so), then take a ball of the pasta and plate that above the shrimp. garnish with a little parsley.

Recipe from Food.com

Uncategorized

Air Fried Artichoke Salad with Lemon Parmesan Dressing

My Air Fryer was calling to me to please try this recipe. I love artichokes, I love salad with parmesan, so what’s to lose! The air fried artichokes were delicious, just to start, but the crunch of the brussel sprouts and celery with the flavorful lemon Parmesan dressing was delicious. I served the dressing separately so I could enjoy the leftovers the next day. It’s a delicious salad that I’ll be making again soon!

Air Fried Artichoke Salad with Lemon Parmesan Dressing

INGREDIENTS:
  • 2 cans artichokes in water, drained
  • 2 cloves garlic, minced
  • extra virgin olive oil
  • Kosher salt
  • Fresh cracked black pepper
  • 6 cups Brussels sprouts
  • 4 stalks of celery, diced
  • 1 can white beans, drained
  • 1/2 cup fresh parsley, chopped
  • 1 small shallot, minced
  • 2 tsp Dijon mustard
  • 1 lemon, juiced
  • 1/2 cup Parmesan cheese, grated plus more for topping, if desired
DIRECTIONS:
  1. To make the Air Fryer Artichokes:
  2. Pat drained artichokes well with a tea towel, then transfer to a bowl.
  3. Toss artichokes with minced garlic, one tablespoon of the olive oil, 1/4 teaspoon salt and a few cracks of black pepper.
  4. Transfer them to an air fryer basket and air fry for at 400 degrees F for 15 minutes.
  5. Once they are crispy and browned, let them cool for a couple of minutes, then slice in half. Reserve.
  6. To Make the Dressing and Salad:
  7. In a glass jar or bowl, combine the minced shallot, Dijon mustard, Parmesan cheese, lemon juice, 1/2 cup extra virgin olive oil, 1/2 teaspoon Kosher salt, and 1/4 teaspoon black pepper.
  8. Whisk or shake to combine.
  9. Shave the Brussels sprouts thinly on a mandoline, or using a very sharp knife.
  10. Add these to a large serving bowl along with the white beans, celery, artichokes and parsley.
  11. Pour the dressing over the salad and toss to combine.
  12. Top with a little bit more Parmesan, if desired, and serve.

Recipe from Kathleenashmore.com

Uncategorized

Thai Coconut Shrimp Soup

Thai food is so delicious but always seemed overwhelming to make. Once I tried some of IowaGirlEats Thai recipes, I knew I could make these dishes at home. Thai Coconut Shrimp Soup does not disappoint and is a quick, easy recipe. At first the ingredients may seem overwhelming, but it’s worth it. I was leary about the amount of red curry paste but 4 tablespoons yielded a mild amount of heat and added wonderful flavor. I added about 1 T. of fresh cilantro to the soup for even more flavor. Some of my family are anti-mushroom, but replacing with carrots would be delicious! IowaGirl Eats also suggests subsituting the rice for riced cauliflower and that would make this dish even healthier.

Thai Coconut Shrimp Soup

INGREDIENTS:
  • 1 Tablespoon coconut oil
  • 1 large shallot or small onion, chopped
  • 3 cloves garlic, pressed or minced
  • 1 Tablespoon freshly grated ginger
  • 3-4 Tablespoons gluten free red curry paste, depending on how hot you like it
  • 2 cups gluten free chicken broth
  • 15oz can coconut milk (I prefer full fat in this recipe)
  • 1 Tablespoon gluten free Tamari or soy sauce (dish will not be GF if using soy sauce)
  • 2 teaspoons gluten free fish sauce
  • 1 Tablespoon coconut sugar
  • 1/2 teaspoon dried basil
  • salt and pepper
  • 1lb 16/20 jumbo shrimp, peeled and deveined
  • 8oz mushrooms, very thinly sliced
  • 4 cups baby spinach, roughly chopped
  • 1 lime, cut in half, one half sliced into wedges
  • For serving: cooked rice, chopped cilantro (For even more flavor add 1 T. of fresh cilantro to the soup)
DIRECTIONS:
  1. Melt oil in a large soup pot over medium heat. Add shallot or onion then saute until softened, 3-4 minutes. Add garlic and ginger then saute until extremely fragrant, 1-2 minutes. Add red curry paste – careful, as it may spit a bit – then saute for 1 more minute. Slowly pour in chicken broth while scraping up any bits from the bottom of the pot then add coconut milk, gluten free Tamari, fish sauce, coconut sugar, dried basil, and salt and pepper to taste. Turn heat up to high to bring the soup to a bubble then turn heat  down to medium-low and simmer for 10 minutes, stirring occasionally.
  2. Turn heat up to high to bring soup to a rolling boil then add shrimp, mushrooms, and spinach. Simmer until shrimp are fully cooked through, 4-5 minutes, then squeeze in the juice of 1/2 lime and stir. Serve soup with cooked rice, lime wedges, and chopped fresh cilantro.

Recipe from IowaGirl Eats

Cookies and Bars · Gluten Free · Uncategorized · Vegan · Vegetarian

Soft Batch Pumpkin Gingersnap Chocolate Chip Cookies

Who doesn’t love a Gingerbread cookie, but bump it up a notch with pumpkin AND chocolate chips! These cookies are delicious and a great fall treat. I added more flour to keep the cookies from spreading, perhaps because of the gluten-free flour I used. I would make these again and try with all-purpose flour and they would equally as good!

Soft Batch Pumpkin Gingersnap Chocolate Chip Cookies

INGREDIENTS:
  • 1/2 cup butter or vegan butter, softened to room temperature
  • 1-3/4 cups sugar, divided
  • 1/2 cup pure pumpkin puree
  • 1/4 cup molasses
  • 1 teaspoon vanilla
  • 1 egg
  • 2-1/3 cups gluten-free 1:1 or “cup for cup” baking flour blend (I added 1/2 cup additional flour after baking the first pan–see before & after photo below)
  • 2 teaspoons baking soda
  • 2 teaspoons cinnamon
  • 4-1/2 teaspoons ground ginger, divided
  • 1 teaspoon ground cloves
  • 1/2 teaspoon salt
  • 1 cup Enjoy Life Dark Chocolate Morsels (I used Nestle)
Left–Cookie before adding additional flour; Right–Cookie after adding flour
DIRECTIONS:
  1. Preheat oven to 350 degrees then line a half sheet pan with a silpat or parchment paper and set aside.
  2. Add butter and 1 cup sugar to the bowl of an electric mixer or large glass bowl if using a handheld mixer. Beat until lightly and fluffy. Add pumpkin puree, molasses, and vanilla then beat until combined. Add egg then mix until just combined.
  3. In a separate bowl stir together flour, baking soda, cinnamon, 1-1/2 teaspoons ground ginger, ground cloves, and salt. Add to the wet ingredients in two batches, mixing until just combined before adding the second batch. Add dark chocolate morsels then mix until just combined.
  4. Stir together remaining 3/4 cup sugar and 3 teaspoons ground ginger in a bowl then scoop cookie dough by the Tablespoon into the mixture and roll to coat. Place onto prepared baking sheet then bake for 7-8 minutes (7-1/2 minutes were perfect for mine.) Rap the sheet pan on the counter (aka drop the sheet pan from a couple inches above the countertop onto the countertop) then let cookies cool slightly before transferring to cooling racks to cool completely.

Recipe from IowaGirlEats

Uncategorized

Raspberry Crumble Bars

Raspberry Crumble Bars are so delicious and easy. Daughter, Megan, introduced me to this great recipe and it hits the mark with my love of raspberries and a crunchy oatmeal base. For some reason, the childhood saying of ‘yummy, yummy in my tummy’ comes to mind.

Raspberry Crumble Bars

INGREDIENTS:

Raspberry Filling

  • two 12-ounce bags of frozen raspberries (see notes)
  • 1/2 cup granulated sugar (more depending on tartness of your berries)
  • 2 tablespoons flour
  • 1 tablespoon cornstarch
  • juice of one lemon

Crumble Layer

  • 3 cups rolled oats
  • 3 cups flour
  • 2 cups brown sugar (loosely packed)
  • 1 teaspoon baking powder
  • 1 1/2 cups melted butter (I prefer salted)
  • 1/2 teaspoon salt
DIRECTIONS:
  1. Prep Raspberries: Preheat the oven to 350 degrees. Place raspberries in a large colander. Run warm water over them for a minute, and then let the liquid drain out for about an hour until softened and thoroughly drained (see notes). Mix raspberries with sugar, flour, cornstarch, and lemon juice.
  2. Soft Delicious Crust: Mix the oats, flour, sugar, baking powder, butter, and salt together into a crumble-like mixture. Press two thirds of the crumble into the bottom of a 9×13 pan lined with parchment paper. Bake for 10 minutes.
  3. Bake: Arrange the raspberry layer on top of the baked bottom layer. Sprinkle with remaining crumble. Bake for another 25-30 minutes.
  4. Finish: Remove from oven. They will need a little time to set up into “bar” formation, so chill them for a few hours to get them really solid. Orrrr… cut into it right away and eat it like a soft fruit crisp! You should be able to remove them from the pan easily by pulling up on the edges of the parchment paper.

Recipe from PinchofYum