Asian Dishes · New Favorite

Vietnamese-Style Caramelized Ground Pork Bowls

Vietnamese and Thai food are a favorite of mine and I was delighted to find this recipe. The caramelized ground pork is out-of-this-world and makes the dish. I also thought the caramelized pork would be great in street tacos (ok, so now I’m on to Mexican food). The leftovers were equally as good, warmed in the microwave. For those that do not like spicy hot, I was relieved that the green curry paste from the grocery store was not at all spicy hot, it just added the right about flavor to the dish.

Vietnamese-Style Caramelized Ground Pork Bowls

INGREDIENTS:
  • For the Quick-Pickled Carrots:
    • 4oz grated carrots
    • 1/2 cup distilled white vinegar
    • 1/2 cup water
    • 2 Tablespoons sugar
    • 1/2 teaspoon salt
  • For the Caramelized Ground Pork:
    • 1 teaspoon vegetable oil
    • 1lb ground pork
    • 1 shallot, chopped
    • 2 cloves garlic, pressed or minced
    • 1/2 teaspoon ground ginger
    • salt and pepper
    • 1/4 cup brown sugar
    • 2 Tablespoons fish sauce
  • For the Cilantro Lime Cauliflower Rice:
    • 2 teaspoons vegetable oil
    • 12oz fresh or frozen cauliflower rice
    • salt and pepper
    • squeeze fresh lime juice
    • 1/4 cup chopped cilantro
  • For the Green Curry Drizzle:
    • 2 Tablespoons green curry paste (I like Thai Kitchen)
    • 1 teaspoon sugar
    • 1/2 cup coconut milk (I like full fat)
    • 2 Tablespoons chicken broth
    • squeeze fresh lime juice
  • For the toppings:
    • 8oz broccoli florets, steamed
    • sliced jalapeños
    • chopped cilantro
    • chopped green onion
    • kimchi
DIRECTIONS:
  1. For the Quick-Pickled Carrots: Add vinegar, water, sugar, and salt into a microwave safe dish then microwave on high for 1 minute. Stir until sugar is completely dissolved then pour over carrots, stir to combine, and refrigerate. Can be done several days ahead of time.
  2. For the Caramelized Ground Pork: Place 2 layers of paper towel on a large plate then set aside. Heat oil in a large wok or skillet over high heat. Add ground pork, shallot, garlic, ginger, salt, and pepper (to taste) then saute until pork is just barely cooked through, breaking it up as it cooks. Add brown sugar and fish sauce to the skillet then stir to combine. Spread pork into an even layer in the bottom of the wok or skillet then saute for 2 minutes – DO NOT DISTURB OR STIR THE PORK as it caramelizes. Stir then spread the pork into an even layer again and cook for 2 more minutes, undisturbed. Continue cooking then stirring in two minute increments – leaving the pork alone as it cooks and caramelizes – until the pork is brown and caramelized. You may need to cook in 1 minute increments near the end to prevent the sugar from burning. Scrape the caramelized pork onto prepared paper towel lined plate to drain then set aside.
  3. For the Cilantro Lime Cauliflower Rice: Get out a serving bowl then set aside. Place wok or skillet back over high heat then add oil. Once oil is hot, add cauliflower rice, season with salt and pepper, then stir fry until cauliflower is crisp tender, 3-4 minutes. Add lime juice and chopped cilantro then stir to combine. Scrape cauliflower rice into serving bowl then set aside.
  4. For the Green Curry Drizzle: Place wok or skillet back over medium high heat. Add curry paste then saute for 30 seconds, scraping/flattening/stirring it with a spatula. Add coconut milk, chicken broth, and sugar then stir until smooth and bring sauce to a simmer. Turn heat down to medium then simmer until sauce is slightly thickened and reduced, 3-4 minutes. Squeeze in a little lime juice to taste.
  5. To assemble: Scoop the Cilantro Lime Cauliflower Rice into bowls then top with the Caramelized Ground Pork, Quick Pickled Carrots, toppings, and Green Curry Drizzling Sauce.

Recipe from IowaGirlsEats and RecipeTinEats

Health · New Favorite · Poultry

Change Your Life Chicken

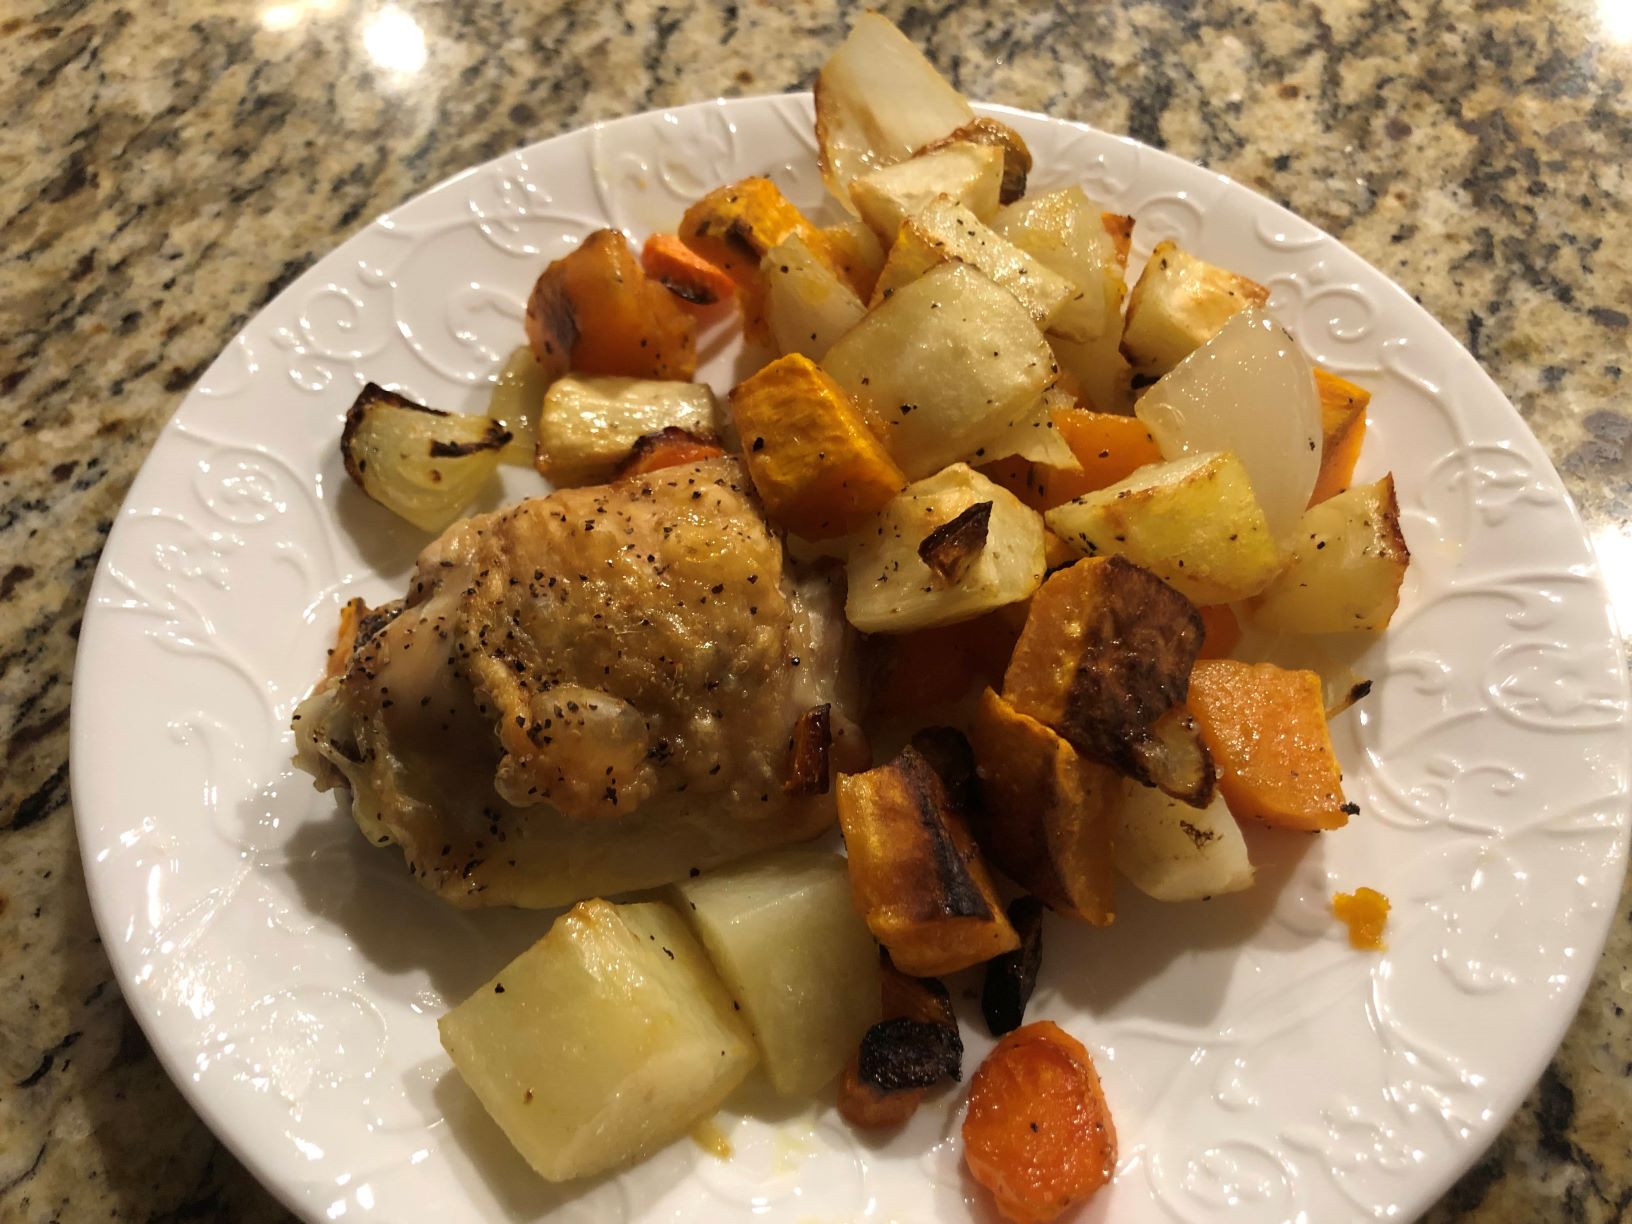
I’ve listened to the podcast ‘The Lazy Genius’ for a while and especially enjoyed the episode talking about her recipe ‘Change Your Life Chicken’.  It sounded so easy and I love roasted vegetables.  Never in my life have I set my oven for 500 degrees F, but I was up for the experiment.  I chopped carrots, sweet potatoes, potatoes and onions.

My oven must run extra hot so I only needed to roast the chicken and vegetables for 35 minutes.  The chicken skin was crispy, the vegetables were cooked through and some were crispy.  It was a delicious dish and a quick meal.  I would have especially loved this recipe when I was working full-time, needing to get dinner on the table quickly.

The instructions below are taken word for word from Thelazygeniuscollective.com website.  She does a great job of explaining the process.

CHANGE YOUR LIFE CHICKEN

What You Need

  • chicken thighs with the bone and the skin
    Yes. I said thighs. That have the bone and the skin. Trust me on this. You can do breasts if you want, but we’re a thigh family to the bone. (I love chicken humor.) Adults eat one, hungry adults eat two, and weird picky tiny kids eat a half.

  • two handfuls of vegetables per person
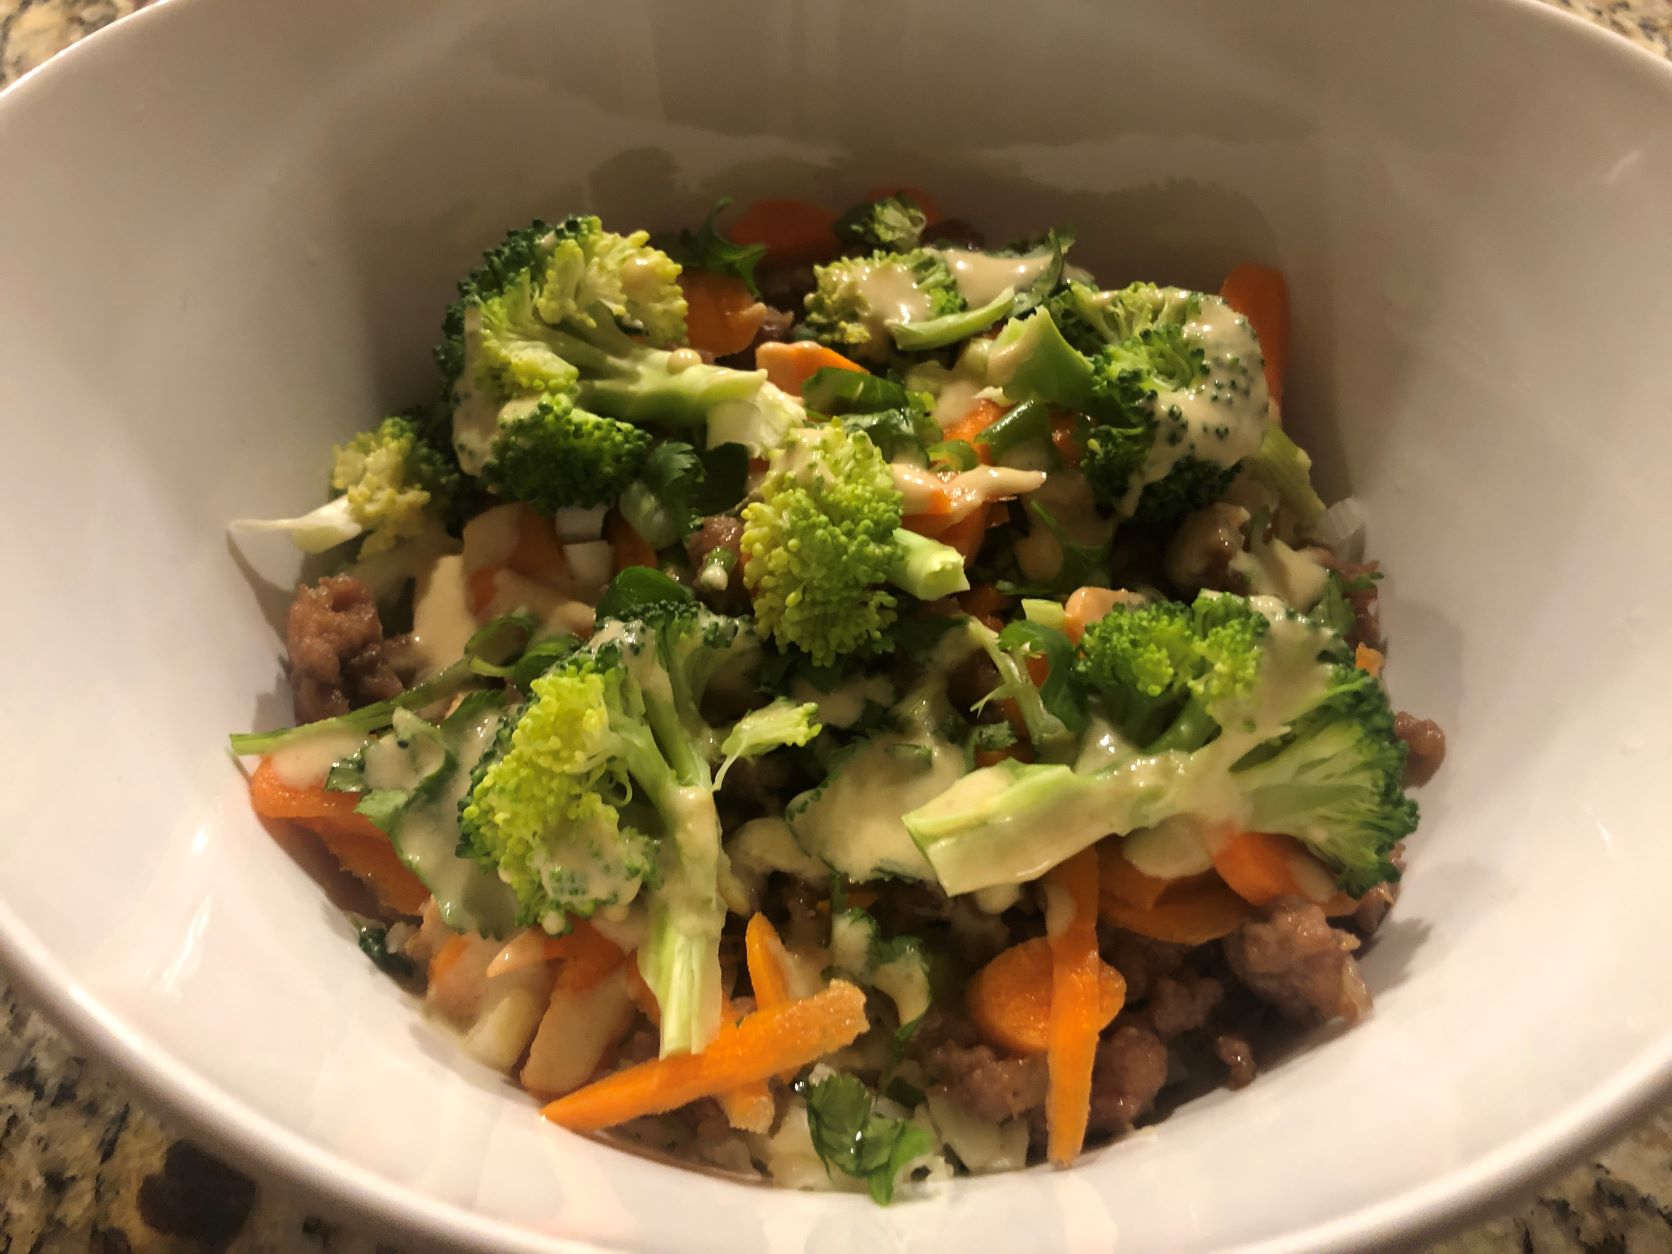
    You can use whatever you have. Options: onion, carrot, potato, green bean, asparagus, leek, sweet potato, and cauliflower. (Avoid mushrooms, zucchini, squash, and broccoli with this method.) I’ll share some favorite combinations at the end.

  • olive oil, salt, and pepper

How You Make It

1. Preheat the oven to 500 degrees. Not a typo. Five hundred.

2. Line a baking sheet with heavy duty foil. Your pan needs to hold your vegetables comfortably – not too close together, not too far apart. Heavy duty is less likely to tear, i.e. to get dirty from chicken grease. Do not use glass. It will shatter. I’d recommend not using any kind of baking dish with high sides because you won’t get the same kind of crisp. Baking sheet… like you use for cookies.

3. Cut your vegetables, and toss with olive oil, more salt than you think you need, and black pepper. These are the sizes to go for: large bite-sized. Carrots take the longest, so make those thinner than the rest. Consider cooking speeds with the vegetables you choose.

Green beans don’t need cutting, so those get tossed with the rest. Notice how cozy the vegetables are with each other but that there isn’t more than one layer.

4. Peel the skin back from the chicken. Don’t wig out. It’s cool. You want to generously season both sides of the chicken with salt and pepper, but you want to season under the skin. So pull back the skin, season, and fold the skin back over.

5. Pat the chicken skin dry with a wad of paper towels. This is how you get magic crusty chicken skin, i.e. the state fair craze somebody needs to start. The best order is to place the chicken skin side down on the vegetables, season, flip, pull back the skin, season, put the skin back, and pat dry. The worst is drying the skin and then realizing you forgot to season the bottom.

6. Place the chicken skin side up directly on top of the vegetables. Here’s what happens: the fat from the chicken skin will seep into the vegetables underneath, imparting flavor and moisture while the exposed vegetables get a tiny bit charred. It’s a perfect marriage of texture and flavor. I’m not showing you a photo of raw chicken because raw chicken.

Ew.

7. Bake at 500 degrees for 50 minutes. Don’t worry if the chicken will be done; it will be. And we don’t have to be concerned about the vegetables burning at such a high temperature because they’re nestled closely together. The most you’ll get will be a few crusty edges, and those are delightful.

And since blog posts don’t have sound effects yet, trust me on the crispiness of the crust. In the Instagram story, I tapped it, and it sounded like a little magic chicken woodpecker. You’re allowed to invent bird species when dinner is this easy.

And that’s it! Then you eat. Bonus: any leftover vegetables are a great snack/lunch straight from the fridge for busy days. (Except for potatoes. Leftover potatoes have a weird texture and are a little depressing. See: old French fries.)

Variations

Start with what’s above, but once you feel comfortable with how it works, feel free to change it up.

  1. Add fresh rosemary or thyme to the vegetables.

  2. Rub the chicken (not the skin) with lemon or orange zest. (Rosemary and orange are a heavenly match.)

  3. Reinvent the meal with different vegetable combinations: onion, potato, carrot; leek and asparagus; onion and sweet potato, green bean and cauliflower. If you love it, try it. The worst that can happen is it’s not great and you won’t make it again.

  4. Same goes for exotic spices. Go nuts with curry powder, a taco seasoning blend, or whatever you want to try. You won’t know if it works until you try.

  5. Use chicken breasts with the bone and skin if you must; be sure to bump the time to an hour. I can’t vouch that it’ll be as good, but I’m not your chicken boss.

Meh, yes I am. Make this chicken, y’all, and change your life.

If you run into any Change Your Life Chicken issues, I dedicated an entire episode of The Lazy Genius Podcast to it. Listen to it here.

New Favorite · Poultry

Chicken Tikka Masala…Trader Joe’s Style

Chicken Tikka Masala is made easy using Trader Joe’s delicious Masala sauce.  The first time I made it, I followed the recipe below.  The second time I made the recipe, I used strips of red, yellow and green pepper, carrots and chopped onions.  Both were delicious and easy, peasy.  We were so excited when a Trader Joe’s was built fairly close to my house. There are always new products to try and enjoy!

During the pandemic, I went to Trader Joe’s only a couple of times.  Hat’s off to Trader Joe’s and how they managed shopper entry, masks, and cleanliness.  By far, the best job of any grocery store I ventured into.

CHICKEN TIKKA MASALA…TRADER JOE’S STYLE

1 (15-ounce) jar Trader Joe’s Masala Simmer Sauce
4 boneless, skinless chicken breasts (about 2 pounds total), cut into bite-sized pieces
1 (14.5-ounce) can fire-roasted diced tomatoes, drained
1 cup frozen pearl onions
1 cup sliced baby carrots
Coarsely chopped fresh cilantro (optional)
Cooked rice, for serving (optional)

  • Pour half of the sauce into the bottom of a 6-quart or larger slow cooker. Nestle the chicken into the sauce in a single layer. Pour the drained tomatoes evenly over the chicken.
  • Add onions and carrots
  • Pour the remaining sauce on top.
  • Cover and cook until the chicken is cooked through.  (I cooked for 4 hours) 
  • Sprinkle with cilantro and serve over rice, if desired.

Recipe adapted from thekitchn.com

New Favorite · New Traditions · Soups and Stews

Hungarian Goulash Soup

Hungarian Goulash is different from the Midwest Goulash I grew up with.  The Midwest version was always elbow macaroni, hamburger, tomatoes and sometimes, cheese. I experienced the traditional version in a Hungarian restaurant in Denver and again in Eastern Europe.  Goulash (Gulyasleves) is one of the national dishes of Hungary.  It reminds me of our traditional Beef Stew, although not as thick as stew and uses different spices.

This recipe is an adapted version of the recipe from a tour guide, Food Tour Budapest.  We had a marvelous tour of wonderful restaurants, meandering the streets of Budapest experiencing traditional food and drink in historic and unique restaurants.  How I wish I could travel again and experience such a tour.  Some day… In the meantime, I can recreate the food memories in my own kitchen.

HUNGARIAN GOULASH

2 tablespoons lard or cooking oil (I used Olive Oil)
2 medium onions, finely chopped
1-2 tablespoons Hungarian sweet paprika; add a bit of spicy paprika if desired
1 pound cubed beef stew meat or pork shoulder
1 teaspoon salt
1-2 teaspoons caraway seed
4 cups water (I added a bit more as the goulash cooked)
1 whole red pepper, chopped
1 whole tomato, peeled and chopped (or a can of tomatoes)
2 potatoes, peeled and cubed
2 carrots, halved and sliced
1/2 cup chopped celery
Optional:  small bits of pasta

  • Add the lard or oil to the stew pot.
  • Add onions to the hot lard or oil.  Cook the onions until they are glossy and saucy.
  • Remove from the fire and add the paprika.  Mix with the onion.  Add a bit of water, to prevent from burning.
  • Add the meat cubes and put back on the fire.  Sprinkle with salt and caraway seed.  Add more or less, depending on your tastes
  • Add the chopped carrots and celery.
  • Once the meat has a bit of color, add water, chopped pepper and tomatoes. Lower heat to simmer and cover. Stir occasionally to prevent burning.
  • After one and a half or two hours, check the meat. Add the chopped potatoes and cook through, about 20 minutes.
  • Add the pasta pieced (optional) when the potatoes are almost done.
  • Taste the broth and adjust seasoning as desired.

Serve with bread (white or rye).  Optional: add freshly ground paprika or spicy green pepper.

Recipe adapted from FoodTour Budapest and Hungarian Cooking Goulash Soup.


New Favorite · Soups and Stews

Broccoli Cheddar Soup

Cold winter nights mean hearty soups in my kitchen. Broccoli Cheddar Soup is always a favorite when dining out but I’ve rarely made it.  This is a great recipe that has become a family favorite.

IMG_7524

BROCCOLI CHEDDAR SOUP

1 tablespoon + 4 tablespoons unsalted butter, divided
1 small/medium sweet yellow onion, diced small
1 clove garlic, peeled and minced finely
1/4 cup all-purpose flour
2 cups low-sodium vegetable or chicken stock
2 cups fat-free half-and-half (I used regular half-and-half)
3 cups broccoli florets, diced into bite-size pieces
2 large carrots, trimmed, peeled, and finely chopped
3/4 teaspoon salt, or to taste
3/4 teaspoon freshly ground black pepper, or to taste
1/2 teaspoon smoked paprika or regular paprika, optional and to taste
1/2 teaspoon dry mustard powder, optional and to taste
pinch cayenne pepper, optional and to taste
8 ounces grated extra-sharp cheddar cheese, with a small amount reserved for garnishing bowls

  • In a small saucepan, add 1 tablespoon butter, the diced onion, and sauté   over medium heat until the onion is translucent and barely browned, about 4 minutes. Stir intermittently.
  • Add the garlic and cook about 30 seconds, stirring constantly so it doesn’t burn. Remove from heat and set pan aside.
  • In a large heavy-bottom pot, add 4 tablespoons butter, flour, and cook over medium heat for about 3 to 5 minutes, whisking constantly, until flour is thickened. You are making a roux and it’s very important the mixture is thick or soup will never thicken properly later.
  • Slowly add the vegetable stock, whisking constantly.
  • Slowly add the half-and-half, whisking constantly.
  • Allow mixture to simmer over low heat for about 15 to 20 minutes, or until it has reduced and thickened some. Whisk intermittently to re-incorporate the ‘skin’ that inevitably forms, this is normal.
  • While mixture is simmering, chop the broccoli and carrots. After simmering 15 to 20 minutes, add the broccoli, carrots, and the onion and garlic you previously set aside.
  • Add the salt, pepper, optional paprika, optional dry mustard powder, and optional cayenne.  Stir to combine.
  • Allow soup to simmer over low heat for about 20 to 25 minutes, or until it has reduced and thickened some. Whisk intermittently to re-incorporate the ‘skin’ that inevitably forms, this is normal.
  • Optional: I used a Braun hand blender to blend the vegetables into a creamier consistency.
  • While soup simmers, grate the cheese. After simmering about 20 to 25 minutes, add most of the cheese, reserving a small amount for garnishing bowls. Stir in the cheese until melted and incorporated fully, less than 1 minute.
  • Transfer soup to bowls, garnish with reserved cheese, and serve immediately. Soup will keep airtight for 5 to 7 days in the fridge. Reheat gently in the microwave.

Recipe slightly adapted from Averiecooks.com  

Garden · Gluten Free · New Favorite · Vegan · Vegetables · Vegetarian

Sweet Potatoes, Carrots and Apples Roasted with OJ

Roasted Vegetables are my absolute favorite yet I didn’t discover this technique until a few years ago.  My carrot harvest this year was the best I’ve ever had, despite Joe’s (my 12 year old Golden Retriever) attempts to steal the carrots out of the basket.

I found this wonderful recipe which did not call for apples, but in later versions I added the apples and loved the added sweet/tart bites.

SWEET POTATOES & CARROTS WITH APPLE CIDER THYME

2 medium sweet potatoes, peeled and cubed
3 medium-large carrots, peeled and cut into 1-inch rounds
1-2 apples, peeled and chopped in large pieces
1 small red onion, cut into 1-inch pieces
3 whole garlic cloves
1/4 cup apple cider
2 Tbsp olive oil
2 Tbsp chopped fresh thyme
salt and pepper to taste

  • Preheat oven to 400 degrees.
  • Place cut sweet potatoes, carrots, red onion and garlic cloves on a baking sheet and spread them in a single layer.
  • In a small bowl, whisk together apple cider, olive oil, thyme, salt and pepper. Drizzle mixture all over vegetables and toss to coat evenly.
  • Roast for 35-45 minutes, until vegetables are caramelized to your liking. Serve immediately.

Adapted from http://www.myjewishlearning.com/blog/food/2014/10/13/sweet-potatoes-and-carrots-with-apple-cider-and-thyme/

Garden · Gluten Free · New Favorite · Skinny · Vegan · Vegetarian

Spring Garden Vegetable Soup

Can you tell I’m in the mood for spring? My past two recipes have been all about it! This Spring Garden Vegetable Soup has also been in my ‘must make’ stack.  I like the versatility of this recipe, easily adapting to Vegan or Vegetarian (using vegetable stock and omitting the cream and chicken) and it is Gluten-Free.

This soup is light and, oh, so healthy.  Daughter Sarah served a small bowl to 10-month old grandson, Evan, and he really liked it!  I served the soup with the not-so-healthy baked Red Lobster Biscuits (which Evan DEVOURED) but a hearty whole-grain bread would be wonderful paired with this soup.

SPRING GARDEN VEGETABLE SOUP with ASPARAGUS, ARTICHOKES, PEAS & SPINACH


6 cups stock (chicken or vegetable)
4-6 cups water (to reach desired thickness)
1 tablespoon butter
1 leek, cut into half circles
2 ribs celery, trimmed and cut into half-inch thick pieces on the diagonal
3 carrots, trimmed and cut into half-inch thick pieces on the diagonal
1 15-ounce can artichoke bottoms, tough bits sliced off and discarded, remaining parts cut into lengths
16 ounces frozen artichoke hearts (from Trader Joe’s)
8 ounces asparagus, woody ends snapped off, skin pared off if tough, spears cut into one-inch lengths, tips set aside
8 ounces frozen peas
8 ounces frozen spinach
Generous salt & pepper to taste
1/2 teaspoon tarragon
Cream to taste (1/4-1/2 cup)
Optional: 2-3 cups chopped chicken
  • In a large pot, melt the butter. Add the leek, stir to coat with butter and let cook until just soft.
  • Add the celery and carrots to the pot, stirring to coat with butter and cooking until soft.
  • Add the artichoke bottoms, artichoke hearts and asparagus lengths (leave the tips aside).
  • Add the stock and bring the soup to a boil. Reduce the heat to maintain a slow simmer until all the vegetables are cooked through. (Optional: Add cooked chicken at this point).
  • Stir in the asparagus tips, peas and spinach and let cook through. Add water to reach desired thickness.
  • Taste, then season with salt and pepper. Stir in cream to taste. Best if left to rest for 24 hours before serving.

Recipe adapted from ALANNA’s TIPS

Family Favorites · New Favorite · New Traditions

Refrigerator Crock Salad…a slaw with many faces

My Mother occasionally made this salad, often with fresh ingredients from her garden.  The last time I made this recipe was 15+ years ago for a Christmas party.  This week I resurrected the recipe and tried it out in several ways.  Each combination was wonderful.

Refrigerator Crock Salad

1)  Side dish to barbecue ANYTHING

2)  Pairs very well with fish and would be GREAT on fish tacos

3)  On a sandwich (daughter Sarah’s fiancé, Kyle, put it on a turkey, cheese, and ham salad combo sandwich).  Sounds incredibly weird, but delicious!

Besides being delicious, this salad keeps in the refrigerator for several days.  In fact it just keeps getting better and better.

REFRIGERATOR CROCK SALAD

1 head green cabbage
2 green sweet bell peppers
2 red or orange sweet bell peppers
4 carrots
2 onions
2 teaspoons celery seed
2 cups white cider vinegar
2.5 cups sugar

  • Shred cabbage, peppers, carrots, onions in a large bowl.  Soak in salt water for 2 hours.  Drain well.
  • In a separate bowl, combine the vinegar and the sugar.  Pour over shredded ingredients and refrigerate.  Let sit for a minimum of 3-4 hours before serving.