Pies and Pastries

Lemon Cookie Pie

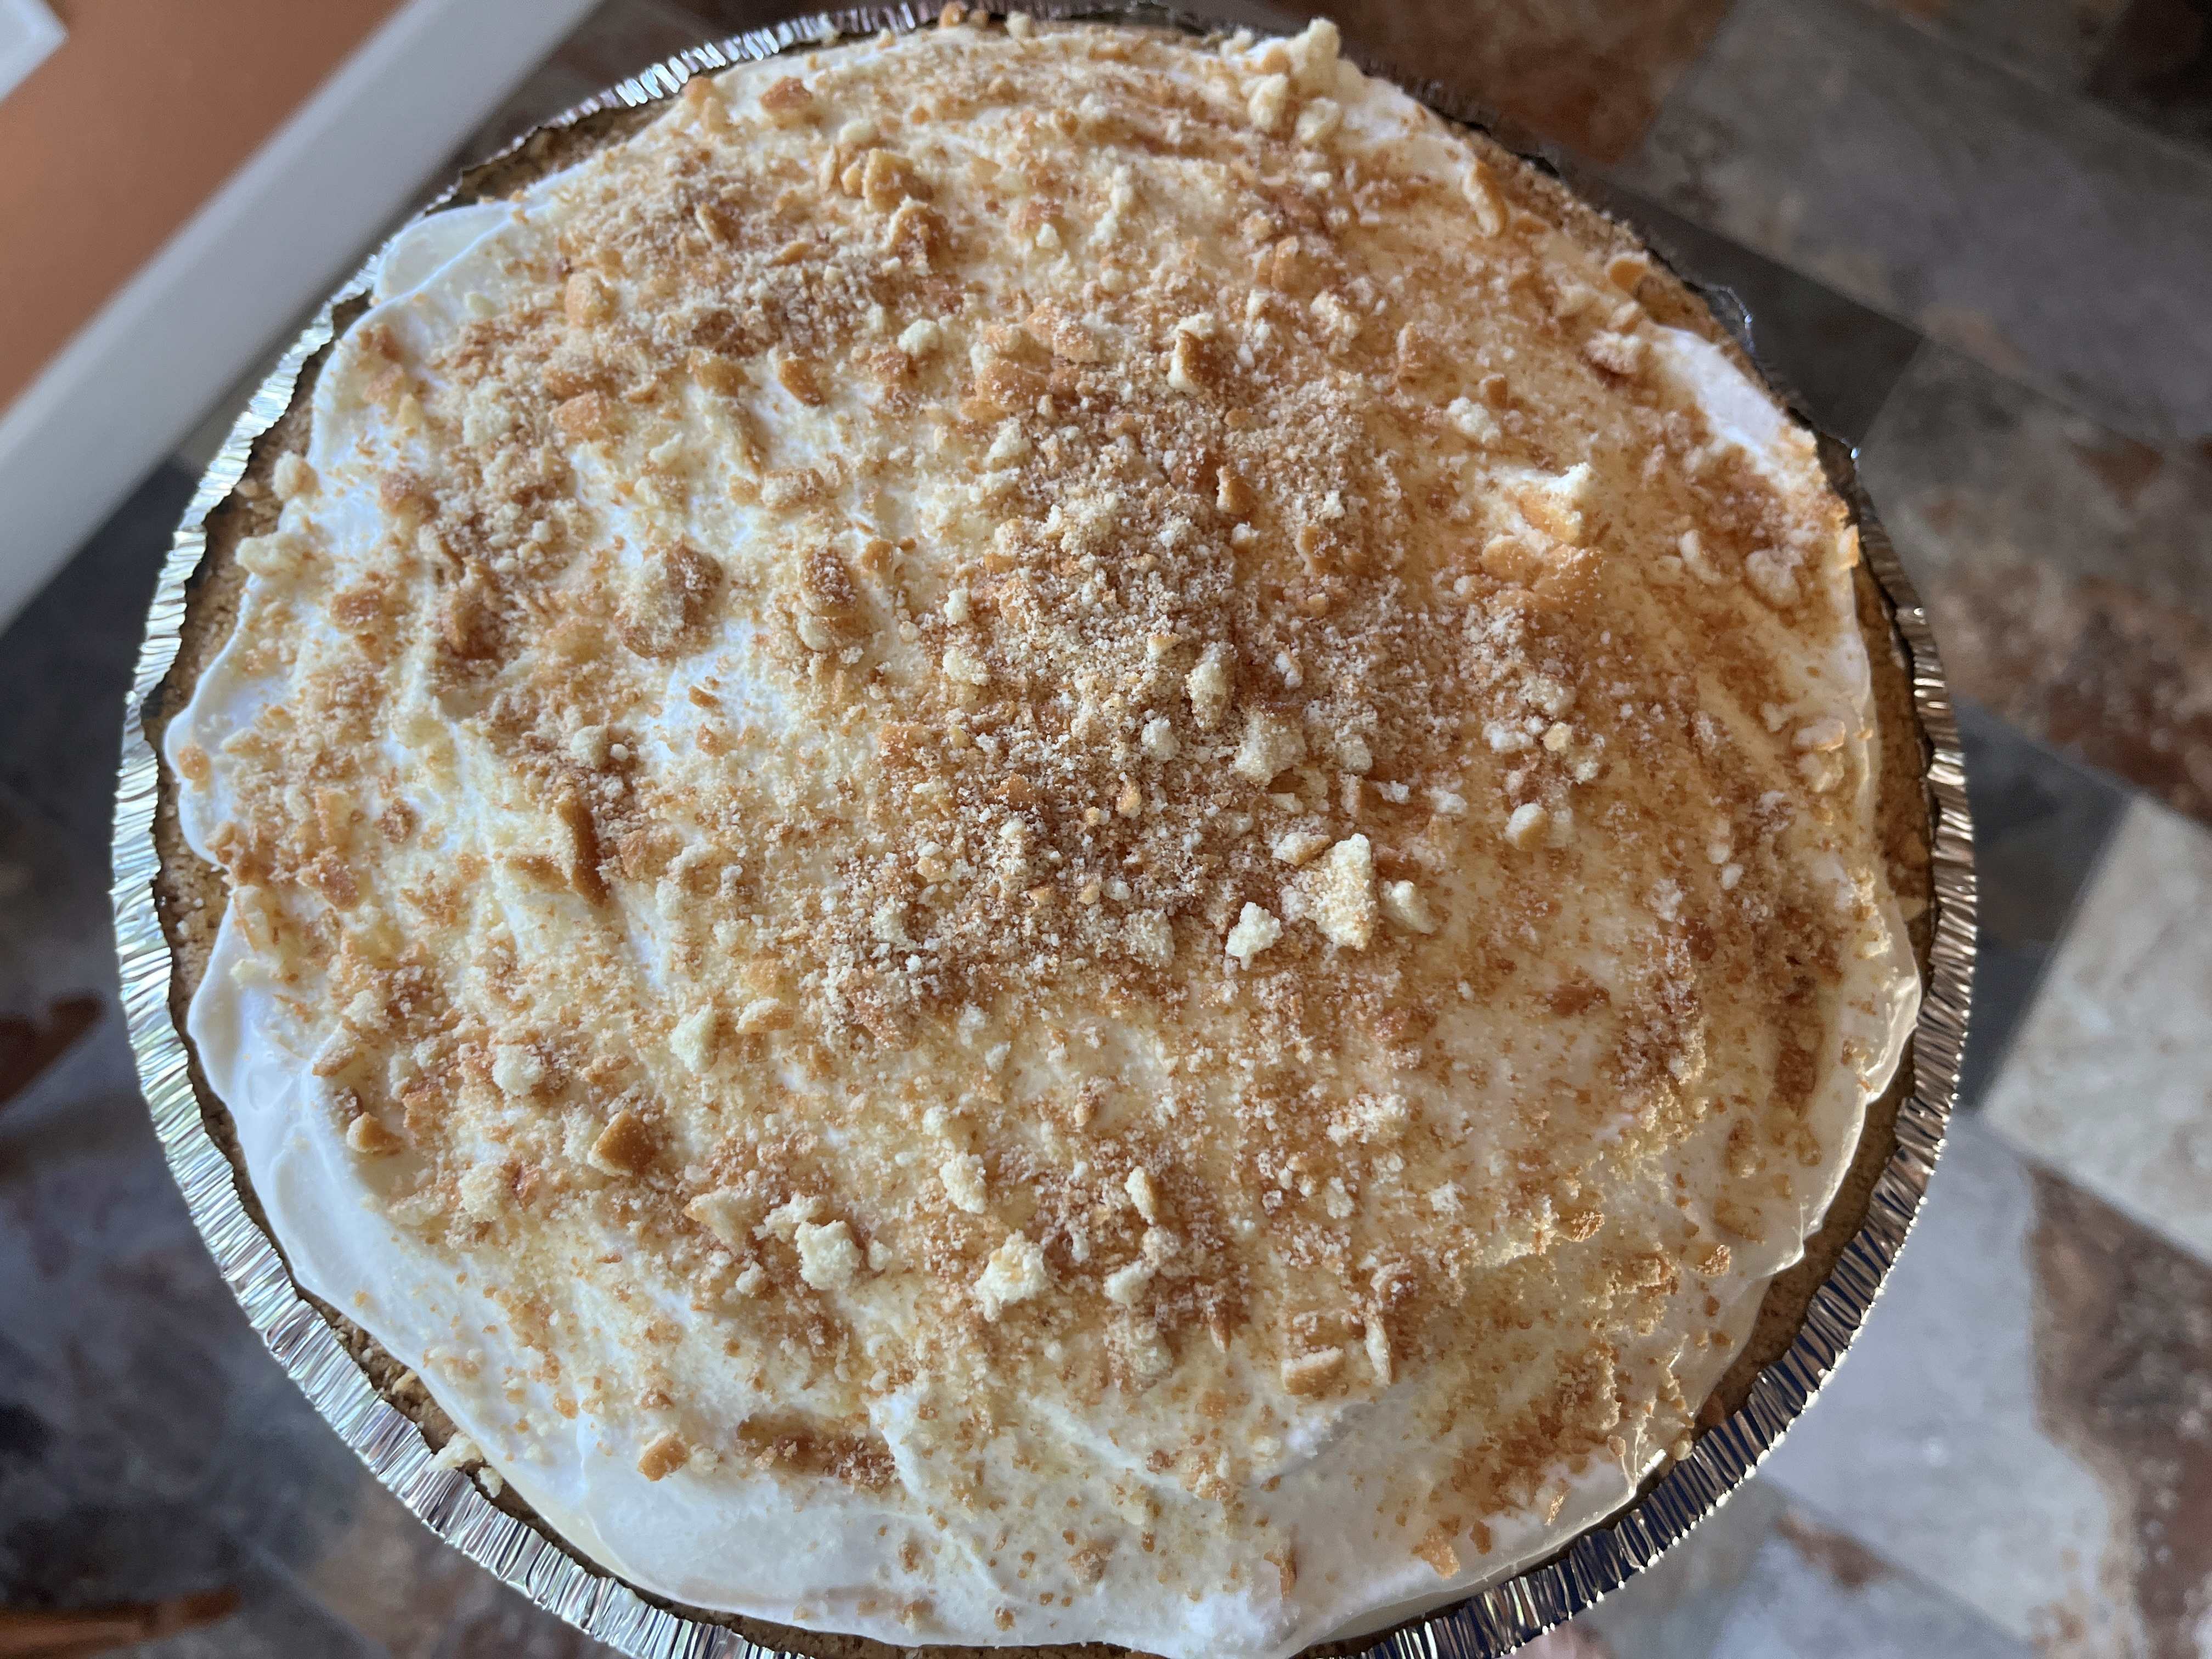
I’ve seen several variations of this pie and have wanted to make it for some time. This recipe is delicious. I served it to guests and gave extra pieces to my family. Everyone loved it. It is quite rich, so a small piece per serving is appropriate. My only regret was not adding more lemon juice. The taste was wonderful but next time I would taste the lemon mixture to determine if I should add more lemon juice. My daughters and I also discussed how good this would be with a dollop of lemon curd, raspberry sauce or fresh raspberries on each serving. This is a wonderful pie to serve when it is hot outside!

Lemon Cookie Pie

INGREDIENTS:
  • Graham Cracker Crust (Fork-Lore:or store bought which I used)
    • 1 1/2 cups (165g) ground graham crackers 
    • 1/4 cup (50g) granulated sugar
    • Pinch of kosher salt
    • 6 tbsp unsalted butter, melted
  • Lemon Pie Filling
    • 8 oz full fat cream cheese, room temp
    • 14 oz can sweetened condensed milk
    • Zest of 1 lemon 
    • 1/2 cup (115g) lemon juice (Fork-Lore: or more to taste liking)
    • 1 3/4 cups (430g) heavy whipping cream
    • 3 tbsp powdered sugar
    • 1 tbsp dry milk powder (optional)
  • 1 1/2 bags Tate’s Bake Shop lemon cookies (regular or gluten free)  
  • Optional: Lemon Curd, Raspberry Sauce or fresh raspberries
DIRECTIONS:
  1. Graham Cracker Crust:
    • Mix together the ground graham crackers, sugar, and salt. Then stir in the melted butter until evenly combined. Press the crust into a 9″ pie dish, covering the bottom and sides. Place in the refrigerator while we make the filling.
  2. Lemon Pie Filling
    • In a medium bowl using a fork, mash the cream cheese until spread out. Then stir in the sweetened condensed milk. Once roughly combined, switch to a whisk and vigorously mix until completely smooth. Then whisk in the zest and juice until well combined. 
    • In a separate bowl using a hand or stand mixer with the whisk attachment, add the heavy whipping cream, powdered sugar, and milk powder if using. Whip on high speed until light, fluffy, and smooth with firm peaks, about 2 minutes. Careful not to over whip as the mixture should still be smooth and creamy.
    • Scoop half of the whipped cream into the lemon mixture and use a rubber spatula to fold to combine. 
    • Spread 1/3 of the filling into the bottom of the chilled crust. Place a layer of cookies on top, breaking some of the cookies to cover as much of the surface as possible.
    • Spread another 1/3 of the filling on top and place another layer of cookies on top.
    • Finish with a final layer of the lemon filling and then top with the remaining whipped cream. The filling will likely overtake the crust but that’s ok! We’re making a big, thick pie. 
    • Sprinkle the top with some crushed cookies and chill uncovered overnight. The next day, serve chilled and enjoy!
  3. Fork-Lore Optional: Serve with a dollop of lemon curd on top.

Recipe from ButternutBakeryBlog

Cookies and Bars

Preacher Cookies

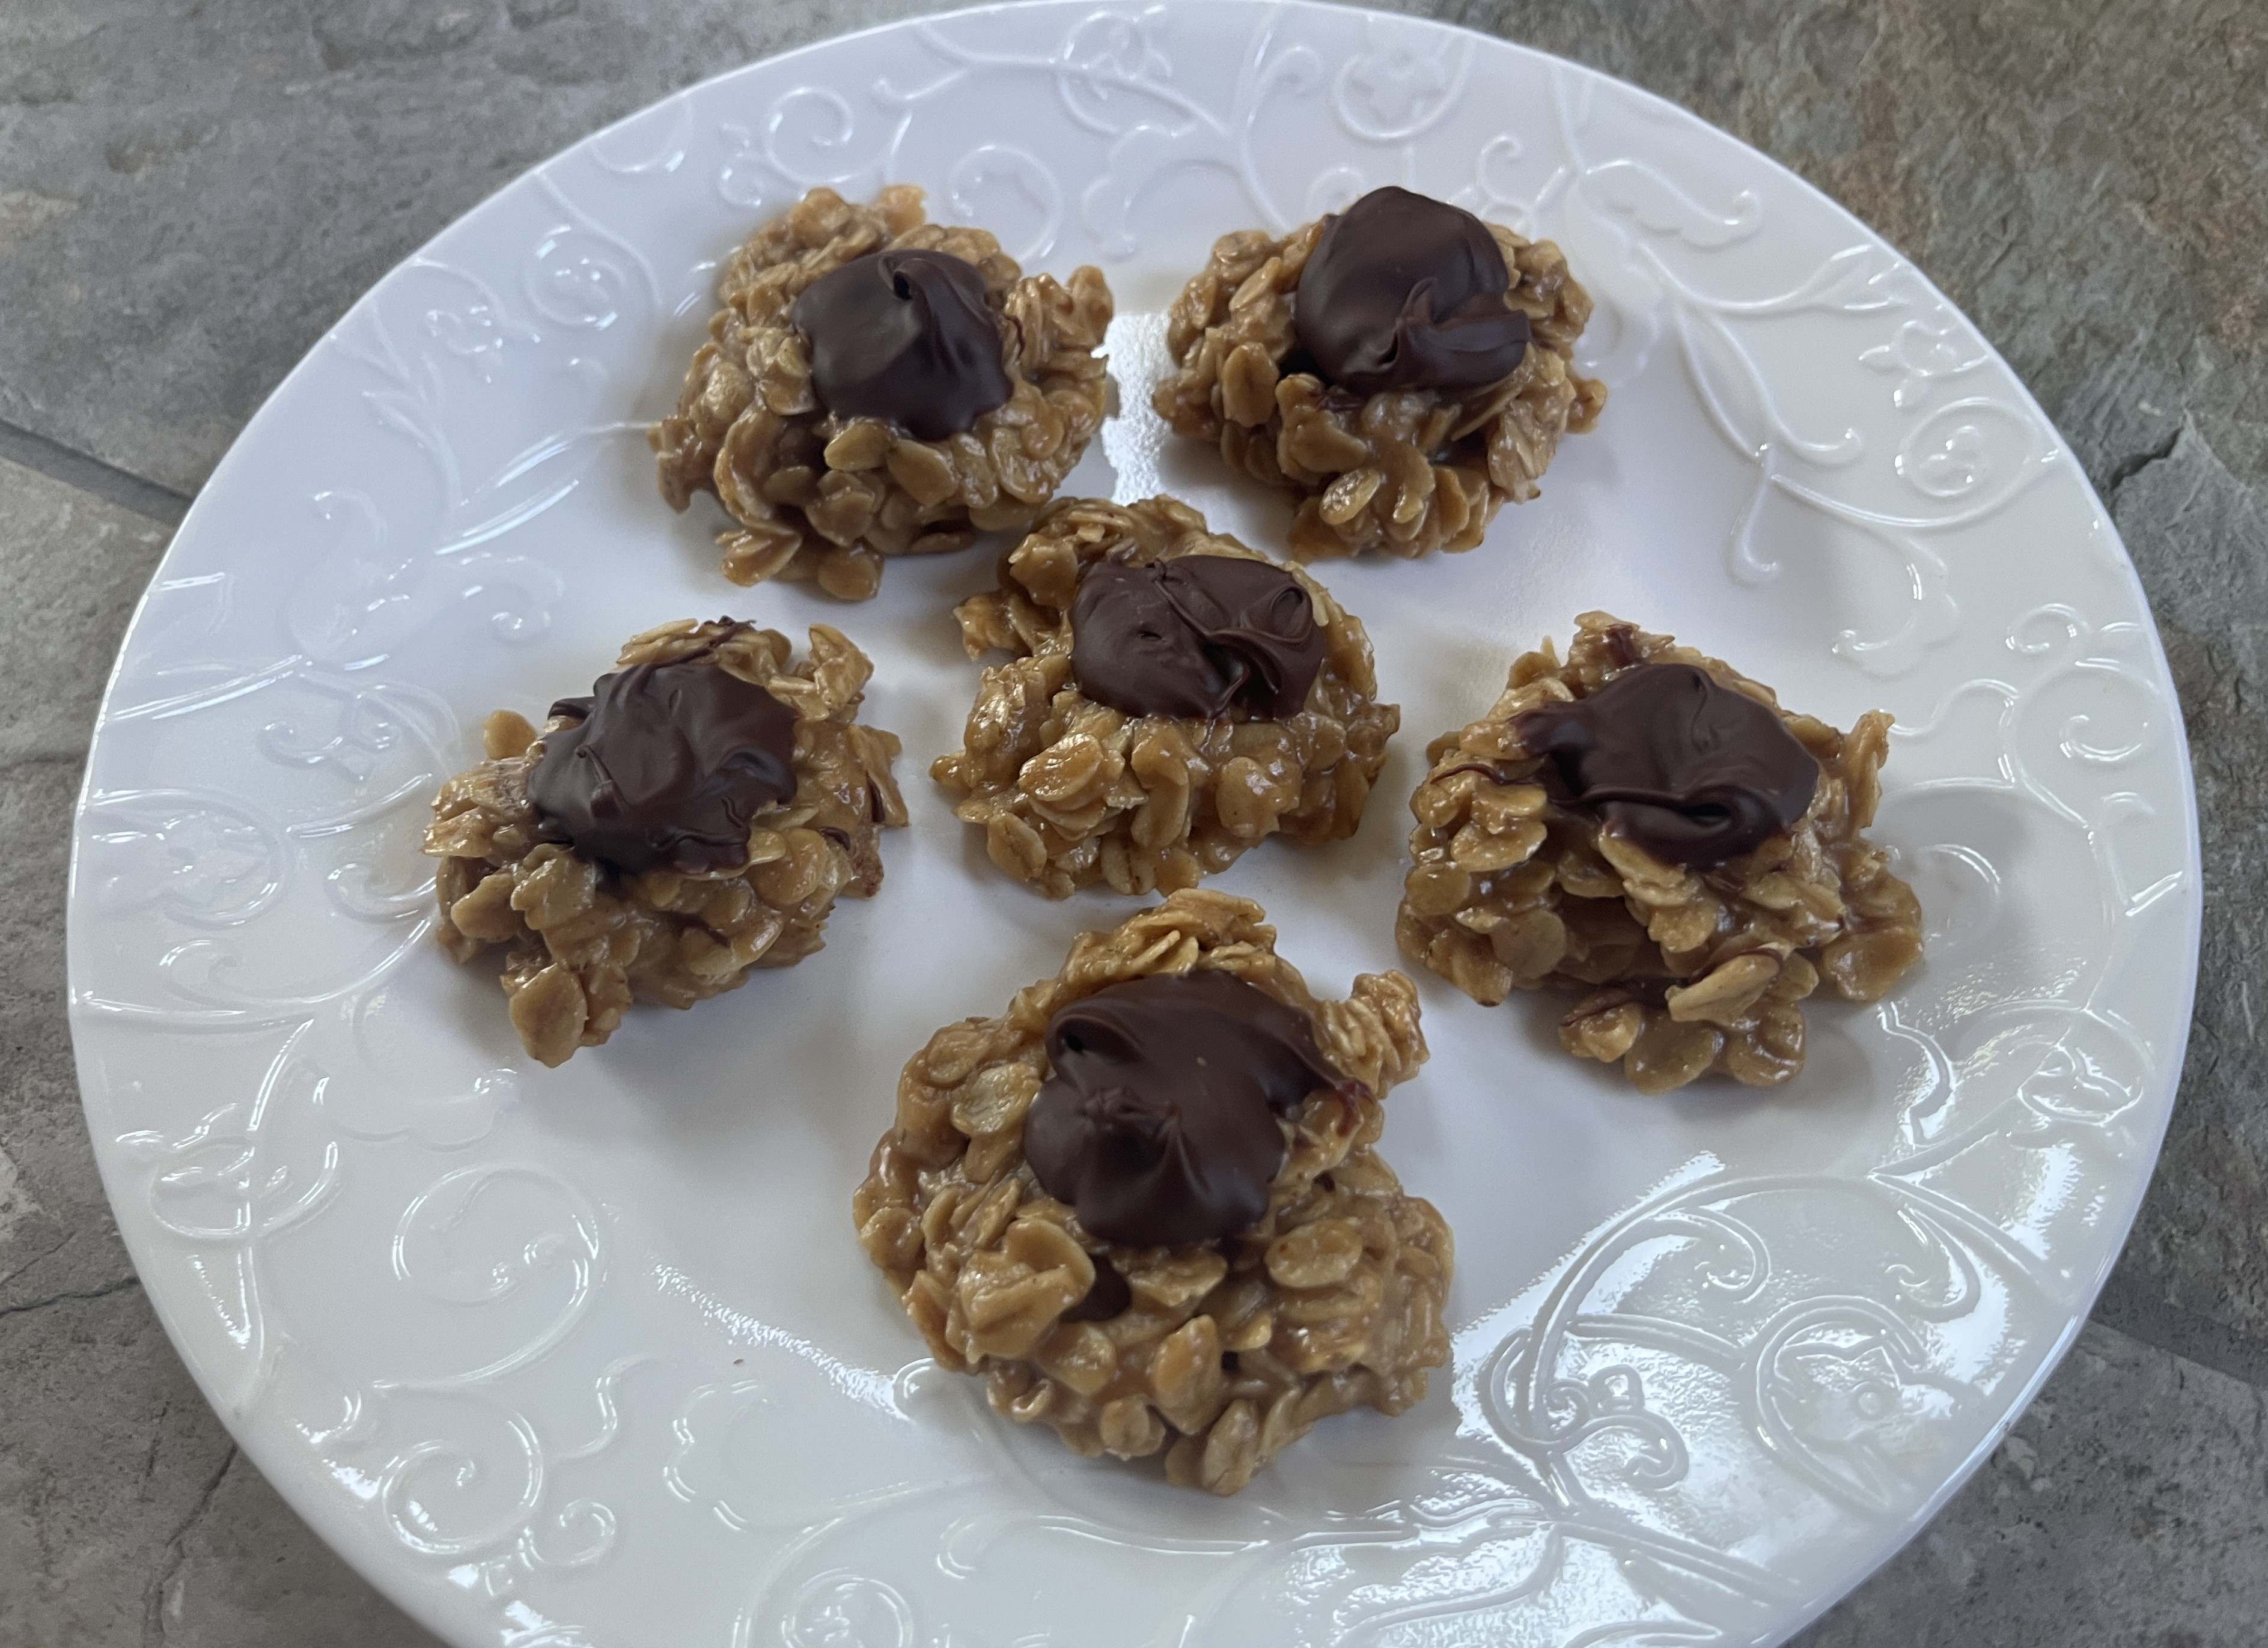
Who doesn’t love a no-bake cookie? This recipe reminds of the chocolate no-bake cookies my family has been making since I was a child. I like the peanut butter oats combination topped with chocolate. The family votes that the Preacher cookies are delicious!

Preacher Cookies

INGREDIENTS:
  • 3.5 cups quick-cooking oats, uncooked
  • 1 cups sugar
  • 1 cup peanut butter
  • 1 stick + 1 tablespoon unsalted butter, divided
  • ½ cup milk
  • 1 teaspoon vanilla
  • ½ cup chocolate chips
DIRECTIONS:
  1. Pour oats into a large bowl and set aside. Line a baking sheet with parchment paper. Note: A baking sheet isn’t “required” – a flat surface, like a countertop, works.
  2. Melt 1 stick butter in a saucepan on medium-high heat, stirring frequently to melt butter. Bring to a boil for 1 minute, then remove from heat. Add milk, sugar, and vanilla extract and stir to combine. Add peanut butter and stir until fully combined.
  3. Pour peanut butter mixture over reserved oats.
  4. Scoop 1 tablespoon full of batter onto baking sheet, pressing down to flatten.
  5. Melt chocolate chips with 1 tablespoon unsalted butter in a microwave safe dish, 20 second intervals on medium heat, stirring after each interval, until chocolate is completely melted.
  6. Use a spoon to drizzle chocolate over top of cookies. Cookies are ready to eat once chocolate has cooled and set. Or, chill in refrigerator for 1 hour. Transfer cookies to a serving platter, or store in an airtight container.
  7. NOTE: I keep the cookies refrigerated.

Recipe modified from 12Tomatoes

Cakes · Desserts

Perfect No-Bake Cheesecake with Homemade Lemon Curd

Daughter Megan did it again with this light, delicious no-bake cheesecake with homemade lemon curd and fresh strawberries. We had family in town for a visit and this dessert was a big hit with everyone. I’ll admit I do not care for traditional cheesecake since it so heavy, but not this version. And who makes their own lemon curd? Yes indeed, Megan does. Perhaps she needs to pursue her dream of a bake shop!

Perfect No-Bake Cheesecake with Lemon Curd

INGREDIENTS:
  • Graham Cracker Crust
  • 2 cups (240g) graham cracker crumbs (about 16 full sheet graham crackers)
  • 1/3 cup (67g) packed light or dark brown sugar
  • 1/2 cup (8 Tablespoons; 113g) unsalted butter, melted
  • 1 and 1/4 cups (300ml) heavy cream or heavy whipping cream
  • Cheesecake
  • three 8-ounce blocks (680g) full-fat cream cheese, softened to room temperature
  • 1/2 cup (100g) granulated sugar
  • 2 Tablespoons (15g) confectioners’ sugar
  • 1/4 cup (60g) sour cream, at room temperature
  • 2 teaspoons lemon juice
  • 1 teaspoon pure vanilla extract
DIRECTIONS:
  1. Make the crust: Stir the graham cracker crust ingredients together. Pour into a 9-inch springform pan or 10-inch springform pan and pack in very tightly. The tighter it’s packed, the less likely it will fall apart when cutting the cheesecake. I recommend using the bottom of a measuring cup to pack it into the bottom and up the sides. You can watch me do this in the video above. Freeze for 10–20 minutes as you prepare the filling.
  2. Make the filling: Using a hand mixer or a stand mixer fitted with a whisk attachment, whip the cold heavy cream into stiff peaks on medium-high speed, about 4–5 minutes. Set aside.
  3. Using a hand mixer or a stand mixer fitted with a whisk or paddle attachment, beat the cream cheese and granulated sugar together on medium speed until perfectly smooth and creamy. Scrape down the sides and up the bottom of the bowl with a rubber spatula as needed. Add the confectioners’ sugar, sour cream, lemon juice, and vanilla extract. Beat for 2–3 minutes on medium-high speed until smooth and combined. Make sure there are no large lumps of cream cheese. If there are lumps, keep beating until smooth.
  4. Using your mixer on low speed or a rubber spatula, fold the whipped cream into the cheesecake filling until combined. This takes several turns of your rubber spatula. Combine slowly as you don’t want to deflate all the air in the whipped cream.
  5. Remove crust from the freezer and spread filling into crust. Use an offset spatula to smooth down the top.
  6. Cover tightly with plastic wrap or aluminum foil and refrigerate for at least 6–8 hours and up to 2 days. For best results, 12 hours is best. I chill mine overnight. The longer refrigerated, the nicer the no-bake cheesecake will set up.
  7. Use a knife to loosen the chilled cheesecake from the rim of the springform pan, then remove the rim. Using a clean sharp knife, cut into slices for serving. For neat slices, wipe the knife clean between each slice.
  8. Serve cheesecake with desired toppings. Cover and store leftover cheesecake in the refrigerator for up to 5 days.

Homemade Lemon Curd

INGREDIENTS:

  • 4 large egg yolks (for thicker lemon curd, see Note on eggs)
  • 2/3 cup (134g) granulated sugar
  • 1 Tablespoon lemon zest (about 1 lemon)
  • 1/3 cup (80ml) fresh lemon juice (about 2–3 lemons)
  • 1/8 teaspoon salt
  • 6 Tablespoons (86g) unsalted butter, softened to room temperature and cut into 6 pieces

DIRECTIONS:

  1. Fill the bottom pot of your double boiler with 1–2 inches of water. (Or use the DIY double boiler method listed in the notes.) Place on high heat. Once the water begins to boil, reduce to low heat to keep the water at a simmer.
  2. Place egg yolks, granulated sugar, lemon zest, lemon juice, and salt into the top pot of your double boiler. Using a silicone whisk, whisk until completely blended, then continue to whisk as the curd cooks. Constant whisking prevents the egg yolks from curdling. Whisk and cook until the mixture becomes thick, resembling the texture of hollandaise sauce, about 10 minutes. If curd isn’t thickening, turn up the heat and constantly whisk.
  3. Remove pan from heat. Whisk the sliced butter into the curd. The butter will melt from the heat of the curd as you whisk. Pour curd into a jar or bowl and place a piece of plastic wrap directly on top so it is touching the top of the curd. (This prevents a skin from forming on top.) The curd will continue to thicken as it cools. Once cool, the plastic wrap can be removed.
  4. Refrigerate the curd for up to about 10 days.

Cheesecake Recipe from Sally’s Baking Addiction

Lemon Curd Recipes from Sally’s Baking Addiction

New Favorite · Vegan · Vegetarian

No Bake Energy Bites

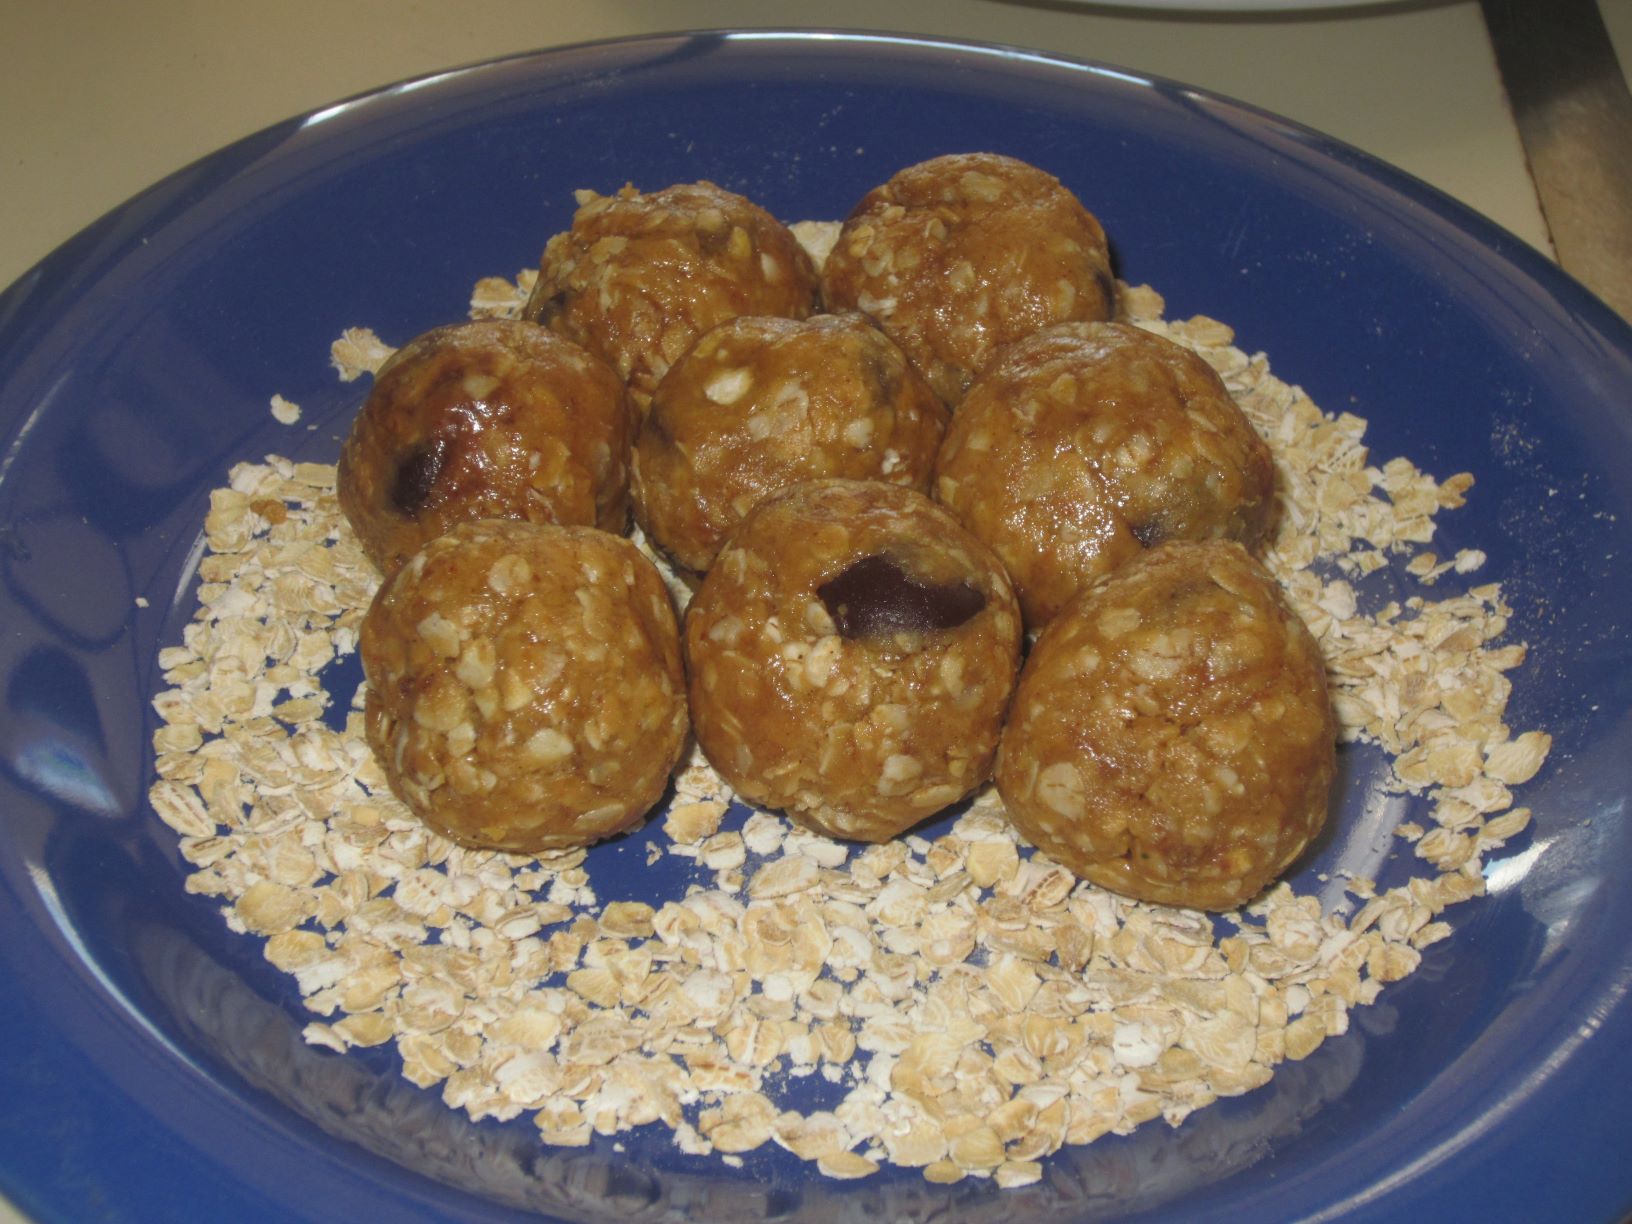
No Bake Energy Bites were another Pinterest find.  They sounded delicious, somewhat healthy, and easy. They remind me so much of the no-bake chocolate cookies we made when I was a kid (and for my kids).

I added cinnamon to the recipe and also rolled some of them in oatmeal, just to add a little visual interest. Next time I plan to add some chopped walnuts, almonds or sunflower seeds.

Energy bites any time of day for energy or when your sweet tooth is getting the best of you!

No Bake Energy Bites

1 cup dry oatmeal
1/2 cup chocolate chips
1/2 cup peanut butter
1/2 cup ground flaxseed
1/3 cup honey
1 tsp. vanilla
1/2 teaspoon cinnamon

  • Mix all ingredients together.
  • Roll into balls and refrigerate. You can also roll the bites in the oatmeal again to coat (optional).

Adapted from:  http://www.gimmesomeoven.com/no-bake-energy-bites/