Desserts · Family Favorites · Holidays

Easy Pecan Shortbread Bars

The Easy Pecan Shortbread Bars are to die for. Daughter, Sarah, is the master of this recipe. The bars are rich, and so yummy. If you bring these to holiday gathering, be prepared to be on the hook for this recipe for all future events.

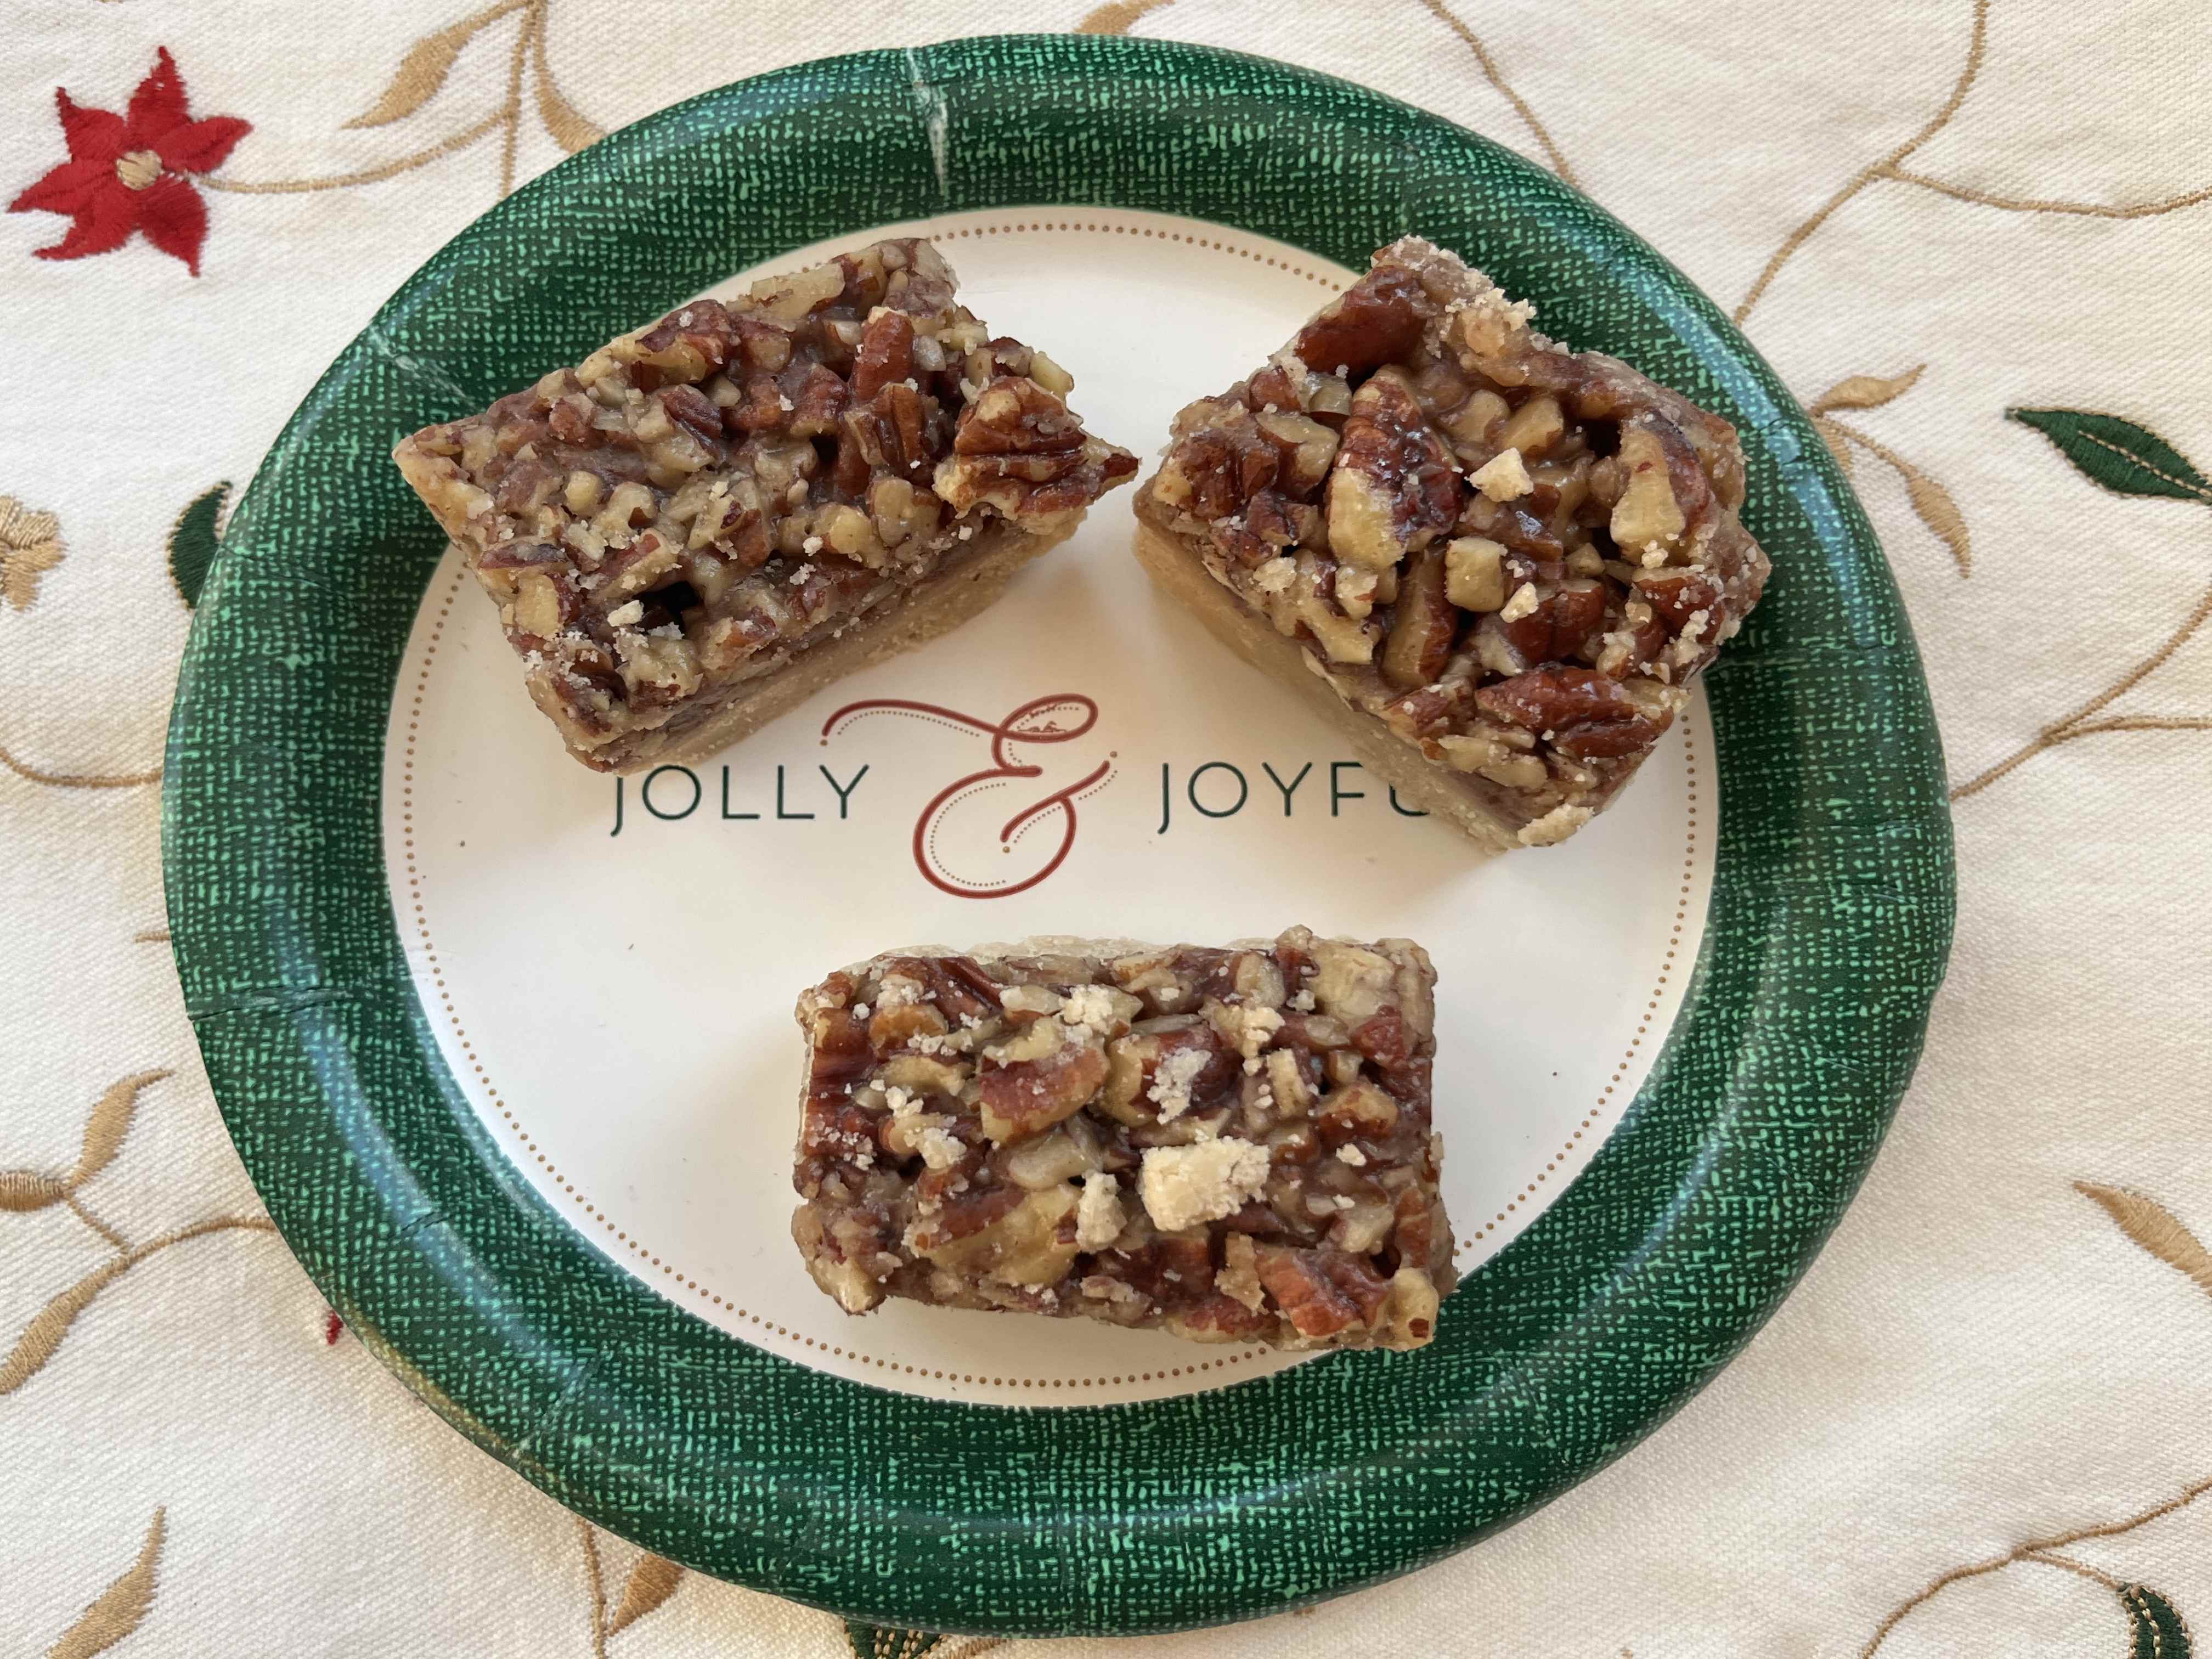
Easy Pecan Shortbread Bars Recipe

INGREDIENTS:
  • Shortbread Crust
    • ½ cup butter {softened}
    • ⅓ cup brown sugar {packed}
    • ½ teaspoon salt
    • 1 ½ cups flour
  • Pecan Filling
    • ¼ cup butter
    • ½ cup brown sugar {packed}
    • ¼ cup honey
    • 2 Tablespoons heavy cream
    • ½ Tablespoon vanilla extract {or vanilla bean paste}
    • 2 cups pecans {roughly chopped}
DIRECTIONS:
  1. Shortbread Crust
    • Preheat the oven to 375 degrees. Prepare a 9×9 pan by lining it with parchment paper and spraying with non-stick cooking spray, set aside. 
    • Using an electric mixer, cream together the butter and brown sugar until it is light and fluffy.  Add salt and flour, continue to mix until it resembles coarse crumbs.  Pour mixture into prepared pan and pat down into an even layer.  Bake for 15 minutes or until the sides start to turn golden brown.  Remove from oven and cool.
  2. Pecan Filling
    • Once crust has cooled, preheat oven to 325 degrees.  Combine butter, brown sugar, honey and heavy cream in a small sauce pan over medium-high heat.  Stir mixture and cook until it boils.  Remove from heat, add vanilla and stir.  Finally, add the chopped pecans and stir until coated. Pour the filling over the prepared crust.  Spread filling out into an even layer and bake for 15-20 minutes or until the filling is bubbly.  Remove from the oven and sprinkle the top with a small amount of flakey sea salt {optional}.  Cool and cut your pecan shortbread bars into squares.  Store in an air tight container for up to 5 days or freeze for up to 3 months.

Notes

  • Don’t skip the step of preparing the pan for this pecan bars recipe.  The topping is super sticky, so be sure that parchment paper goes up the sides of the pan.  I would also spray with nonstick cooking spray to be sure that it will remove easily.
  • The shortbread dough may look crumbly when you pour it into the pan but that is how it is supposed to be. It will come together as you press it into the pan and create a buttery shortbread crust.
  • This recipe can be easily doubled and made in a 9×13 pan. This will give you a good amount of bars and is great for feeding a crowd. 

Variations:

  • Chocolate Shortbread: Add cocoa powder to the shortbread crust ingredients for a delightful chocolate twist.
  • Spiced Crust: Add a pinch of ground cinnamon, nutmeg, or cardamom to the shortbread crust for a warm and aromatic touch.
  • Chocolate Pecan: Sprinkle chocolate chips or chunks over the shortbread crust before adding the pecan filling for a chocolatey delight.
  • Coconut Pecan: Mix shredded coconut into the pecan filling for a tropical twist.

Recipe from PracticallyHomemade

Desserts

Peach Crumble

Twas the end of peach season and I had a few peaches left. I wanted a healthier version of Peach Cobbler and this fit the bill. It was very good but I substituted cinnamon for the nutmeg…a personal choice. A nice dessert to end summer and welcome Autumn!

Peach Crumble

INGREDIENTS:
  • 5 peaches
  • 1/4 c. light brown sugar
  • 2 tsp. lemon juice
  • 1/2 tsp. fresh-ground nutmeg
  • 1/2 c. granola
  • 3 tbsp. flour
  • 1 tsp. lemon zest
  • 4 tbsp. butter
DIRECTIONS:
  1. Preheat oven to 350 degrees F.
  2. Toss the peaches, 2 tablespoons brown sugar, lemon juice, and nutmeg together in a small bowl. Transfer the peaches to an 8-inch tart dish and set aside.
  3. Mix the granola, flour, remaining brown sugar, and lemon zest together in the bowl of a food processor fitted with a metal blade. Add the butter and pulse just to combine.
  4. Sprinkle the granola topping over the peaches and bake until the peach mixture is bubbling and the granola crumble is golden brown and crispy — 30 to 40 minutes. (I cookied mine another 5 minutes). Cool slightly before serving.

Recipe from Country Living

Cakes · Czech Heritage and Dishes · Desserts

Cherry Bublanina: Czech Sponge Cake

Cherry Bublanina is a delightfully light sponge cake with fruit. I used cherries, my favorite but other fruit can be used. This was my first time making this Czech delicacy. It was easy and the results were delicious.

Cherry Bublanina

INGREDIENTS:
  • 1 1/4 cups milk
  • 5 eggs, separated
  • 12 tbsp. unsalted butter
  • 3 tbsp. yogurt or sour cream
  • 2 cups plain flour
  • 3/4 cup sugar
  • 1 tsp. baking powder
  • pinch salt
  • lemon zest (I used 1/2 of 1 lemon)
  • 1 tsp. vanilla
  • 2 cups cherries (I used sour cherries)
  • Powdered sugar for dusting
DIRECTIONS:
  1. Preheat oven to 375 degrees Fahrenheit. Grease a 9×11″ pan.
  2. Toss the fruit with a spoonful of flour and set aside.
  3. In a small bowl, whisk together the dry ingredients: flour, sugar, baking powder, lemon zest, and salt.
  4. Melt the butter, mix in vanilla, yogurt or sour cream and egg yolks until smooth batter forms.
  5. Whip the egg whites in a clean, dry bowl until glossy, stiff peaks form.
  6. Using a spatula, fold the egg whites into the batter.
  7. Pour the batter into a baking dish and cover evenly with cherries. Be gentle so you do not deflate the cake too much.
  8. Bake for about 30 minutes, or until a toothpick inserted comes out cleanly.
  9. Cool, cut into squares, and dust with powdered sugar.

Attribution

Cakes · Desserts

Perfect No-Bake Cheesecake with Homemade Lemon Curd

Daughter Megan did it again with this light, delicious no-bake cheesecake with homemade lemon curd and fresh strawberries. We had family in town for a visit and this dessert was a big hit with everyone. I’ll admit I do not care for traditional cheesecake since it so heavy, but not this version. And who makes their own lemon curd? Yes indeed, Megan does. Perhaps she needs to pursue her dream of a bake shop!

Perfect No-Bake Cheesecake with Lemon Curd

INGREDIENTS:
  • Graham Cracker Crust
  • 2 cups (240g) graham cracker crumbs (about 16 full sheet graham crackers)
  • 1/3 cup (67g) packed light or dark brown sugar
  • 1/2 cup (8 Tablespoons; 113g) unsalted butter, melted
  • 1 and 1/4 cups (300ml) heavy cream or heavy whipping cream
  • Cheesecake
  • three 8-ounce blocks (680g) full-fat cream cheese, softened to room temperature
  • 1/2 cup (100g) granulated sugar
  • 2 Tablespoons (15g) confectioners’ sugar
  • 1/4 cup (60g) sour cream, at room temperature
  • 2 teaspoons lemon juice
  • 1 teaspoon pure vanilla extract
DIRECTIONS:
  1. Make the crust: Stir the graham cracker crust ingredients together. Pour into a 9-inch springform pan or 10-inch springform pan and pack in very tightly. The tighter it’s packed, the less likely it will fall apart when cutting the cheesecake. I recommend using the bottom of a measuring cup to pack it into the bottom and up the sides. You can watch me do this in the video above. Freeze for 10–20 minutes as you prepare the filling.
  2. Make the filling: Using a hand mixer or a stand mixer fitted with a whisk attachment, whip the cold heavy cream into stiff peaks on medium-high speed, about 4–5 minutes. Set aside.
  3. Using a hand mixer or a stand mixer fitted with a whisk or paddle attachment, beat the cream cheese and granulated sugar together on medium speed until perfectly smooth and creamy. Scrape down the sides and up the bottom of the bowl with a rubber spatula as needed. Add the confectioners’ sugar, sour cream, lemon juice, and vanilla extract. Beat for 2–3 minutes on medium-high speed until smooth and combined. Make sure there are no large lumps of cream cheese. If there are lumps, keep beating until smooth.
  4. Using your mixer on low speed or a rubber spatula, fold the whipped cream into the cheesecake filling until combined. This takes several turns of your rubber spatula. Combine slowly as you don’t want to deflate all the air in the whipped cream.
  5. Remove crust from the freezer and spread filling into crust. Use an offset spatula to smooth down the top.
  6. Cover tightly with plastic wrap or aluminum foil and refrigerate for at least 6–8 hours and up to 2 days. For best results, 12 hours is best. I chill mine overnight. The longer refrigerated, the nicer the no-bake cheesecake will set up.
  7. Use a knife to loosen the chilled cheesecake from the rim of the springform pan, then remove the rim. Using a clean sharp knife, cut into slices for serving. For neat slices, wipe the knife clean between each slice.
  8. Serve cheesecake with desired toppings. Cover and store leftover cheesecake in the refrigerator for up to 5 days.

Homemade Lemon Curd

INGREDIENTS:

  • 4 large egg yolks (for thicker lemon curd, see Note on eggs)
  • 2/3 cup (134g) granulated sugar
  • 1 Tablespoon lemon zest (about 1 lemon)
  • 1/3 cup (80ml) fresh lemon juice (about 2–3 lemons)
  • 1/8 teaspoon salt
  • 6 Tablespoons (86g) unsalted butter, softened to room temperature and cut into 6 pieces

DIRECTIONS:

  1. Fill the bottom pot of your double boiler with 1–2 inches of water. (Or use the DIY double boiler method listed in the notes.) Place on high heat. Once the water begins to boil, reduce to low heat to keep the water at a simmer.
  2. Place egg yolks, granulated sugar, lemon zest, lemon juice, and salt into the top pot of your double boiler. Using a silicone whisk, whisk until completely blended, then continue to whisk as the curd cooks. Constant whisking prevents the egg yolks from curdling. Whisk and cook until the mixture becomes thick, resembling the texture of hollandaise sauce, about 10 minutes. If curd isn’t thickening, turn up the heat and constantly whisk.
  3. Remove pan from heat. Whisk the sliced butter into the curd. The butter will melt from the heat of the curd as you whisk. Pour curd into a jar or bowl and place a piece of plastic wrap directly on top so it is touching the top of the curd. (This prevents a skin from forming on top.) The curd will continue to thicken as it cools. Once cool, the plastic wrap can be removed.
  4. Refrigerate the curd for up to about 10 days.

Cheesecake Recipe from Sally’s Baking Addiction

Lemon Curd Recipes from Sally’s Baking Addiction

Desserts

Rhubarb Strawberry Crumble Bars

My rhubarb plant finally produced enough fruit to make a dessert and the crumble bars hit the mark. In my rush to make the recipe I forgot to pulse the crust in the food processor but the results were still delicious, although a bit chewier than the original recipe. Delicious topped with whipped cream or ice cream!

Rhubarb Strawberry Crumble Bars

INGREDIENTS:

Crust:

  • 1 1/4 cups old-fashioned rolled oats
  • 3/4 cup white whole wheat flour
  • 1/2 cup packed light brown sugar
  • 1/4 teaspoon baking soda
  • 1/4 teaspoon salt
  • 1/3 cup unsalted butter, melted
  • 1/4 cup chopped pecans

Fruit Filling:

  • 1 1/4 cups finely chopped strawberries
  • 1 1/4 cups finely chopped rhubarb
  • 1/2 cup granulated sugar
  • 1 tablespoon cornstarch
DIRECTIONS:
  1. Preheat oven to 375 degrees F. Spray an 8×8 baking pan with cooking spray.
  2. Combine oats, flour, brown sugar, baking soda and salt in the bowl of a food processor. Pulse twice to combine. Add butter, pulse until well incorporated. Measure our 1 cup of oat misture and reserve for topping. Transfer remaining dough to prepared baking pan. Press down firmly to form an even crust.
  3. In a medium bowl, combine strawberries, rhubarb, sugar and cornstarch. Spread the fruit filling over the crust.
  4. In a small bowl, combine the reserved oat mixture with the chopped pecans. Sprinkle the topping over the fruit filling.
  5. Bake for 40-45 minutes, or until the top is golden brown and the filling is bubbly in spots around the edges. Transfer the pan to a rack and let cool completely before cutting into bars.

Recipe from United Healthcare RENEW magazine

Cookies and Bars · Desserts

Caramel Cookie Bars

Caramel Cookie Bars should be classified as a sin…but a very delicious one! Daughter, Megan, made these to take to friends that recently had a baby and she shared a piece with me. Oh my gosh! They are decadent and perfect for a special occasion.

Caramel Cookie Bars

INGREDIENTS:
  • 1 cup salted butter softened
  • 1 cup brown sugar
  • 1 cup granulated sugar
  • 1 egg
  • 1 tsp vanilla extract
  • 2 1/4 cups all purpose flour
  • 1 tsp baking soda
  • 1/2 tsp salt
  • 2 cups chocolate chips/chopped chocolate use your favorite (I like a combination of milk and semi sweet)
  • 40 Werther’s Soft Caramels (this is 2 small packages)
  • 1/2 cup sweetened condesned milk
  • sea salt optional
DIRECTIONS:
  1. Preheat the oven to 350°.
  2. Prepare a 9×9 pan by lining it with parchment paper or spraying it with non stick spray.
  3. Measure out the chocolate chips/chopped chocolate into a bowl. Set aside.
  4. In the bowl of a stand mixer, cream together the butter and sugars until smooth, light in color and fluffy. This will take a few mintues.
  5. Scrape the sides of the bowl and mix in the egg add vanilla.
  6. Once completely combined, stop the mixer and add in the flour, baking soda and salt.
  7. Start mixing slowly, once the flour mixture is about half way incorporated into the dough, pour the chocolate chips/ chopped chocolate into the mixer and allow everything to mix together.
  8. Stop the mixer as soon as the flour is completely incorporated. Avoid over mixing. Set the cookie dough aside.
  9. In a medium sauce pan over medium heat, stir to combine the caramels and sweetened condensed milk until smooth. Remove from heat and set aside.
  10. Divide the dough in half and press half into the bottom of your prepared 9×9 pan.
  11. Pour the caramel mixture on top of the cookie dough. Spread until evenly covered.
  12. Take large portions of the remaining cookie dough, flatten them in your hand and then place on top of the caramel.
  13. Bake in your 350° oven for 25-35 minutes, or until the top is golden brown and the center is just set.
  14. Sprinkle with sea salt, if desired.
  15. Let the cookie bars cool COMPLETELY before cutting.
  16. Cut the bars into your desired size and serve.
  17. Store in an air tight container for up to 3 days.

Recipe from CookingwithKarli.com

Desserts · Family Favorites · New Traditions

Peach Ice Cream

Fresh Peach Ice Cream is a summer dream come true. I’ve made it in the past but never cared for the icy chunks of peach in the ice cream. This recipe appealed to me with the blended peaches, allowing the peach flavor to permeate the ice cream. I added a bit of lemon juice (noted in the recipe below) to add a little citrus kick to the creamy goodness of peach ice cream. I served with fresh raspberries, my favorite combination with peach!

Peach Ice Cream

INGREDIENTS:
  • 2 cups chopped peaches (peel removed)
  • 1 1/4 cups sugar (divided)
  • 2 cups heavy cream
  • 1 cup whole milk
  • 1/2 tsp vanilla extract
  • optional: 1/2-1 tsp fresh lemon juice
DIRECTIONS:
  • Mix chopped peaches with 1/2 cup sugar in a medium sized bowl. Allow to set for about 15 minutes so the peach pieces release their juices. 
  • Blend peaches up in a blender or food processor until nice and smooth. (Add 1/4 cup of your whole milk if you need more liquid to blend it up)
  • In a large bowl combine peach mixture with heavy cream, whole milk, vanilla extract, and remaining 3/4 cup sugar. Set aside.
  • Get out your freezer bowl and start running your ice cream maker. Pour the peach mixture into the running ice cream maker. And allow to run according to manufactures instructions (Mine is about 25-30 minutes.) 
  • Serve now for soft serve ice cream. 
  • For scoopable ice cream, scoop the peach ice cream into a bread loaf pan and cover with plastic wrap. Place in the freezer for 6 hours up to overnight. Then scoop and serve.

Recipe slightly adapted rom LikeMotherLikeDaughter

Appetizers · Desserts

Funfetti Dip

Funfetti Dip is an easy dessert, especially for kids. Who doesn’t love to dunk a Nilla Wafer or animal cracker into a yummy dip. We served this for a baby shower but it would be great for a kids or adult party.

Funfetti Dip

INGREDIENTS:
  • 1 box Funfetti cake mix (unprepared)
  • 8 oz cream cheese softened
  • 8 oz cool whip thawed
  • 1/2 cup milk
  • Sprinkles for topping
DIRECTIONS:
  • Cream together cream cheese and whipped topping until smooth with a hand mixer.
  • Add cake mix (unprepared) and half of the milk and mix, gradually adding in more milk until desired texture is established.
  • Top with extra bright colored sprinkles
  • Serve with Nilla wafers, animal crackers or graham crackers
  • Enjoy!

Recipe from EatingonaDime

Desserts · Family Favorites · Italian Dishes

Tiramisu

Tiramisu is one of my favorite desserts and this recipe is heavenly.  I followed Chef Lucas during the COVID lockdown.  When I saw his Facebook Live featured Tiramisu, I was in!  I have found that Ladyfingers from Cost Plus World  Market are best, and appropriately crunchy. The ladyfingers from my local grocery store are soft, so I crisp them up in the oven before dipping into the water/Amaretto mixture.

I’d highly recommend a food scale to get the ingredients right, but I have adapted to U.S. measurements below. 

TIRASMISU

INGREDIENTS:
  • 3 eggs
  • 130g sugar (4.58 ounces or .5725 cup)
  • 500g mascarpone (17.637 oz. or 2.205 cup)
  • 125g whipping cream (4.40925 oz. or .55116 cup)
  • 100g amaretti cookies (3.5274 oz. or .44 cup)
  • 30g cocoa powder (1.058 oz. or .1323 cup)
  • 1 package lady fingers
  • 1/2 cup amaretto liquor
  • 1/2 cup caffè (coffee) or water
DIRECTIONS:
  1. Using a tumbler, fill about 3/4 full with 50% Amaretto (or coffee) and 50% water.
  2. Quickly dip each ladyfinger in the glass; flip to get both sides. Place in 9×13″ glass dish.  There should be about 15 ladyfingers per layer.
  3. Crush the Amaretto cookies. Set aside.
  4. Separate the eggs.
  5. Add sugar to the egg yolks.  Mix well.  Add Mascarpone to the egg mixture. Folding in gently.
  6. Add a dash of water to the egg whites.  Beat until stiff peaks.
  7. Fold the egg white mixture into the yolk mixture.
  8. Add Amaretto cookies, crumbled, to the mixture.
  9. Whip the cream until stiff peaks form.
  10. Fold whipping cream into egg mixture.
  11. Spread 1/2 of the cream mixture over the first layer of lady fingers.
  12. Put cocoa powder in a sieve and sprinkle over the cream mixture.
  13. Repeat the dipping of lady fingers in Amaretto and water and place 2nd layer into the pan.
  14. Spread remaining cream on top of the lady fingers.
  15. Chill the Tiramisu.
  16. When ready to service, sift cocoa powder over the top.
  17. Cut into squares and serve.

Recipe from Chef Lucas Migliorelli

Desserts · Family · Family Favorites · Holidays

Chocolate Mousse by Megan

Megan is the dessert queen of our family.  She whipped up this decadent dessert and served it in an antique compote dish of my Mother’s.  It was rich, velvety and so wonderful.  Perfect for your Valentine’s Day dinner…or anytime you want to spoil your family and friends.

CHOCOLATE MOUSSE

6 ounces (170 g) semisweet chocolate, finely chopped
6 tablespoons (89 g) unsalted butter, cubed
4 large egg yolks
1/4 cup (50 g) granulated sugar
2 teaspoons vanilla extract
1 cup (240 ml) heavy cream
Sweetened whipped cream, chocolate shavings, and fresh strawberries for garnish, optional

  • In a small heatproof bow, combine the chocolate and butter. Set the bowl over a pot of barely simmering water. Stir constantly until chocolate is melted and smooth. Remove from heat but leave the pot of simmering water on the burner.
  • In a medium heatproof bowl, whisk the egg yolks and sugar together until well combined. Set the bowl over the pot of barely simmering water and whisk for about 5 minutes, until the mixture turns pale and becomes slightly stiff. Remove from heat.
  • Stir in the vanilla followed by the chocolate mixture. Stir for a few more minutes to allow the mixture to cool then set aside until it cools to room temperature.
  • In a large bowl, whip the cream to soft peaks. Whisk 1/4 of the whipped cream into the cooled chocolate mixture. Use a silicone spatula to gently fold in the remaining whipped cream until fully mixed in.
  • Divide the mousse among four 6-ounce ramekins and refrigerate until set, about 1 hours.
  • Garnish with whipped cream, chocolate shavings, raspberries, or strawberries if desired.

HOMEMADE WHIPPED CREAM

1 cup (240 ml) heavy whipping cream
1 teaspoon vanilla extract
4 tablespoons confectioners’ sugar

  • In a medium bowl, whip cream with an electric mixer on medium-low speed just until soft peaks form.
  • Add vanilla extract and sugar. Continue to whip until the cream forms stiff peaks. Make sure not to over beat, the cream will become lumpy and butter-like.

Recipe from bakedbyanintrovert.com