I’m from Iowa and I’m pretty sure popcorn is its own food group. We grew popcorn on the farm from time to time and I remember stripping the tiny dry kernels from the cob. My best popcorn memories are, of course, eating it! Popcorn for dinner, leftover popcorn for breakfast, kettle corn at the fairs, popcorn balls in the fall…why not a popcorn cake? My college buddy, Mary, celebrates her birthday in late July. When we were in college and celebrating BIG for her birthday, I decided to make her a popcorn cake. A month later, Mary made me a Snickers birthday cake (winding my favorite miniature circles of Snickers bars into a cake). Until this year, it was the only popcorn cake I’ve ever made but I decided to celebrate my birthday BIG this year by making myself one and sharing it on my blog. Happy Birthday to Me! Now that I’ve told everyone about it, does that I mean I have to share?
POPCORN CAKE
2/3 cup light corn syrup
2 cups sugar
2 tablsepoons vinegar
2/3 cup boiling water
2 teaspoons cream of tartar
2 tablespoons melted butter
2 teaspoons vanilla
1/3 teaspoon baking powder
Pop about 10-15 cups of popcorn (2 batches in the air popper).
Bring sugar, water, vinegar and syrup to a boil. Add cream of tartar and boil to soft crack stage (260 degrees–use candy thermometer).
Add the melted butter, vanilla and baking soda. Stir well. Pour over popped corn and stir to mix well.
Pour popcorn mixture into a buttered angel food cake pan. Push the popcorn down with buttered hands to remove air pockets. Let cool. (Note: if you have any remaining popcorn mixture, use buttered hands to shape into popcorn balls about the size of a baseball. Place on waxed paper to cool.)
Once cool, take a knife and go around the sides of the angel food cake pan to release the popcorn mixture from the pan. Push the cake out of the pan from the underside of the pan (removable bottom).
Decorate as you wish. I decorated the top with colored candies and candles and tied a purple ribbon around the middle. Add candy to the popcorn mixture or use icing to write on the top.
HAPPY BIRTHDAY TO ME…HAPPY BIRTHDAY TO ME (and Mary, too!)
Ok, I’m on a Pinterest roll this week. I LOVE this website and used so many ideas from Pinterest for both daughter’s weddings. I noticed several family and friends pinned this Strawberry Bruschetta and I had to try it. It is amazingly simple yet fantastically delicious. I’m made it for parties, assembled and ready to serve. It’s like dessert for an appetizer. It feels soooo right.
It’s summer! Enjoy!
STRAWBERRY BRUSCHETTA
1 cup strawberries, hulled and diced
1 tbsp. sugar
1 French baguette
4 oz. goat cheese
1 tbsp. olive oil
2 tsp. balsamic vinegar
¼ cup minced basil leaves
Freshly ground black pepper
Combine the strawberries and sugar in a small bowl; toss to combine. Let the berries sit for about 30 minutes so that they begin to release their juices. Spread a thin layer of goat cheese on top of each baguette slice. Top each slice with spoonfuls of the strawberry mixture. Drizzle lightly with olive oil and balsamic vinegar. Top each slice with the basil leaves and cracked pepper, to taste.
Tomorrow my baby, Sarah, will be married. Where did the 23.6666 years go? Wasn’t it yesterday she was saying ‘me do it’ and putting herself in time-out? So fun to see our children grow up and become adults, but not so fun to look in the mirror and not recognize that person.
Sarah Bearah, age 2
The preparations are almost done as we are gearing up for the ceremony at a local rose garden, followed by the reception in my backyard.
The ceremony and reception will be Colorado Casual with live music, BBQ and backyard fun. While the main course will be catered, we have been busy making the appetizers and cupcakes, clearing out the furniture on the first floor of my house to make room for tables and chairs.
We are PRAYING for no moisture, no high winds, and comfortable temperatures. In Colorado, you never know what you’ll get. We had a blizzard for older daughter Megan’s wedding to Christian last October, moving from the gorgeous outdoor venue to the ballroom. Oh well, made for beautiful photos and many stories.
October 8, 2011 — uh oh, wedding indoors!
Hopefully, no snow (or rain, or hail, or tornadoes, of hurricanes, or wind bursts, or earthquakes) on July 28 in Centennial and Littleton, Colorado….but I ramble….
I’m sending positive thoughts and prayers for a beautiful wedding and reception for Sarah and Kyle on their special day… and many years of love, joy and laughter!
When I was a little girl, I wanted to grow up to be a rootin’, tootin’ cowgirl just like I saw on TV…Sky King, Roy Rogers, Gunsmoke and so many more. I really have dated myself. My parents indulged my desire, with my dreamy cowgirl outfit and boots. Smokin’ hot, right?
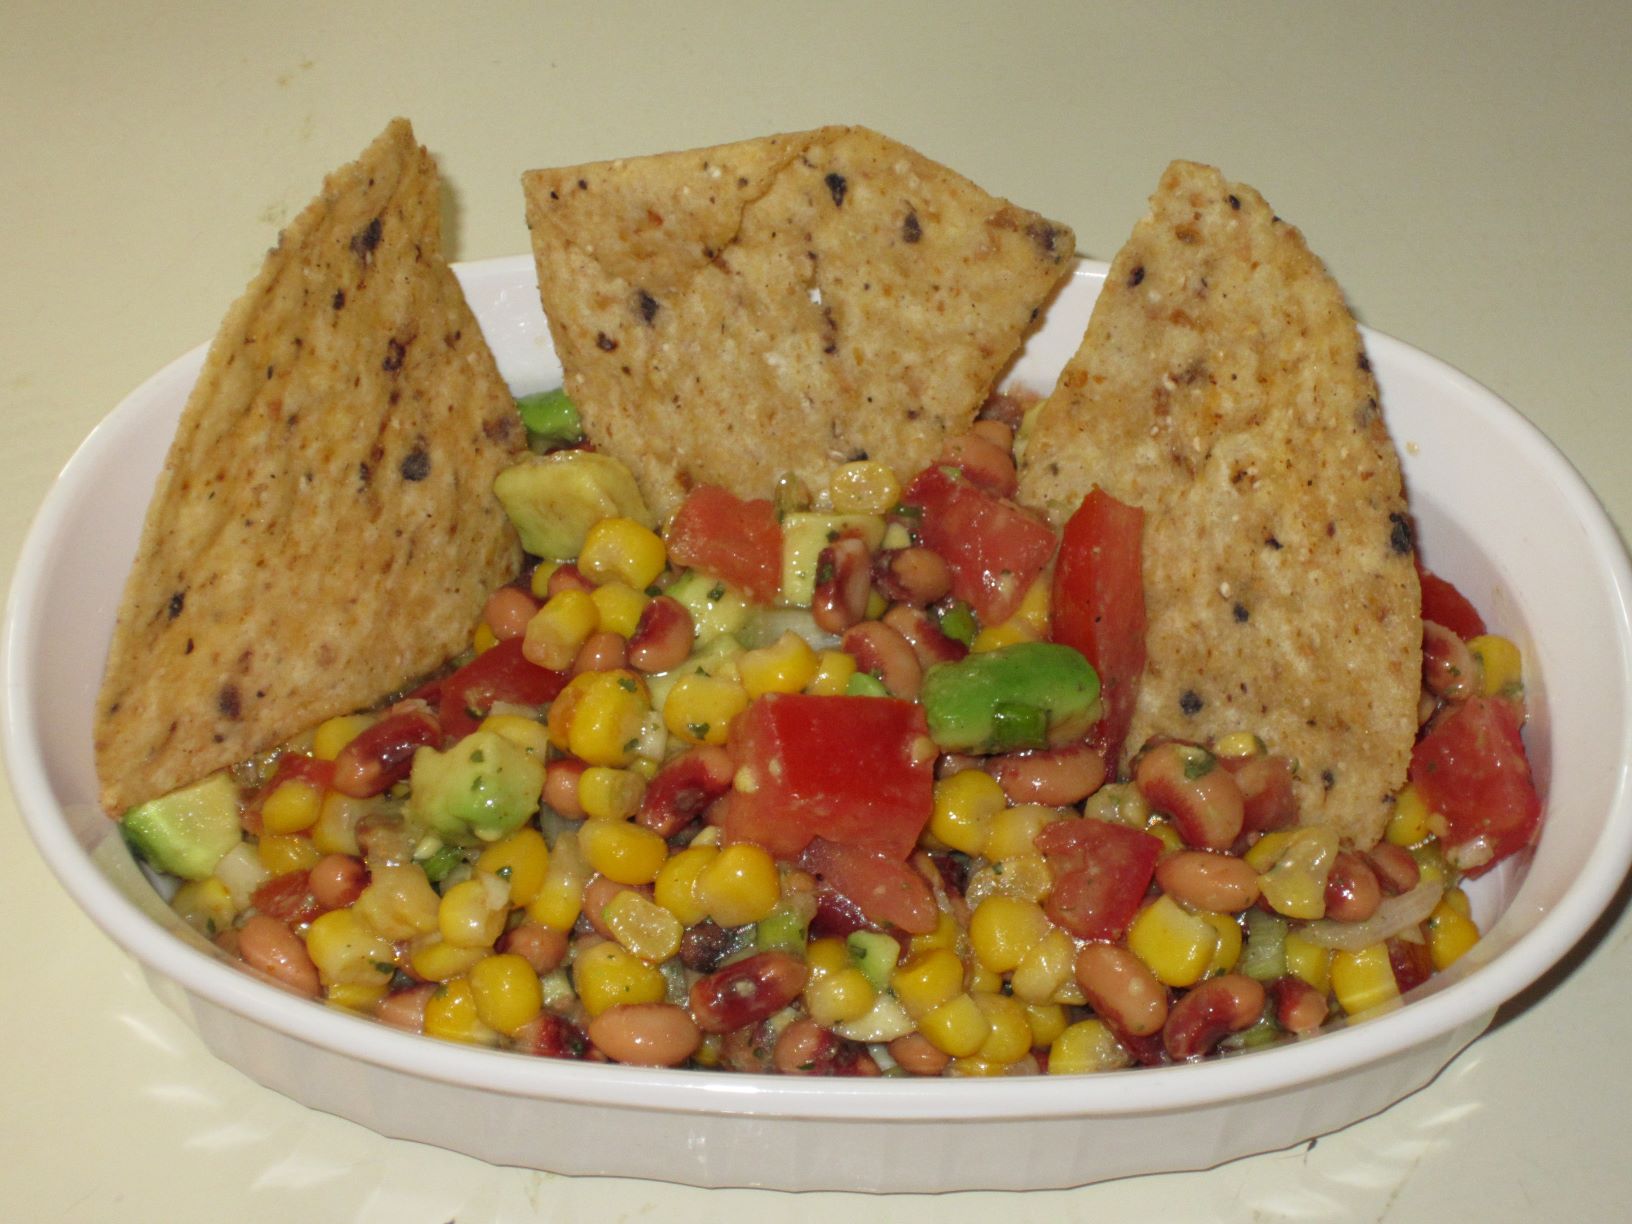
Now, the closest I get to being a cowgirl is 1) taking my once a decade horse ride or 2) making Cowboy Caviar. I feel so rustic, and healthy, when I eat it, aside from the chips that are a ‘must serve’. Ordinary tortilla chips are good but my new favorite, Food Should Taste Good Multigrain Chips, are the best! Even better, they are gluten-free.
COWBOY CAVIAR
2 tablespoons red wine vinegar
1 1/2 to 2 teaspoons hot sauce
1 1/2 teaspoons salad oil
1 clove garlic, minced
1/8 teaspoon pepper
1 firm-ripe avocado
15 ounce can black-eyed peas
11 ounce can corn kernels
2/3 cup thinly sliced green onions
1/2 pound Roma tomatoes, coarsely chopped
salt chopped
fresh cilantro to taste
1 bag tortilla chips (or 2 cups finely shredded cabbage for salad)
In a large bowl, mix vinegar, hot sauce, oil, garlic, and pepper. Peel, pit and cut avocado into 1/2 inch cubes. Add to vinegar mixture and mix gently to coat.
Drain and rinse peas and corn. Add peas, corn, onions, cilantro and tomatoes to avocado, mix gently to coat. Add salt to taste.
Serve pea mixture with chips as an appetizer or add cabbage to make a salad.
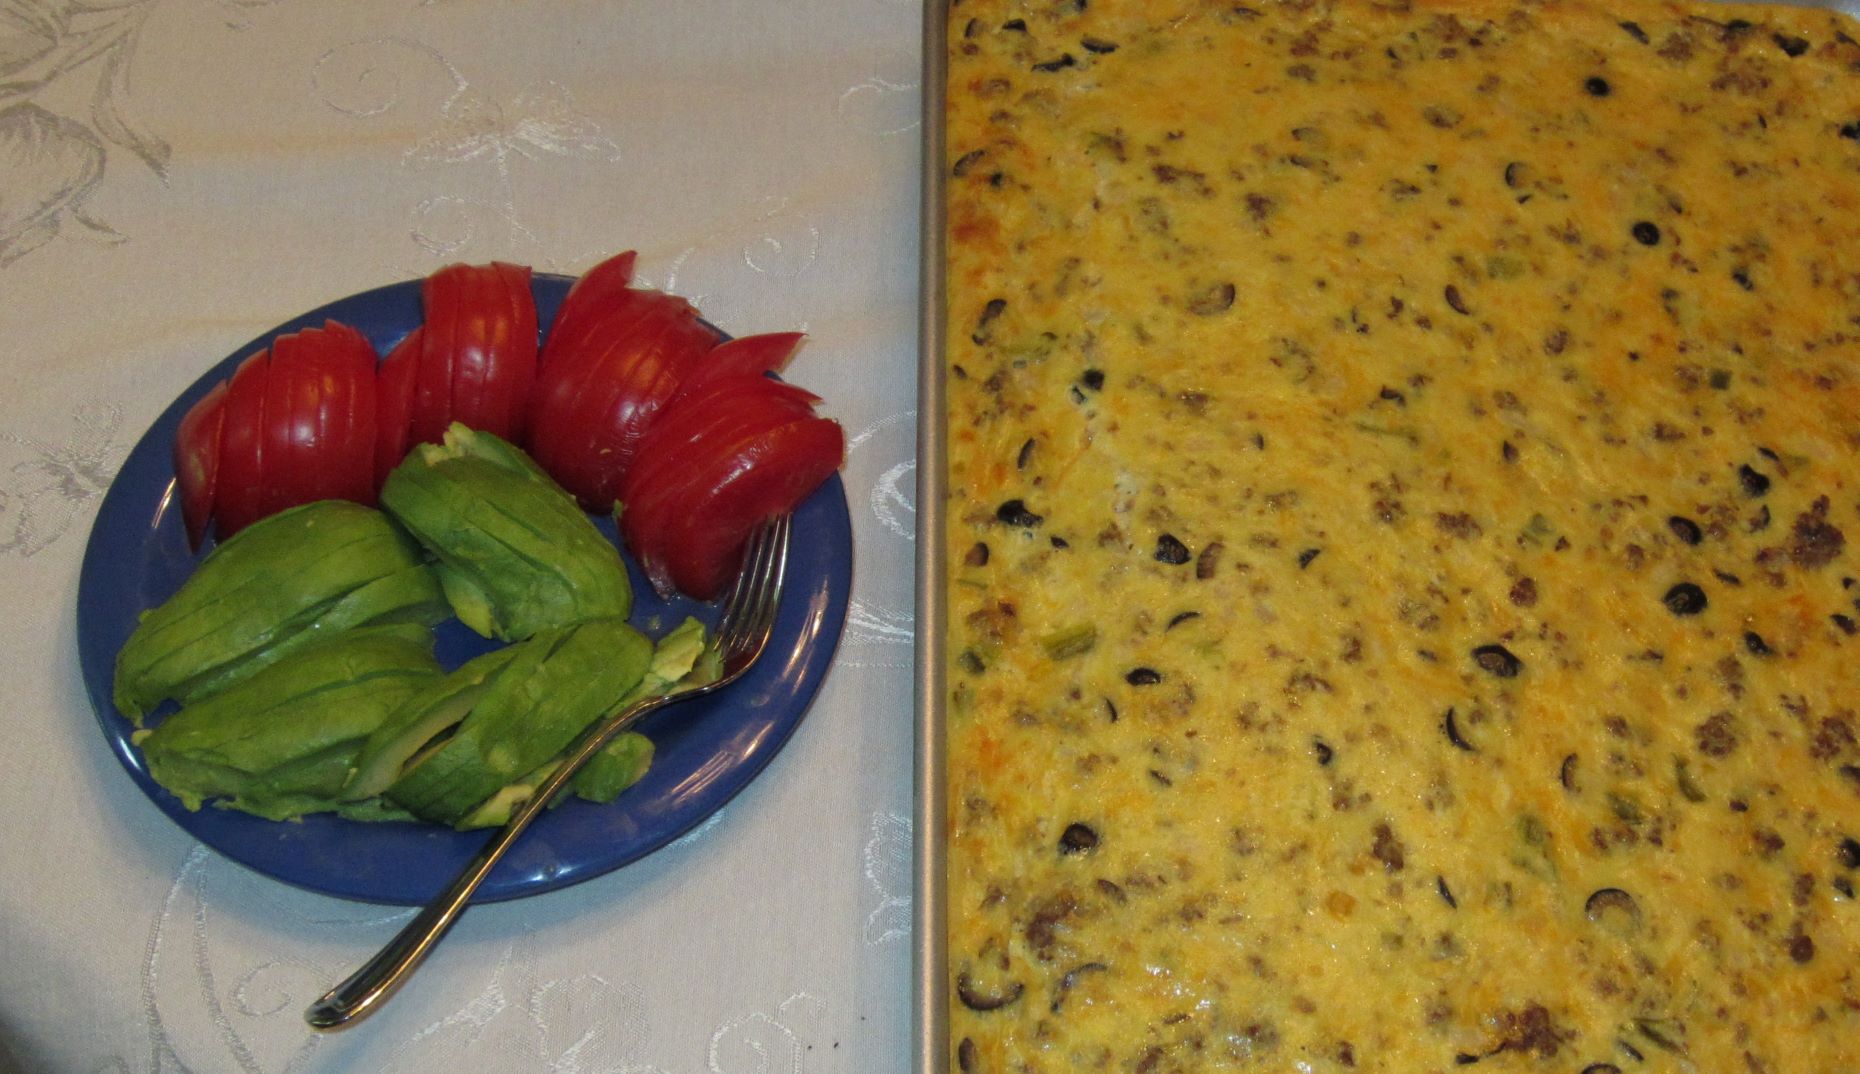
Mexican Quiche hit my recipe box via Sunset Magazine circa early 1980s. Over the years, I have made with it with chorizo or more often with a savory sausage. Topped with a fresh slice of yummy avocado and tomato, it presents beautifully.
Recently I served Mexican Quiche at my annual Mother’s Day Coffee. There were a few pieces left over and were equally tasty the next day.
When serving a crowd, I often make the Quiche the night before and have it ready to pop in the oven the next morning. Enjoy!
MEXICAN QUICHE
1 pound chorizo (or savory) sausage
2 medium-size onions, chopped
1 teaspoon salt
1/8 teaspoon pepper
4 tablespoons diced green chiles
10 eggs
2 cups half and half or milk
1 can sliced ripe olives, drained (2.5 oz.)
1 can whole kernel corn, drained (8.75 oz.)
3 cups shredded Jack cheese
Avocado and Tomato Slices
Fresh cilantro sprigs
Remove casings (if necessary) from chorizo. Crumble or finely chop meat and place in a wide frying pan; cook, stirring over medium-high heat until browned. Add onions and saute until tender. Drain off excess fat. Stir in salt, pepper, and chilies. Remove from heat.
In a large bowl, beat eggs and half-and-half just until blended. Stir in chorizo mixture, olives, corn and cheese. Evenly spread in a greased 10×15″ jelly roll pan.
3. Bake in 375F oven for 25 to 30 minutes or until knife inserted in center comes out clean. Let stand 10 minutes. Garnish with avocado, tomato, and cilantro.
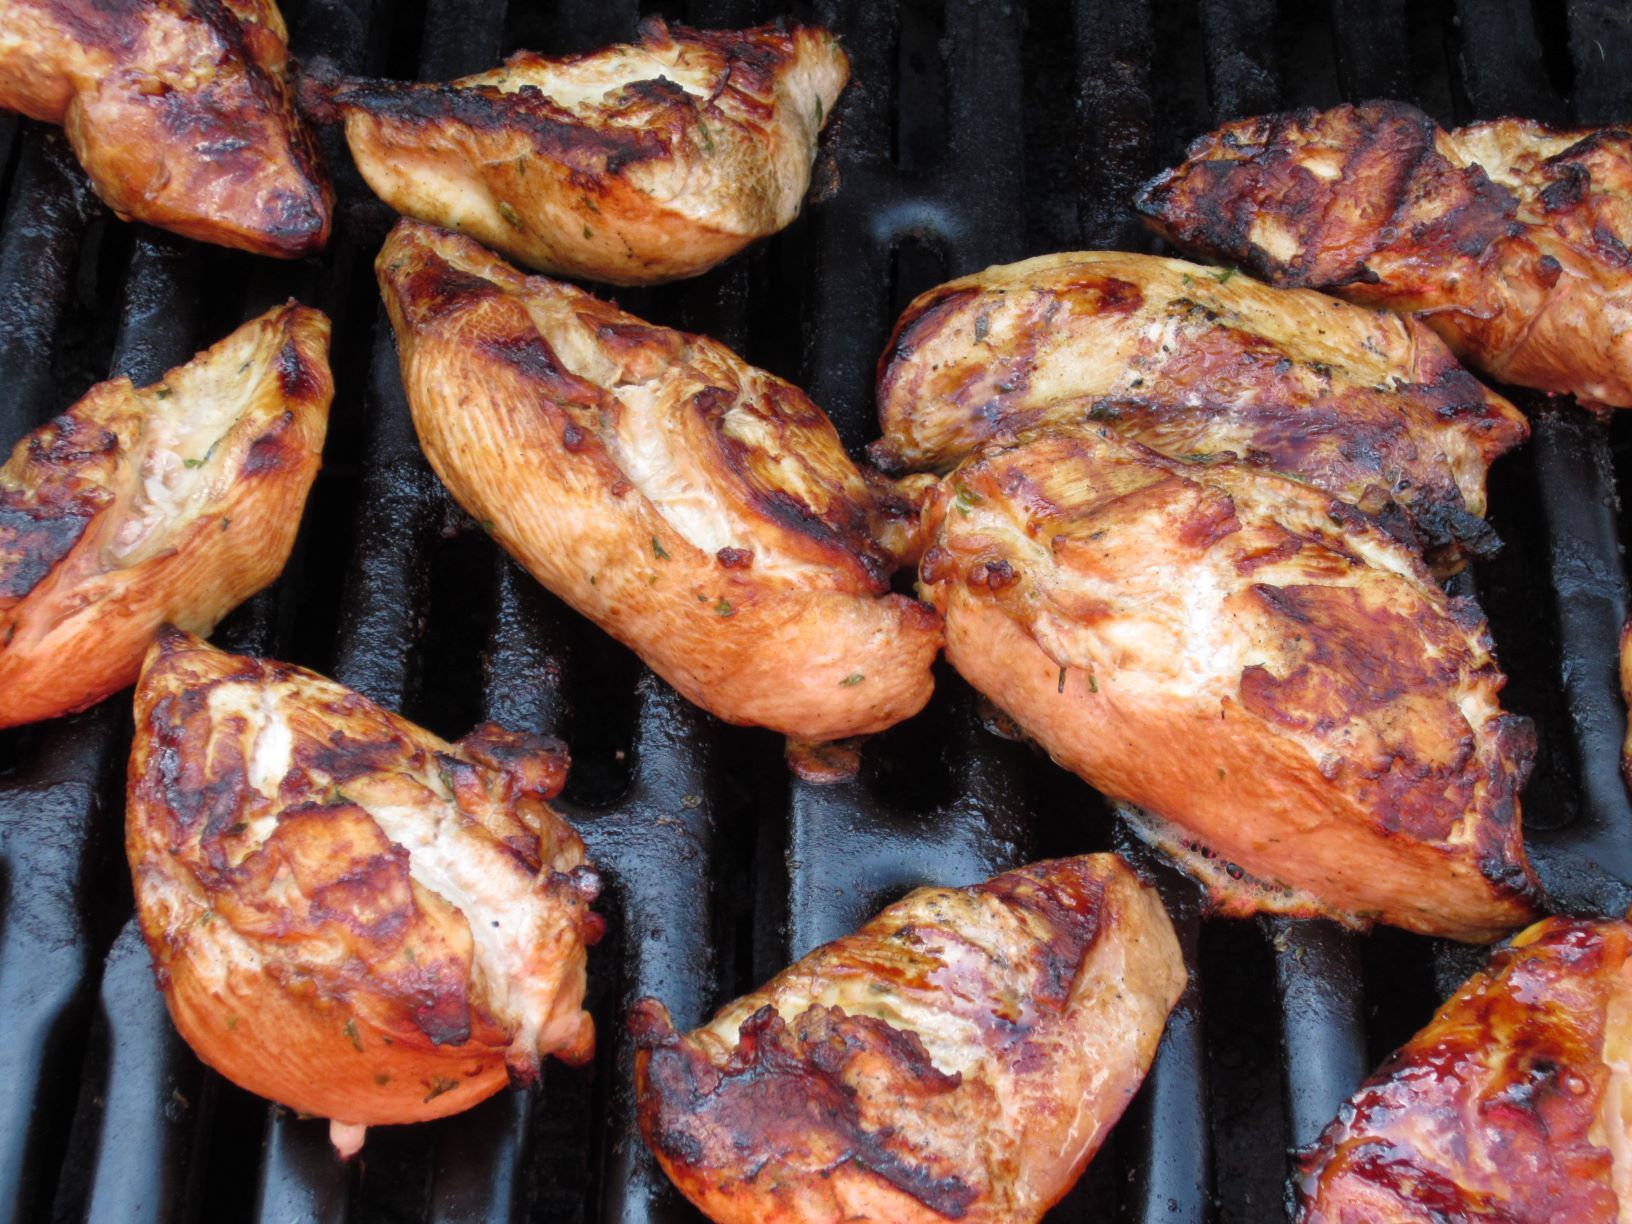
SUMMER = BBQand it’s time to get this summer started! Several years ago a co-worker shared this recipe, from Creme de Colorado Cookbook, and it has become a summer staple. The chicken is so moist and flavorful. I liked to marinade for 24 hours, but a minimum of 4-5 hours will do.
Typically I grill several extra chicken breasts to have the next day(s) in salads. So delicious! Get ready for some yummy chicken for your 4th of July BBQ!
BBQ CHICKEN MARINADE
2 whole frying chickens, cut into pieces (or skinless/boneless breasts)
3/4 cup vegetable oil
1/3 cup soy sauce
3 tablespoons Worcestershire sauce
1/4 cup red wine vinegar
juice of 1 lemon
1 tablespoon dry mustard
1 teaspoon salt
2 tablespoons minced fresh parsley
1 clove garlic, crushed
Mix all marinade ingredients. Pour into large plastic ziplock bag. Add chicken and assure chicken is coated. Marinate 2-4 hours. Can also freeze in marinade to enjoy later.
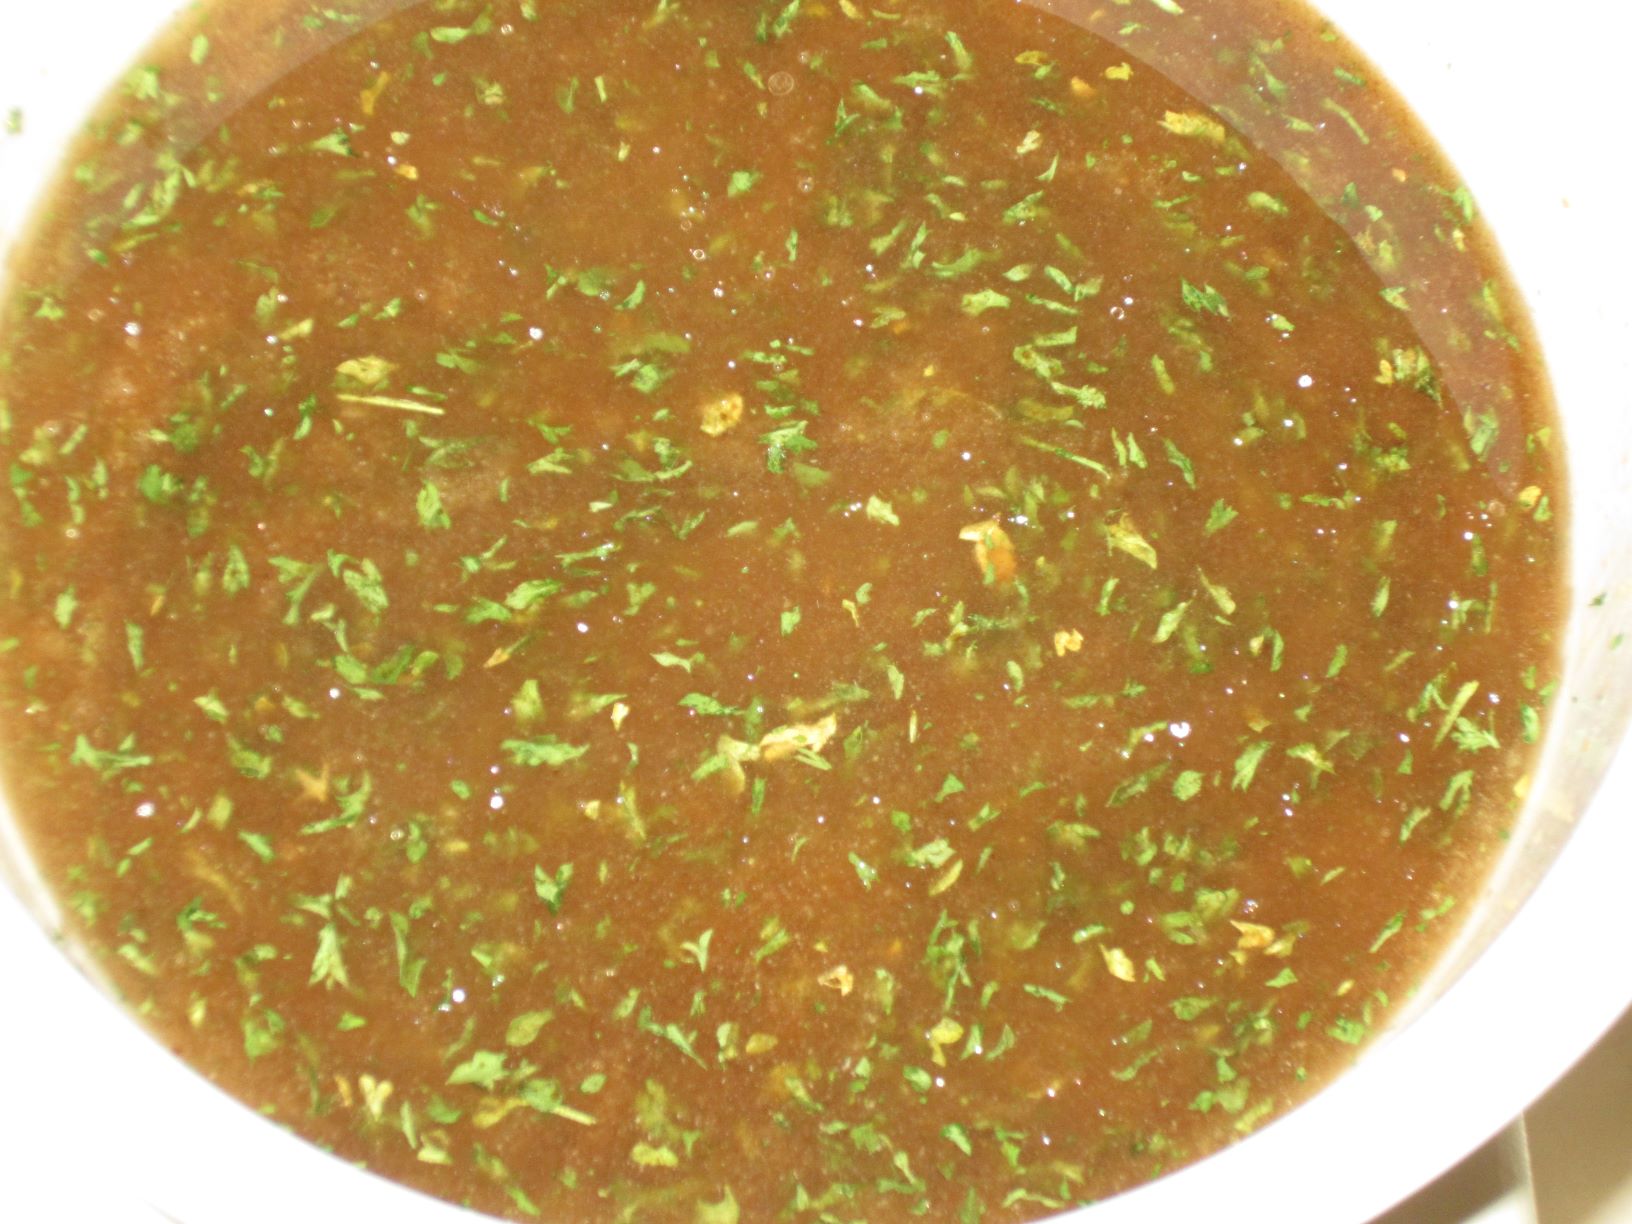
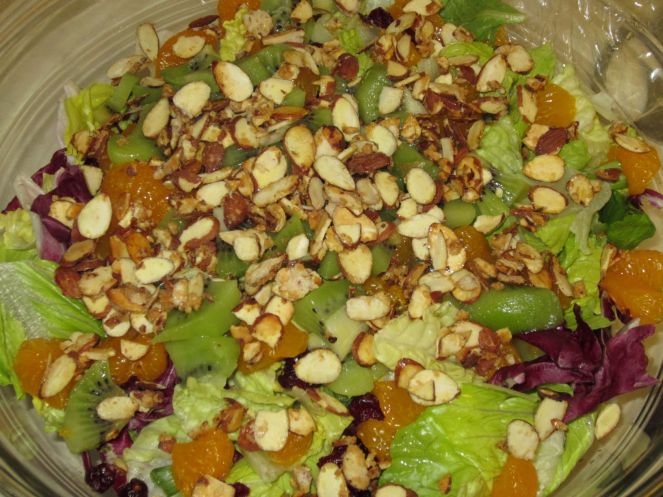
Mandarin Salad, Colorado Cache Cookbook, is a staple for my friends and I. It is so yummy and refreshing and perfect with BBQ chicken (check out my coming post on June 29, 2012).
It’s perfect any time of year. Experiment with it when other fresh fruits are available. This time, I added kiwi and Craisins and loved it! The tangy kiwi and Craisins with the sugary almonds are delightful.
KIWI MANDARIN SALAD
SUGARED ALMONDS
1/2 cup sliced almonds, `
3 tablespoons sugar
SALAD
1/2 head iceberg lettuce
1/2 head romaine lettuce
1 cup chopped celery
2 whole green onions, chopped
11 ounces can mandarin oranges, drained
3 fresh kiwi, peeled and chopped
1/2 cup Craisins
In a small pan over medium heat, cook almonds and sugar, stirring constantly until almonds are coated and sugar dissolved. Watch carefully as they will burn easily. Cool and store in air-tight container.
Mix all dressing ingredients and chill.
Mix lettuces, celery and onions.
Just before serving, add almonds, mandarins, kiwi and Craisins. Toss with the dressing.
Adapted from Colorado Cache Cookbook, Mandarin Salad
My sister-in-law, Betty, gets all the credit for making my trip to Nicaragua a reality. Betty has kindly shared the following information about her Mother’s (Gamma’s) Fudge Recipe and her introduction of the recipe to Nicaraguan families in San Ramon, using local, ground cocoa beans.
Cocoa Beans in Nicaragua
————————————–
My Mother had a way with Hershey’s cocoa powder. It was a cupboard staple, allowing a host of unique concoctions to be served in our family kitchen. There was chocolate gravy, made in a skillet from a roux of flour, sugar, and cocoa powder laced with milk and butter. It had a certain satin sheen when ready to be served for our before-school breakfast. Yikes! There was also an ugly chocolate pie, made with cocoa powder, sugar and butter pats folded simply into pastry and baked. Yum! Nothing, however, competed with her five-ingredient fudge, ready in 20 minutes if one of the family developed an after-dinner sweet tooth. We didn’t often have layered cakes or fruit pies, but we had fudge to die for.
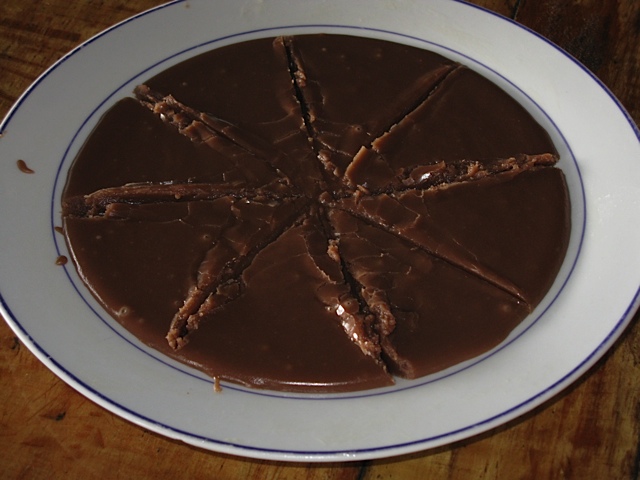
Gamma’s Fudge in Nicaragua
Family legend says that during the Depression and the rationing of sugar, that the prized candy was coveted – so much so that a sad tale is told that while “beating the mixture” the sauce pan capsized into the dirty kitchen sink while Mother attended to a baby’s wailing – only to have the cry equaled by the disappointed older brother, Karl, who awaited the prized fudge.
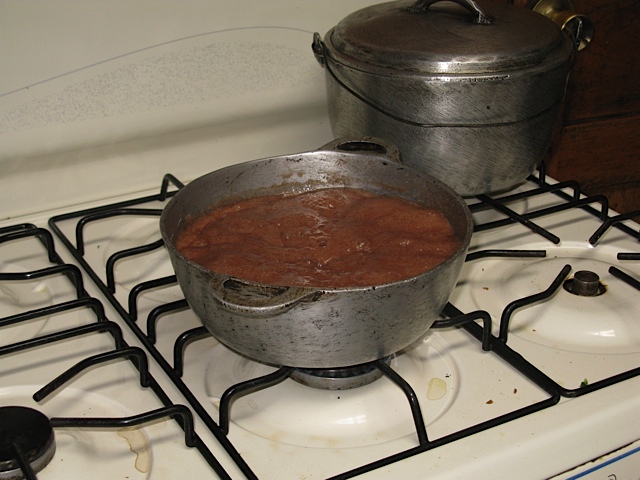
Most of the family still loves Gamma’s Fudge, especially thinking of it and Buttermilk Fudge at Christmas-time when she carefully rationed it among families. I’ve made it for kids and grandkids. I even made it with Nicaraguan women when we recently visited, with Cathy, in the small town of San Ramon. Processed chocolate candy is not affordable to the locals, so I taught three different households how to make fudge using their own ground cocoa beans, their local sugar and dairy and butter or margarine. Thankfully, vanilla extract was for sale, a spoonful at a time, at one of the many tiny shops lining the four streets of San Ramon. The fudge was a big hit – and I am hoping some were able to make it into a cottage industry – or maybe just into a new family tradition.
Teaching Fudge Making in one Nicarguan home
Teaching Fudge Making in a second Nicaraguan Home
GAMMA’S FUDGE (Spanish)
In a saucepan, combine:
2 C. sugar
1 C. milk
4 T. cocoa
Heat over medium-high heat, stirring to blend until the mixture reaches a boil. Then adjust heat to maintain a low boil. Check mixture frequently until it begins to thicken, but do not stir too vigorously as the mixture will turn grainy. After about 15 minutes, check to see if the mixture forms a ball when a teaspoonful is dropped into a glass or cool water. When you are sure the chocolate ball is forming and there is loss of brightness to the mixture, turn off heat, then add:
4 T. butter or margarine
1 T vanilla or vanilla extract
Hand beat the mixture within the tilted saucepan until it thickens and forms folds when dropped from spoon back into the mixture. When very hard to beat, pour the mixture on a plate that has been greased with a little margarine. Let stand for 30 minutes before cutting into 1-inch squares.
If for some reason the fudge does not harden, use the crumbles as chips in cookies or as sprinkles on top of ice cream. This recipe can also be used to make a fudge sauce when reheated with a little milk or cooking stopped before the mixture is at hard-stage.
Delicious!
DULCE DE AZUCAR DE GAMMA
Simple ingrediente de 5 Fudge
En una cacerola, combine
2 C. azúcar
1 taza de leche
4 T. cacao
Calienta a fuego medio-alto, revolviendo ocasionalmente para mezclar, hasta que la mezcla llegue a hervir. A continuación, ajuste de calor para mantener a fuego bajo, para comprobar si la mezcla de chocolate, cuando cayó en el agua, forma un grupo de bolas. Asegúrese de no mezclar con demasiada frecuencia, sin embargo, como se puede convertir en dulces granulada.
Cuando uno está seguro de que el chocolate es la combinación de una pelota, así como la pérdida de su brillo, apagar el fuego, añadir
4 T. mantequilla o margarina
1 T de vainilla o esencia de vainilla
Mano batir la mezcla hasta que espese y forma pliegues cuando se deja caer por cucharada de nuevo en su mezcla. Cuando muy difícil de batir, vierta la mezcla en una placa que ha sido untada con un poco de margarina.
Deje reposar durante 30 minutos, luego se corta en cuadrados de 1 pulgada.
Si por alguna razón no se endurecen, se derrumba como el uso de las cookies o en helados. También se podría utilizar como una salsa de recalentamiento con un poco de leche.
Sin embargo, esta consta de 5 ingredientes simples y la clave es cómo late el tiempo suficiente que sólo “establece” una vez que se vierte en el plato.
Gooseberry…a prickly bush with hard green fruit, very sour to the taste. These green gems were not in my fruit repertoire growing up in Iowa. When I moved to St. Joseph, MO after college, I was introduced to them but not a big fan. When I met my husband, and his Mother (referred to as Gamma), I was quickly educated on the value of the meager gooseberry. They coveted a rare can of gooseberries at the grocery store for a pie or cobbler, toting a few cans back to relatives in North Carolina.
When we bought our home several years ago, we HAD to plant a gooseberry bush. Little did I know how prickly these bushes were, until our first harvest. My arms looked like I had been attacked by a herd of cats. Now it was time to clean the gooseberries. Holy smokes…it took flippin’ forever! Each gooseberry has a stem and a brown beard (my term) that need to be removed from the berry. I LOVED it when Gamma visited during gooseberry season. She was content to sit in the shade and do ‘the dirty work’ of cleaning these little devils. Missin’ you Gamma and not just at Gooseberry time!
I was happy to take it from here and make the gooseberry pie or cobbler, drowning the filling in white sugar to mask the very sour gooseberry flavor. The end result is a very tasty, unique, seasonal dessert. The fresh gooseberry cannot be matched by a can of gooseberries, but will do if you are having tremendous gooseberry cravings.
This year, I decided to tackle the gooseberry harvest alone. My 9-year-old Golden Retriever, Joe, decided to help. His idea of ‘help’ is to guard the berries and then help himself to a gooseberry or two from the harvest. I truly thought one bite of gooseberry would quickly send him off to another part of the yard. I was wrong. Joe LOVES fresh, sour, crunchy, gooseberries. Silly boy!
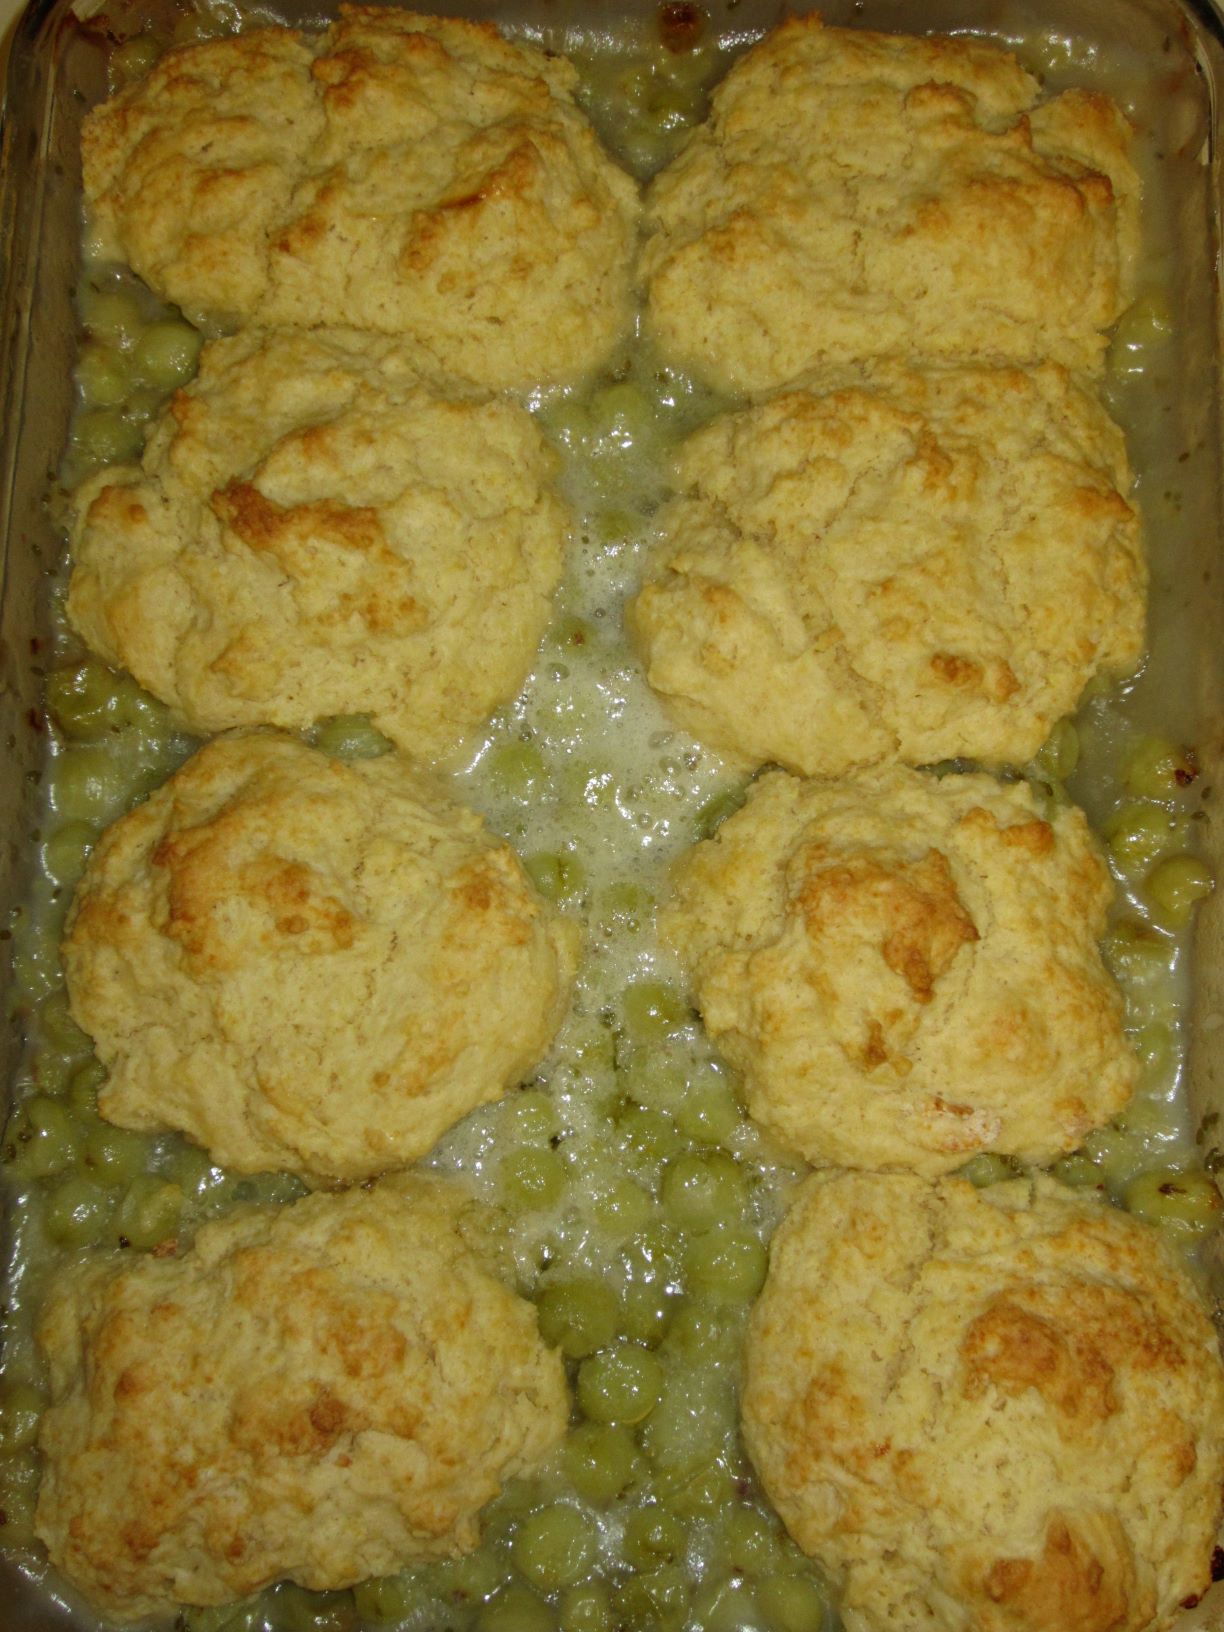
For the two quarts of gooseberries needed to make the cobbler, it took over 2 hours of cleaning. Good thing I had a movie to watch! Cleaning is the hard part, but making the cobbler itself is easy, peasy. I split the recipe into two smaller pans so I could share one pan with others and save one pan for family.
Gooseberries…worth the effort…once a year (or so)!
GOOSEBERRY COBBLER
FRUIT FILLING
1 1/2 cups sugar
1/2 cup flour
1 teaspoon salt
2 quarts Gooseberries
3 tablespoons lemon juice
3 tablespoons butter
TOPPING
2 cups flour
2 tablespoons sugar
4 teaspoons baking powder
1 teaspoon salt
1/2 cup shortening
2/3 cup milk
1 egg, slightly beaten
Mix sugar, flour and salt; combine with berries and lemon juice. Pour into a greased 13x9x2″ baking pan; dot with butter.
Place in a preheated hot oven (400 degrees) about 15 minutes; be sure that mixture is hot and bubbling.
In the meantime, mix the topping. Sift together 2 cups flour, baking powder, sugar and salt. Cut in shortening until mixture resembles coarse meal. Add milk and slightly beaten egg to dry ingredients. Stir with fork to blend well.
Remove hot fruit mixture from oven. Drop topping mixture onto hot berries, making 12 biscuits.
Return to hot oven (400 degrees); bake about 20 minutes, or until biscuits are browned. Serve warm with ice cream.
It seems my world truly revolves around food, as it does for my daughters! Our oldest daughter, Megan, was married last year; we asked bridal shower guests to share a favorite recipe to insert in a cookbook. This year daughter, Sarah, is also engaged and we did the same for her shower. I photocopied hand-written recipes of Grandmothers, Great-Grandmothers, and other family members no longer with us. We also asked each guest to write a note the bride inside the cookbook.
As favors, we gave each guest a copy of three of Megan’s favorite dip/spread recipes which we also served at her shower.
Megan’s recipe favors at bridal shower
The dips shared were Cheesy Apple Spread (today’s post), Hot Wing Dip, and Peach Salsa. They are all family favorites. The Cheesy Apple Spread recipe has been in my recipe box for at least 30 years. Younger daughter, Sarah, loves this dip as well and prepared the dip for the shower. Cheesy Apple Spread is truly an oldie but still a goodie!
Apple Dip
CHEESY APPLE SPREAD
8 ounces low-fat cream cheese, softened
1/2 cup low-fat mayonnaise
1/2 cup shredded cheddar cheese
1/2 cup chopped apple
Ingredients for Apple Dip
Blend together the cream cheese and mayonnaise. Add shredded cheese and chopped apple. Chill until ready to serve with Ritz or other favorite crackers.