Being a dog in Nicaragua can be a good and a bad thing. Most of them run free, wandering the streets of the small towns or countryside without a care in the world. But many of them also are in need of vet care, food, and boundaries.
Coming from a long line of dog lovers, I HAD to take pictures of the many dogs that crossed my path. I thought about a calendar highlighting a dog each month, but will settle to share these little darlin’s with you on my blog.
Just say AAAWWW and then scroll to the bottom for more information on how to help our canine friends!
An afternoon out with the boy at the local gaming pavillion
While these dogs appear to have a wonderful, carefree life, many of these have health issues, suffer from malnutrition, and over-population. I chose to take photos of the healthier dogs, but we saw many dogs that were suffering. For more information on how to help, visit the WorldVets website.
Tomorrow my baby, Sarah, will be married. Where did the 23.6666 years go? Wasn’t it yesterday she was saying ‘me do it’ and putting herself in time-out? So fun to see our children grow up and become adults, but not so fun to look in the mirror and not recognize that person.
Sarah Bearah, age 2
The preparations are almost done as we are gearing up for the ceremony at a local rose garden, followed by the reception in my backyard.
The ceremony and reception will be Colorado Casual with live music, BBQ and backyard fun. While the main course will be catered, we have been busy making the appetizers and cupcakes, clearing out the furniture on the first floor of my house to make room for tables and chairs.
We are PRAYING for no moisture, no high winds, and comfortable temperatures. In Colorado, you never know what you’ll get. We had a blizzard for older daughter Megan’s wedding to Christian last October, moving from the gorgeous outdoor venue to the ballroom. Oh well, made for beautiful photos and many stories.
October 8, 2011 — uh oh, wedding indoors!
Hopefully, no snow (or rain, or hail, or tornadoes, of hurricanes, or wind bursts, or earthquakes) on July 28 in Centennial and Littleton, Colorado….but I ramble….
I’m sending positive thoughts and prayers for a beautiful wedding and reception for Sarah and Kyle on their special day… and many years of love, joy and laughter!
Jamaican Apples (aka Otaheiti Apple) remind me of a red pear with the core of an avocado and the texture of an apple. Our hostess, Neyda, had a tree of them in her backyard and her helper, David, obliged our request to try one. He scampered up the tree to fetch a few for us to try. In Nicaragua, the fruits are eaten ripe, with or without the skin. It is sometimes eaten unripe with salt and vinegar or lime juice.
David Climbing for Jamaican AppleJamaican ApplesJamaican Apple halved
Today we would also enjoy a day hike from San Ramon out into the country. It was a beautiful day for a hike. Everyone walks, uphill, downhill, all around. If you need to go far, you hop on a bus or hitch a ride. If you need to market or buy something, you carry it.
Man Carrying a bunch of bananas
As we walked, we saw what appeared to be ordinary fences from local wood. The fascinating thing is the wood/branches are cut and simply put in the grow and they grow into trees/hedges for the property. (never would happen in Colorado!)
Grow a fence post!
After our hike, local craft fair, and two more wonderful meals with Neyda, we were off to a farewell concert and dancing in the park. It was a wonderful week with many unforgettable, enriching moments. Now it was time to return to reality but with memories that I will cherish.
When I was a little girl, I wanted to grow up to be a rootin’, tootin’ cowgirl just like I saw on TV…Sky King, Roy Rogers, Gunsmoke and so many more. I really have dated myself. My parents indulged my desire, with my dreamy cowgirl outfit and boots. Smokin’ hot, right?
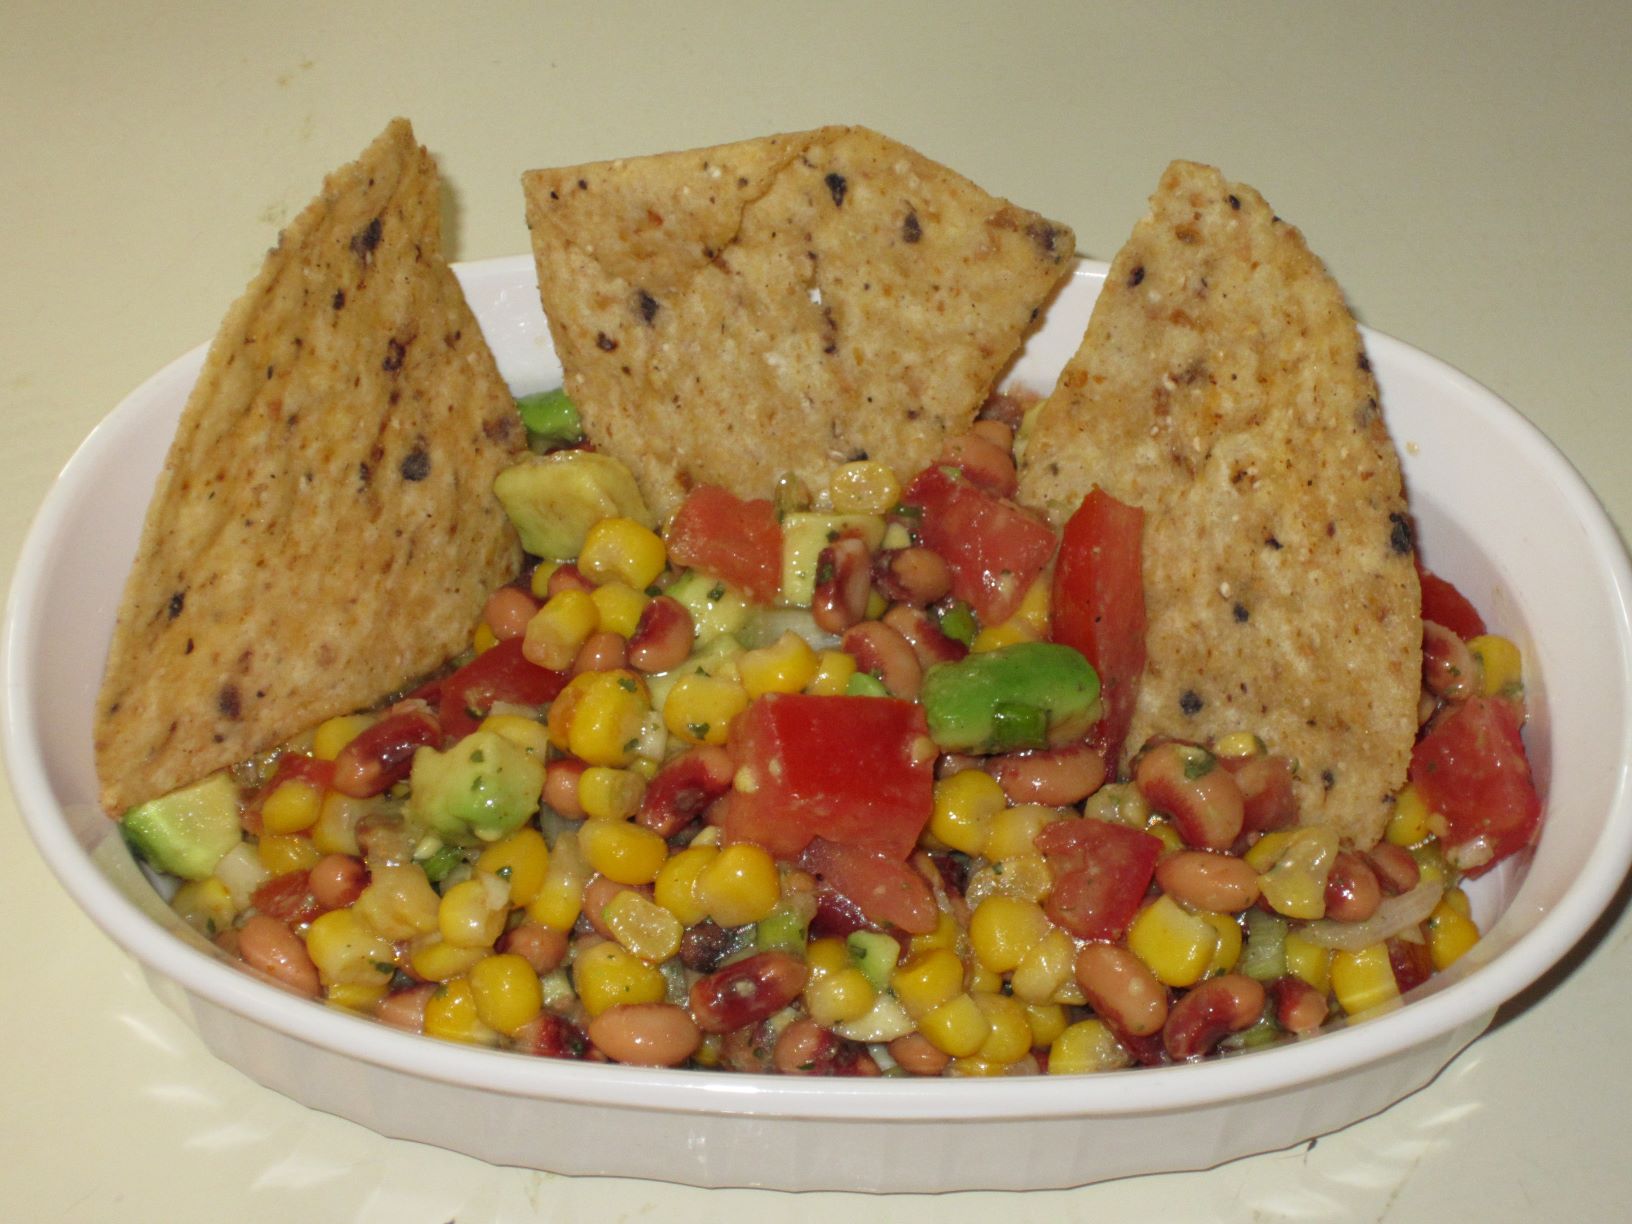
Now, the closest I get to being a cowgirl is 1) taking my once a decade horse ride or 2) making Cowboy Caviar. I feel so rustic, and healthy, when I eat it, aside from the chips that are a ‘must serve’. Ordinary tortilla chips are good but my new favorite, Food Should Taste Good Multigrain Chips, are the best! Even better, they are gluten-free.
COWBOY CAVIAR
2 tablespoons red wine vinegar
1 1/2 to 2 teaspoons hot sauce
1 1/2 teaspoons salad oil
1 clove garlic, minced
1/8 teaspoon pepper
1 firm-ripe avocado
15 ounce can black-eyed peas
11 ounce can corn kernels
2/3 cup thinly sliced green onions
1/2 pound Roma tomatoes, coarsely chopped
salt chopped
fresh cilantro to taste
1 bag tortilla chips (or 2 cups finely shredded cabbage for salad)
In a large bowl, mix vinegar, hot sauce, oil, garlic, and pepper. Peel, pit and cut avocado into 1/2 inch cubes. Add to vinegar mixture and mix gently to coat.
Drain and rinse peas and corn. Add peas, corn, onions, cilantro and tomatoes to avocado, mix gently to coat. Add salt to taste.
Serve pea mixture with chips as an appetizer or add cabbage to make a salad.
Nacatamals are a Nicaraguan specialty, similar to a tamal. This evening we would have the opportunity to make Nacatamals as well as have a feast with our travel companions and hosts.
Nacatamals are prepared in homes in rural communities and often sold to neighbors on Saturdays. Our master chefs this evening are sisters that prepare Nacatamals for sale in the community. Nacatamals are traditional for special occasions and served to demonstrate hospitality to friends and visitors. Nacatamals are a full meal and are traditionally served with Nicaraguan coffee. These are quite different from the tamales I have enjoyed for many years.
We each made our own Nacatamal but due to the long cooking time, our creations were to be enjoyed (or tolerated) by the locals the next day. We were served perfect Nacatamals made by our hostesses that morning. They were flavorful and, oh, so filling.
My sister-in-law and her husband, and other travel companions have made them at home with great success. One day, I too, will try, but today I will just enjoy the memory.
Banana Leaves for the NacatamalsAdd base of masa and seasoned chicken legAdd uncooked rice and sliced potatoesAdd CondimentsCondiments: Mint, Capers/Olives, Peppers, Tomatoes, RaisinsRolling and Sealing the NacatamalTying the NacatamalSteamed NacatamalSteamed Nacatamal
NACATAMALS
Masa (Dough)
Masa harina — 6 cups
Lard or shortening — 1 cup
Salt — 1 tablespoon
Sour orange juice (see variations) — 1/2 cup
Chicken stock or broth — 4-5 cups
Filling
Pork butt, cubed — 3 pounds
Salt and pepper — to season
Rice, soaked in warm water for 30 minutes — 3/4 cup
Potatoes, peeled, sliced into 1/4-inch rounds — 1/2 pound
Onion, sliced into 1/4-inch rounds — 1
Bell pepper, sliced into 1/4-inch rounds — 2
Tomatoes, sliced into 1/4-inch rounds — 2
Mint — 1 bunch
Assembly
Banana leaves, hard spine removed and cut into 10×10-inch rectangles — 12 pieces OR
Aluminum foil, cut into 10×10-inch rectangles — 12 pieces
METHOD
Place the masa harina, lard or shortening and salt in the bowl of an electric mixer. Blend on a low speed to incorporate the fat into the masa harina and give it a mealy texture. You may have to do this and the next step in two batches if your mixer bowl is not large enough to hold all the ingredients without overflowing.
With the mixer still on low speed, add the sour orange juice and enough chicken stock to make a soft, moist dough. It should be a little firmer than mashed potatoes. Increase the mixer speed to medium-high and beat for 2-3 minutes to incorporate some air into the masa and make it fluffier. Cover the bowl and set the masa aside to rest for at least 30 minutes.
Season the pork with salt and pepper. Drain the rice. Assemble all of your filling ingredients and assembly items on a large table or work surface. Gather family and friends to help in an assembly line.
Lay out a banana leaf square with the smooth side up. Place 1 cup of the masa in the middle of the banana leaf and, using wetted hands, spread it out a little. Put about 1/2 cup of pork on top of the masa and sprinkle 1 or 2 tablespoons of rice over the pork. Lay 1 or 2 slices of potato on top of the pork and then top with 1 or 2 pieces of onion, 1 or 2 pieces of pepper and a slice of tomato. Top it all off with a few mint leaves.
Fold the top edge of the banana leaf down over the filling. Bring the bottom edge of the banana leaf up over this. Then fold in both sides to make a rectangular package. Be careful not to wrap it too tightly or the filling will squeeze out. Flip the package over so it is seam side down.
Set the tamal in the middle of an aluminum foil square and wrap it up tightly the same way you wrapped up the banana leaf. Set aside and repeat with the remaining ingredients to make 10 to 12 nacatamales in total.
Add 2 or 3 inches of water to a tamalera or pot large enough to hold all the nacatamales. (You may have to use two pots if you don’t have one big enough to hold the nacatamales in one batch.) Place a rack in the bottom or toss in enough wadded up aluminum foil to hold the nacatamales mostly out of the water. Add thenacatamales and bring to a boil over high heat. Cover tightly, reduce heat to low and steam for 3 to 4 hours. Add more water as needed to keep the pot from boiling dry.
Remove the nacatamales from the pot, take off their aluminum foil covering and serve hot. Each diner opens the banana leaf on his or her own nacatamal before eating.
Masa Variations: This recipe uses masa made from masa harina flour. If you can find fresh masa, definitely use that instead. The flavor and texture will be better. A variety of ingredients can be added to the masa do give it more flavor. Substitute milk for some or all of the chicken stock. Add some chopped, cooked bacon, along with its fat. Add a cup or two of mashed potatoes to the dough. Mix in some chopped and sautéed onions, garlic or chile peppers.
Meat Variations: Use chicken instead of pork. For more flavor, season the meat with some sour orange juice, ground achiote or paprika, cumin and minced garlic.
Filling Variations: Many recipes call for adding a few green olives and raisins or prunes to the filling. Other ingredients sometimes added are capers, sliced hot chiles and even pickles.
Vegetarian Nacatamales: eliminate meat, use butter, shortening or vegetable oil instead of lard and water or milk instead of chicken stock. You won’t find many Nicaraguans who will even touch this version.
Wrapping: Banana leaves can be found in the frozen section of many Latino and Asian markets. If they aren’t available in your area, you can use a double layer of aluminum foil alone. You won’t get the extra flavor the banana leaves add though. In Central America, nacatamales are usually wrapped in banana leaves alone and tied like a package with twine or the spines from the banana leaves.
Sour Orange Substitute: If you can’t find sour orange (naranja agria) juice, substitute the juice of 1 orange and 2 limes.
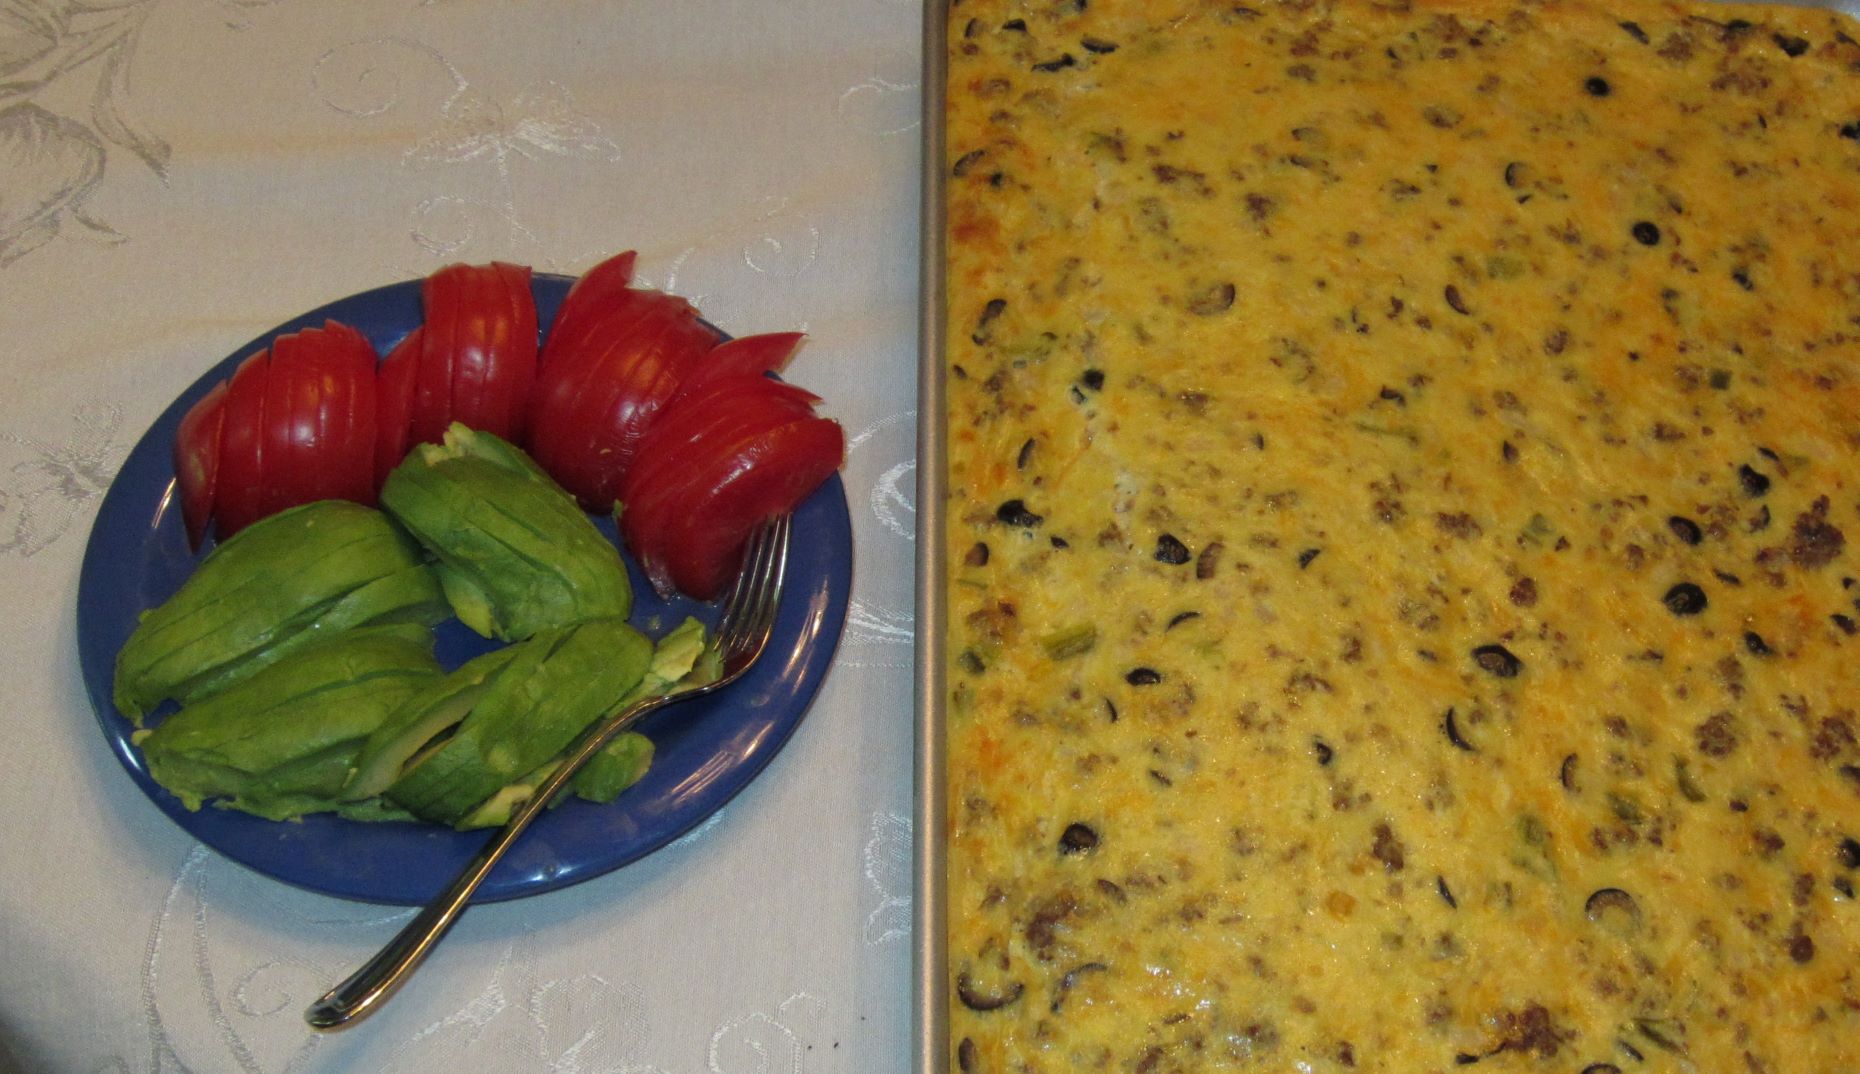
Mexican Quiche hit my recipe box via Sunset Magazine circa early 1980s. Over the years, I have made with it with chorizo or more often with a savory sausage. Topped with a fresh slice of yummy avocado and tomato, it presents beautifully.
Recently I served Mexican Quiche at my annual Mother’s Day Coffee. There were a few pieces left over and were equally tasty the next day.
When serving a crowd, I often make the Quiche the night before and have it ready to pop in the oven the next morning. Enjoy!
MEXICAN QUICHE
1 pound chorizo (or savory) sausage
2 medium-size onions, chopped
1 teaspoon salt
1/8 teaspoon pepper
4 tablespoons diced green chiles
10 eggs
2 cups half and half or milk
1 can sliced ripe olives, drained (2.5 oz.)
1 can whole kernel corn, drained (8.75 oz.)
3 cups shredded Jack cheese
Avocado and Tomato Slices
Fresh cilantro sprigs
Remove casings (if necessary) from chorizo. Crumble or finely chop meat and place in a wide frying pan; cook, stirring over medium-high heat until browned. Add onions and saute until tender. Drain off excess fat. Stir in salt, pepper, and chilies. Remove from heat.
In a large bowl, beat eggs and half-and-half just until blended. Stir in chorizo mixture, olives, corn and cheese. Evenly spread in a greased 10×15″ jelly roll pan.
3. Bake in 375F oven for 25 to 30 minutes or until knife inserted in center comes out clean. Let stand 10 minutes. Garnish with avocado, tomato, and cilantro.
Early to bed, early to rise, makes a man/woman healthy, wealthy (maybe) and wise. We were advised to bring ear plugs for our stay in San Ramon because truly the cocks crow at dawn…and sometimes in the middle of the night. I rather enjoyed it, reminding me of the many years on the Iowa farm. Neyda, again prepared a wonderful breakfast for us including fried plantains, pinto gallo, fresh avocado, watermelon, with fresh pineapple juice. It was sooo good.
Breakfast Day Two San Ramon
Next we were off to Los Pipitos: Center for Children With Disabilities. My generous travel group delivered supplies for the center. Los Pipitos works to change local perceptions of children with disabilities and provide children with services. For more information on Los Pipitos as well as other health care initiatives from Sister Cities of San Ramon (SCSRN), visit http://san-ramon.org/what_we_do/health-care.
Los Pipitos
Next we were off to visit a local entrepreneurship supported by SCSRN, paper-making by local women. The women utilize discarded paper making beautiful paper and crafts for sale.
Paper Making in San RamonFinished Paper Made in San Ramon
After our tour the women sold blank paper in addition to beautiful handmade books, bookmarks, and cards.
Handmade Paper Crafts from San Ramon
Guess what! It’s time to eat again. Neyda served fresh tortillas, beets, rice, yucca, peppers and onions. It’s so interesting to experience the local foods and traditions.
Lunch Day Two
Next we were off to experience another entrepreneurship of jewelry making. The locals make gorgeous jewelry from the local seeds that are beautiful in their own right. We had the opportunity to design and make our own jewelry. My masterpiece is shown below. Tomorrow we will attend a local craft fair and be able to purchase pieces from local artisans.
Jewelry Making from Local Seeds
Siesta! The hammock was calling me (although entry was not so graceful) and read Sarah’s Key, on the docket for my next book club discussion. While the storyline of the book is anything but relaxing, I thought it would be fun to take a picture reading the book in paradise to send to my book club buddies.
Hammock Reading in San Ramon
After my siesta, we were ready to experience Nacatamals, a Nicaraguan dish similar to a tamale. Can’t wait for another experience to make (and eat) a local delight!
What says summer better than a cool, refreshing salad. I LOVE quinoa and experimenting with different combinations. Today, I decided to combine my affection for chicken salad with fruit and nuts along with the quinoa. Love it!
QUINOA SALAD WITH STRAWBERRIES AND CHICKEN
1 cup quinoa cooked in two cups boiling water for 12 minutes.
sliced strawberries
chopped yellow pepper
2-3 chopped green onions
2 cups chopped, cooked chicken
1 cup chopped pecans
salt
balsamic salad dressing
We arrived in San Ramon around lunch. The FEV guides, walked us to our host family homes where we would stay for the next three days. The walk through the village of San Ramon was enlightening with people working, people walking, children playing, and the sound of music and nature everywhere.
Roommate, Sally, and I were the last stop, staying with our wonderful hostess Neyda and her daughter Gabriella. After a warm welcome and a quick opportunity to drop our bags in our own Cabana, we sat down for lunch. Neyda prepared a wonderful meal of chicken, cabbage salad, fresh tortillas, tomatoes, radishes and star fruit from her garden!
Lunch with Neyda
Neyda’s backyard was a haven for wonderful fruit, today showing the star fruit, passion fruit, and mango. I wish I could grow these in Colorado!
Star Fruit in Neyda’s back yardPassion FruitFresh Mango
After lunch, it was time for our walking tour of San Ramon, visiting the church, parks, etc. After another wonderful dinner, we were off to the community library for a welcome ceremony with local dancers.
San Ramon Welcome Ceremony
Another wonderful day and experience. Tomorrow we will observe paper making, jewelry making, and local cuisine.
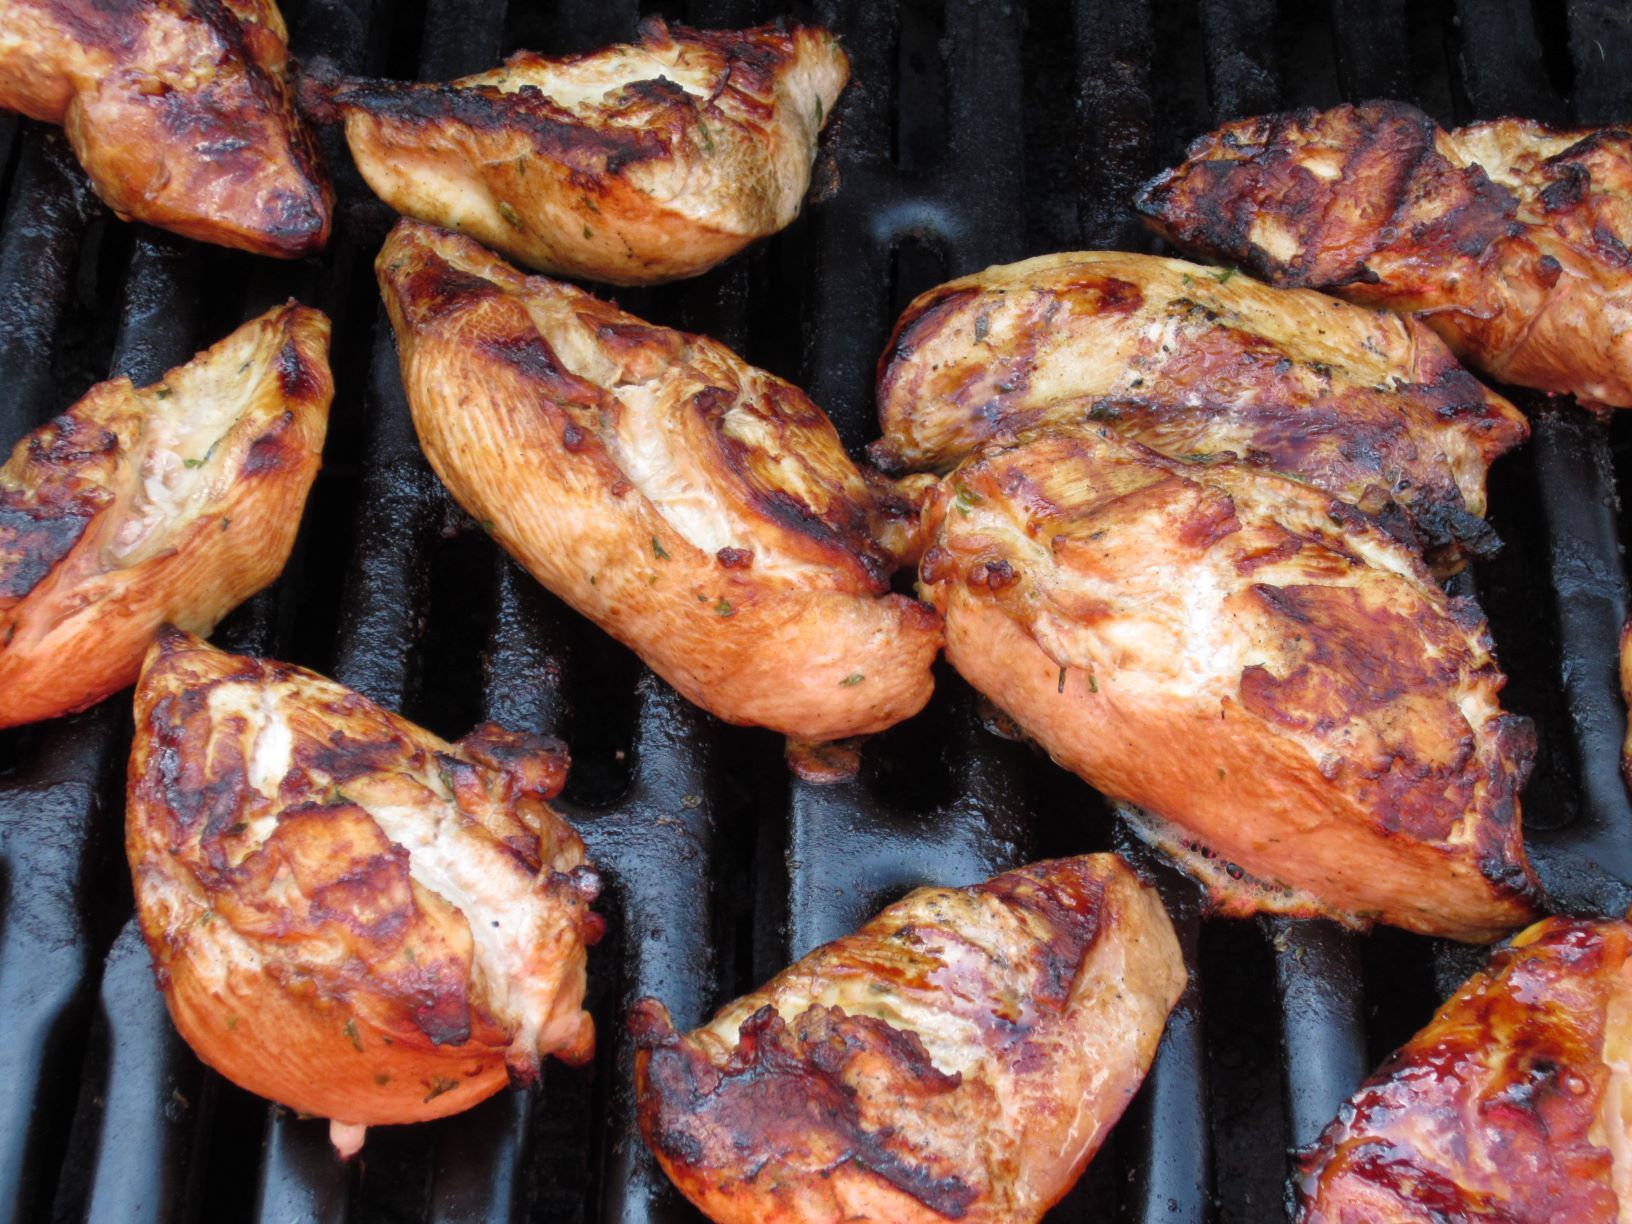
SUMMER = BBQand it’s time to get this summer started! Several years ago a co-worker shared this recipe, from Creme de Colorado Cookbook, and it has become a summer staple. The chicken is so moist and flavorful. I liked to marinade for 24 hours, but a minimum of 4-5 hours will do.
Typically I grill several extra chicken breasts to have the next day(s) in salads. So delicious! Get ready for some yummy chicken for your 4th of July BBQ!
BBQ CHICKEN MARINADE
2 whole frying chickens, cut into pieces (or skinless/boneless breasts)
3/4 cup vegetable oil
1/3 cup soy sauce
3 tablespoons Worcestershire sauce
1/4 cup red wine vinegar
juice of 1 lemon
1 tablespoon dry mustard
1 teaspoon salt
2 tablespoons minced fresh parsley
1 clove garlic, crushed
Mix all marinade ingredients. Pour into large plastic ziplock bag. Add chicken and assure chicken is coated. Marinate 2-4 hours. Can also freeze in marinade to enjoy later.


 Beggar Dog outside Granada…quite the performer!
 An afternoon out with the boy at the local gaming pavillion