Saying good-bye to our new friends at Finca Esperanza Verde (FEV) was sad. The staff made our stay so memorable and wonderful. After a delightful breakfast of fresh banana bread and jam with a slice of French toast, the staff gathered to say good-bye to our group.
Last Breakfast at FEV
FEV Staff says good-bye
Next we gathered our things and were off to visit a rural, primary school on our way to San Ramon. The truck was parked and we hiked up a steep dirt path to the top of the hill to the school. It was muddy, full of ruts and the path the children take each and every day to their school.
When we arrived, we were greeted by the community leader, the teacher, as well as several students and their families. Again, it was their summer break, but they took time out of their day to greet us.
Visiting Rural Primary School in Nicaragua
The children were so sweet and well-behaved. The classroom, while barren in comparison to U.S. classrooms, had many of the same characteristics of classrooms around the world.
Classroom in Nicaraguan Rural Primary School
I noticed immediately that they weren’t enough desks for all of the children and many of the desks were broken, with the seat intact but the writing desk was long gone. I asked about help for this school, specifically, and my donation was guided to the Sister Communities of San Ramon, website www.san-ramon.org which has helped build 6 rural primary schools in San Ramon, as well as supporting healthcare, water projects, environment preservation, etc.
After a delightful morning, we were ready for the hike down, grabbing a fresh orange for nourishment. Back in the trucks, we’re off for San Ramon to meet our guest host families and become acquainted in the community.
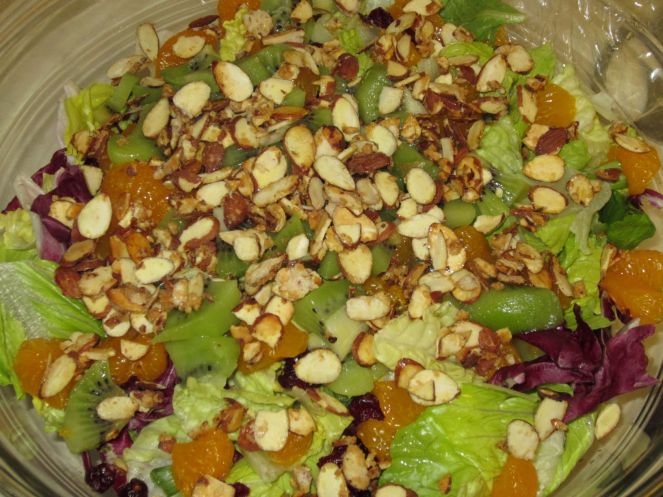
Mandarin Salad, Colorado Cache Cookbook, is a staple for my friends and I. It is so yummy and refreshing and perfect with BBQ chicken (check out my coming post on June 29, 2012).
It’s perfect any time of year. Experiment with it when other fresh fruits are available. This time, I added kiwi and Craisins and loved it! The tangy kiwi and Craisins with the sugary almonds are delightful.
KIWI MANDARIN SALAD
SUGARED ALMONDS
1/2 cup sliced almonds, `
3 tablespoons sugar
SALAD
1/2 head iceberg lettuce
1/2 head romaine lettuce
1 cup chopped celery
2 whole green onions, chopped
11 ounces can mandarin oranges, drained
3 fresh kiwi, peeled and chopped
1/2 cup Craisins
In a small pan over medium heat, cook almonds and sugar, stirring constantly until almonds are coated and sugar dissolved. Watch carefully as they will burn easily. Cool and store in air-tight container.
Mix all dressing ingredients and chill.
Mix lettuces, celery and onions.
Just before serving, add almonds, mandarins, kiwi and Craisins. Toss with the dressing.
Adapted from Colorado Cache Cookbook, Mandarin Salad
My sister-in-law, Betty, gets all the credit for making my trip to Nicaragua a reality. Betty has kindly shared the following information about her Mother’s (Gamma’s) Fudge Recipe and her introduction of the recipe to Nicaraguan families in San Ramon, using local, ground cocoa beans.
Cocoa Beans in Nicaragua
————————————–
My Mother had a way with Hershey’s cocoa powder. It was a cupboard staple, allowing a host of unique concoctions to be served in our family kitchen. There was chocolate gravy, made in a skillet from a roux of flour, sugar, and cocoa powder laced with milk and butter. It had a certain satin sheen when ready to be served for our before-school breakfast. Yikes! There was also an ugly chocolate pie, made with cocoa powder, sugar and butter pats folded simply into pastry and baked. Yum! Nothing, however, competed with her five-ingredient fudge, ready in 20 minutes if one of the family developed an after-dinner sweet tooth. We didn’t often have layered cakes or fruit pies, but we had fudge to die for.
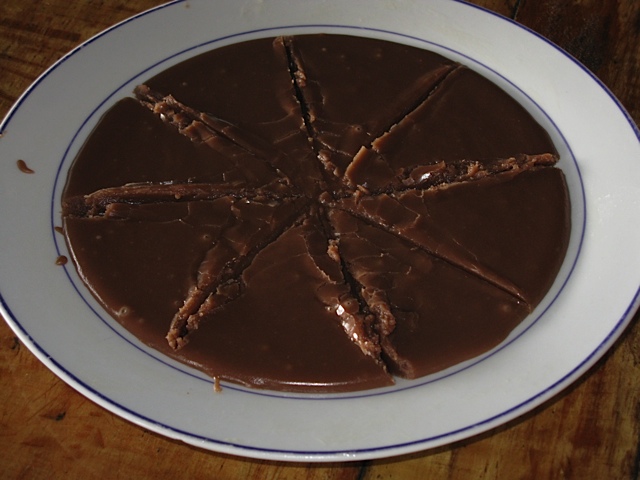
Gamma’s Fudge in Nicaragua
Family legend says that during the Depression and the rationing of sugar, that the prized candy was coveted – so much so that a sad tale is told that while “beating the mixture” the sauce pan capsized into the dirty kitchen sink while Mother attended to a baby’s wailing – only to have the cry equaled by the disappointed older brother, Karl, who awaited the prized fudge.
Most of the family still loves Gamma’s Fudge, especially thinking of it and Buttermilk Fudge at Christmas-time when she carefully rationed it among families. I’ve made it for kids and grandkids. I even made it with Nicaraguan women when we recently visited, with Cathy, in the small town of San Ramon. Processed chocolate candy is not affordable to the locals, so I taught three different households how to make fudge using their own ground cocoa beans, their local sugar and dairy and butter or margarine. Thankfully, vanilla extract was for sale, a spoonful at a time, at one of the many tiny shops lining the four streets of San Ramon. The fudge was a big hit – and I am hoping some were able to make it into a cottage industry – or maybe just into a new family tradition.
Teaching Fudge Making in one Nicarguan home
Teaching Fudge Making in a second Nicaraguan Home
GAMMA’S FUDGE (Spanish)
In a saucepan, combine:
2 C. sugar
1 C. milk
4 T. cocoa
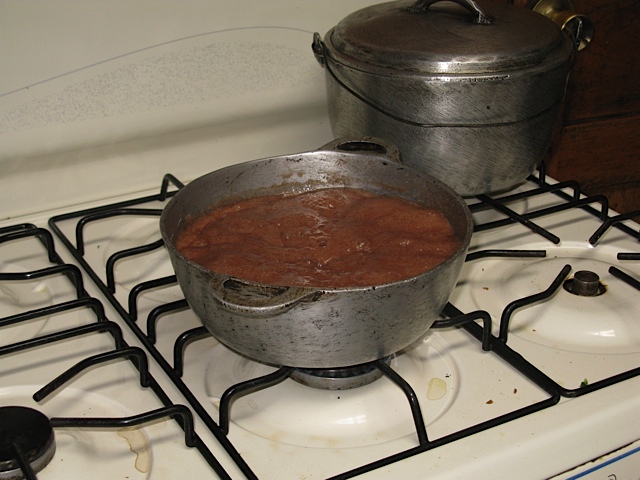
Heat over medium-high heat, stirring to blend until the mixture reaches a boil. Then adjust heat to maintain a low boil. Check mixture frequently until it begins to thicken, but do not stir too vigorously as the mixture will turn grainy. After about 15 minutes, check to see if the mixture forms a ball when a teaspoonful is dropped into a glass or cool water. When you are sure the chocolate ball is forming and there is loss of brightness to the mixture, turn off heat, then add:
4 T. butter or margarine
1 T vanilla or vanilla extract
Hand beat the mixture within the tilted saucepan until it thickens and forms folds when dropped from spoon back into the mixture. When very hard to beat, pour the mixture on a plate that has been greased with a little margarine. Let stand for 30 minutes before cutting into 1-inch squares.
If for some reason the fudge does not harden, use the crumbles as chips in cookies or as sprinkles on top of ice cream. This recipe can also be used to make a fudge sauce when reheated with a little milk or cooking stopped before the mixture is at hard-stage.
Delicious!
DULCE DE AZUCAR DE GAMMA
Simple ingrediente de 5 Fudge
En una cacerola, combine
2 C. azúcar
1 taza de leche
4 T. cacao
Calienta a fuego medio-alto, revolviendo ocasionalmente para mezclar, hasta que la mezcla llegue a hervir. A continuación, ajuste de calor para mantener a fuego bajo, para comprobar si la mezcla de chocolate, cuando cayó en el agua, forma un grupo de bolas. Asegúrese de no mezclar con demasiada frecuencia, sin embargo, como se puede convertir en dulces granulada.
Cuando uno está seguro de que el chocolate es la combinación de una pelota, así como la pérdida de su brillo, apagar el fuego, añadir
4 T. mantequilla o margarina
1 T de vainilla o esencia de vainilla
Mano batir la mezcla hasta que espese y forma pliegues cuando se deja caer por cucharada de nuevo en su mezcla. Cuando muy difícil de batir, vierta la mezcla en una placa que ha sido untada con un poco de margarina.
Deje reposar durante 30 minutos, luego se corta en cuadrados de 1 pulgada.
Si por alguna razón no se endurecen, se derrumba como el uso de las cookies o en helados. También se podría utilizar como una salsa de recalentamiento con un poco de leche.
Sin embargo, esta consta de 5 ingredientes simples y la clave es cómo late el tiempo suficiente que sólo “establece” una vez que se vierte en el plato.
Gooseberry…a prickly bush with hard green fruit, very sour to the taste. These green gems were not in my fruit repertoire growing up in Iowa. When I moved to St. Joseph, MO after college, I was introduced to them but not a big fan. When I met my husband, and his Mother (referred to as Gamma), I was quickly educated on the value of the meager gooseberry. They coveted a rare can of gooseberries at the grocery store for a pie or cobbler, toting a few cans back to relatives in North Carolina.
When we bought our home several years ago, we HAD to plant a gooseberry bush. Little did I know how prickly these bushes were, until our first harvest. My arms looked like I had been attacked by a herd of cats. Now it was time to clean the gooseberries. Holy smokes…it took flippin’ forever! Each gooseberry has a stem and a brown beard (my term) that need to be removed from the berry. I LOVED it when Gamma visited during gooseberry season. She was content to sit in the shade and do ‘the dirty work’ of cleaning these little devils. Missin’ you Gamma and not just at Gooseberry time!
I was happy to take it from here and make the gooseberry pie or cobbler, drowning the filling in white sugar to mask the very sour gooseberry flavor. The end result is a very tasty, unique, seasonal dessert. The fresh gooseberry cannot be matched by a can of gooseberries, but will do if you are having tremendous gooseberry cravings.
This year, I decided to tackle the gooseberry harvest alone. My 9-year-old Golden Retriever, Joe, decided to help. His idea of ‘help’ is to guard the berries and then help himself to a gooseberry or two from the harvest. I truly thought one bite of gooseberry would quickly send him off to another part of the yard. I was wrong. Joe LOVES fresh, sour, crunchy, gooseberries. Silly boy!
For the two quarts of gooseberries needed to make the cobbler, it took over 2 hours of cleaning. Good thing I had a movie to watch! Cleaning is the hard part, but making the cobbler itself is easy, peasy. I split the recipe into two smaller pans so I could share one pan with others and save one pan for family.
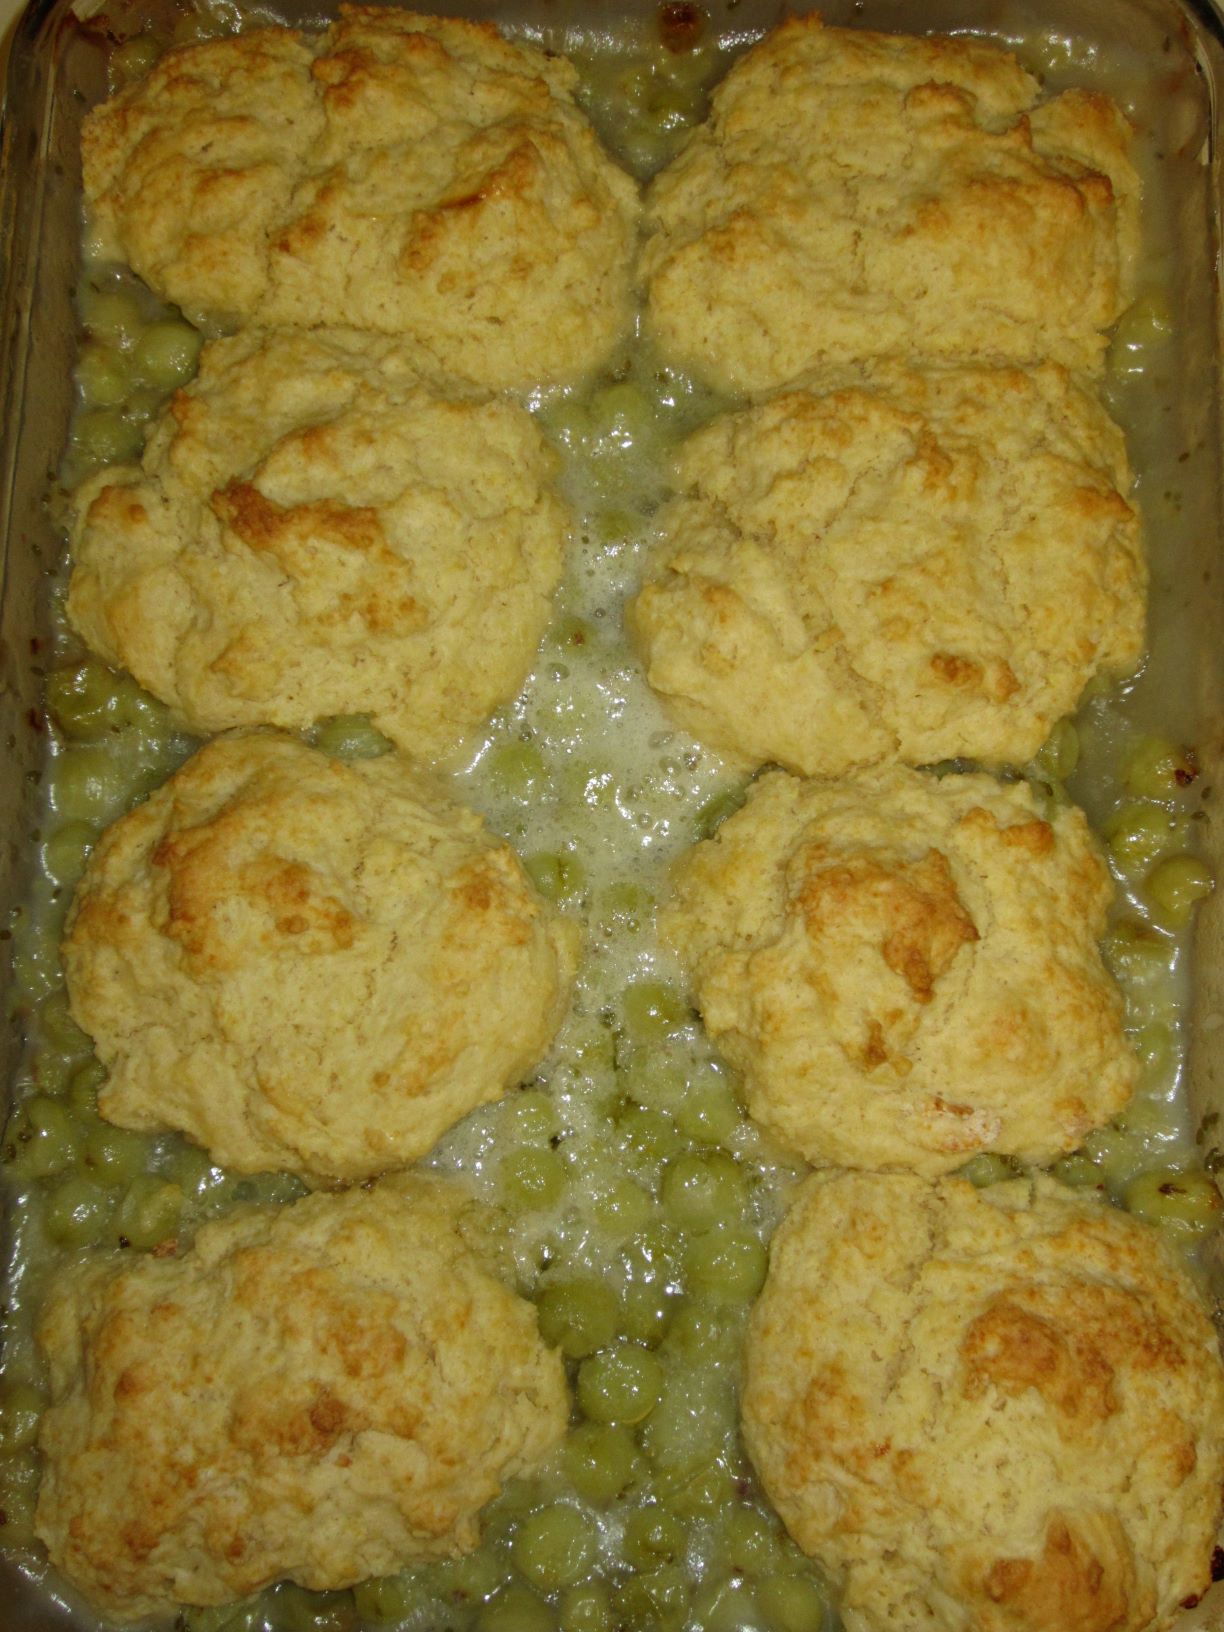
Gooseberries…worth the effort…once a year (or so)!
GOOSEBERRY COBBLER
FRUIT FILLING
1 1/2 cups sugar
1/2 cup flour
1 teaspoon salt
2 quarts Gooseberries
3 tablespoons lemon juice
3 tablespoons butter
TOPPING
2 cups flour
2 tablespoons sugar
4 teaspoons baking powder
1 teaspoon salt
1/2 cup shortening
2/3 cup milk
1 egg, slightly beaten
Mix sugar, flour and salt; combine with berries and lemon juice. Pour into a greased 13x9x2″ baking pan; dot with butter.
Place in a preheated hot oven (400 degrees) about 15 minutes; be sure that mixture is hot and bubbling.
In the meantime, mix the topping. Sift together 2 cups flour, baking powder, sugar and salt. Cut in shortening until mixture resembles coarse meal. Add milk and slightly beaten egg to dry ingredients. Stir with fork to blend well.
Remove hot fruit mixture from oven. Drop topping mixture onto hot berries, making 12 biscuits.
Return to hot oven (400 degrees); bake about 20 minutes, or until biscuits are browned. Serve warm with ice cream.
Finca Esperanza Verde (FEV) produces organic certified, shade-grown coffee. Various trees, including productive fruit trees (bananas and papaya) provide vital nitrogen while the oak and ‘barazan’ are planted for reforestation.
Coffee Plants
Coffee plant with ripening beans
Coffee plants take 2-3 years to produce their first fruit, blooming 2-3 times per year, but producing fruit one time per year. Each plant is productive for 8-10 years before replanting must occur. FEV utilizes the husks, leaves etc. to produce their own worm compost for their organic coffee farm.
Red, ripe coffee beans
Picking Coffee Beans
There are many coffee farms in Nicaragua, but unlike American farms, coffee workers walk long distances to get to the fields where they will pick anywhere from 8-10, 5-gallon bags per person, per day. Larger farms can harvest up to 15-20, 5-gallon bags per person, per day. In most cases, the coffee workers and their family members then carry the bags of coffee beans to the farm or market for sale. At the time of our visit, the average pay per bag was $2, or anywhere from $16 to $40 per person, per day.
My harvest coffee bean harvest
During our ecotour excursion, about 20 novices picked 3/4 of a gallon of coffee beans in 1.5 hours. I am in awe at the skill and efficiency of the Nicaraguan coffee worker.
It’s a manual job. There are no John Deere Combines that do this job in the steep, rainforest conditions. Each coffee bean must be carefully picked to assure that the stem will produce another fruit next year. And the processing has yet to begin.
Coffee Processing
The coffee beans are put in water, to sort the floating inferior beans. The beans are then hulled to remove the red, outer husk. The coffee beans inside the husk are typically beige in color and are covered in a slightly sweet, sticky gel. At this stage they taste nothing like the dark, sometimes bitter coffee we drink each morning.
bags of coffee ready to be hulled and processed
The beans are wet processed, removing the skin of the coffee bean, then followed by a fermentation bath that eats away the pulp, leaving the bean. The beans are dried in the sun, with any remaining residue removed by the coffee workers. The beans are then sorted by grade.
Sorting the coffee beans by grade, drying the beansDifferent grades of coffee beans
Coffee Roasting & Grinding
The FEV cooking staff spent an afternoon showing us how the locals roast the dried coffee beans over a wood stove, until the beans reach the desired richness. As the beans roasted over the fire, another paper-like shell was released and blown away from the roasting beans.
Roasting coffee beans over wood stoveRoasted Coffee Beans
At this point, the beans are ready for the grinder. At home, I would throw them in my electric coffee grinder and be done in a few seconds. The locals use a heavy duty hand grinder that builds muscle, and a little character. In rural Nicaragua, you have to work hard to have your morning cup a Joe.
grinding coffee beans
Coffee Cupping
Coffee cupping is another term for coffee tasting, experiencing the flavors of different brewed coffees. The grounds are often left in the coffee. The coffee, after being sniffed, is then slurped into the mouth allowing the back of tongue to experience the full tasting detecting body, acidity and sweetness. Experienced coffee cuppers can distinguish the coffee origin in this tasting experience.
We had the unique experience of visiting another local coffee farmer and his family for a cupping experience. Can’t say I’m a big fan…couldn’t get over the coffee grounds but appreciate the process!
Coffee Cupping in Nicaragua
Cathy’s Coffee Comments:
For years I have purchased coffee at the local grocery store without a thought as to how it was grown, harvested and prepared. It was just…coffee…my morning ‘pick me up’. Coffee growing and processing is, in so many ways, primitive to our way of thinking. Farm life in the USA is hard work but we have so many tools in our toolbox. The coffee farmers and workers have 1) their feet, 2) their hands and their backs. They make it work.
I’ll think of that every morning the rest of my life as I sip on my morning coffee. Thank you coffee workers. Where would we be without you?
Fresh blueberries are coming into season and a wonderful time for a warm, Blueberry Coffee Cake. I served this yummy cake for my annual Mother’s Day Coffee.
It’s easy to make and I LOVE the crumb topping. Great with a hot cup of coffee or tea with family and friends.
I typically double this recipe for a larger coffee cake.
BLUEBERRY COFFEE CAKE
CAKE BATTER:
3/4 cup sugar
1/4 butter, softened
1 egg, beaten
1/2 cup milk
2 cups flour
2 1/2 teaspoons baking powder
1/2 teaspoon salt (optional)
2 1/4 cups blueberries, fresh or frozen
1/2 teaspoon cinnamon
CRUMB TOPPING:
3/4 cup sugar
1/2 cup flour
1/2 teaspoon cinnamon
1/4 cup soft butter
Preheat oven to 375 degrees. Rinse and drain the blueberries.
Combine 3/4 cup sugar, 2 1/2 teaspoons baking powder, 1/2 teaspoon salt and 1/2 teaspoon cinnamon in a bowl and mix well. Add 1/4 cup soft butter, egg and mix. Add 1/2 cups milk and mix well. Stir in 2 cups of flour. The batter will resemble thick pancake batter. You may have to finish mixing by hand. Add the blueberries and gently mix in.
Blueberry Cake Batter
Grease and flour pans (9″ square pan or two loaf pans). Pour batter into pans, about 1/2 full.
Mix topping. Crumble evenly on top of batter.
Blueberry Coffee Cake ready for the oven
Bake for 45 minutes. If not brown on the top, bake a bit longer, checking every 3 to 4 minutes. Set the coffee cake on a rack to cool and enjoy.
After a busy morning with the local children, we were ready to sit, eat and share stories of our busy, busy morning. Again, the FEV cooking staff did not disappoint.
Lunch of pork with vegetables, potato, rice and pasta saladYummy Flan for Dessert
The afternoon ahead included coffee picking. (My June 12 post will address my Nicaragua coffee experience). Our hostess discovered a red eyed tree frog near the dining room. I didn’t kiss it (no prince needed at this time), but I did hold it. So colorful and amazing!
Red Eyed Tree Frog in Nicaragua
The grounds of Finca Esperanza Verde have beautiful flowers everywhere. This day a large white orchid was blooming, for one day only, and graced our table in the dining room.
Large White Orchid that blooms one day only
After the coffee hike, it was time to eat again…oh shoot! (I jest). Even in the small, efficient kitchen of FEV, the cooking staff got creative. I love, in the photo below, the presentation of the sliced squash with melted cheese to resemble a cooked egg. Makes me smile to look at it again!
Final Dinner at FEV
Tomorrow morning we will say good-bye to the wonderful staff of Finca Esperanza Verde and continue our adventure in San Ramon with local hosts.
It seems my world truly revolves around food, as it does for my daughters! Our oldest daughter, Megan, was married last year; we asked bridal shower guests to share a favorite recipe to insert in a cookbook. This year daughter, Sarah, is also engaged and we did the same for her shower. I photocopied hand-written recipes of Grandmothers, Great-Grandmothers, and other family members no longer with us. We also asked each guest to write a note the bride inside the cookbook.
As favors, we gave each guest a copy of three of Megan’s favorite dip/spread recipes which we also served at her shower.
Megan’s recipe favors at bridal shower
The dips shared were Cheesy Apple Spread (today’s post), Hot Wing Dip, and Peach Salsa. They are all family favorites. The Cheesy Apple Spread recipe has been in my recipe box for at least 30 years. Younger daughter, Sarah, loves this dip as well and prepared the dip for the shower. Cheesy Apple Spread is truly an oldie but still a goodie!
Apple Dip
CHEESY APPLE SPREAD
8 ounces low-fat cream cheese, softened
1/2 cup low-fat mayonnaise
1/2 cup shredded cheddar cheese
1/2 cup chopped apple
Ingredients for Apple Dip
Blend together the cream cheese and mayonnaise. Add shredded cheese and chopped apple. Chill until ready to serve with Ritz or other favorite crackers.
Day four at Finca Esperanza Verde (FEV) began with a wonderful, local breakfast, presented beautifully. The traditional gallo pinto, along with fried plantains, ham salad rolled in a sliced of ham and a slice of local cheese. With a glass of fresh Jamaican flower juice, hot cup of FEV coffee and fruit, we were fueled for a full morning of activities with local children coming to FEV.
Nicaraguan Breakfast of Gallo Pinto, Fried Plantains, ham salad roll and local cheeseFresh Jamaican Flower (Hibiscus) Juice with lime and cinnamon
The children were to arrive at 9 a.m. but the skies were dark and it was raining. Nothing. My travel companions from ERUUF were prepared to do paper crafts, games, and musical activities. Would the children even go out in these conditions. Oh ye of little faith!
These children, and their parents, are strong. They are used to the rain, the muddy conditions and walking miles (truly uphill) to reach their destinations.
Local children begin to arrive for a morning at FEV
Before long, more children arrived on foot, many wearing their much-needed rubber boots, others in street shoes. After almost two hours, a truck full of children arrived, hitching a ride from a local driver. We hustled around to assure that we had activities for the 85+ children that were our guests. Activities included multiple paper crafts, games, music (bells, musical chairs) and more. The children were anxious to participate in all of the activities as were their parents.
– The children gather for good-byes at FEV
The FEV staff prepared sandwiches and drinks for each guest that joined us for their long walk home. For the final 35 or so, a local pickup provided transportation back down the long road. This would never happen in the States. We watched in amazement as the parents, and perhaps teachers, jammed about 35 children in the back of the pickup to return home.
Children departing via pickup truck from FEV
Reflecting on the morning, I admired the children for their respectful and patient behavior. Their parents were kind and supportive. Would our children in the States spend their summer holiday walking miles to visit strangers to partake in a morning of crafts and art? These families have so little in material things, yet are so rich in community and family. Perhaps the greatest souvenir from this trip will be gratefulness and admiration of the Nicaraguan people of Managua.
Our Book Club meets every other month and tries to match the pot-luck cuisine to align with the story. This month our book was ‘Sarah’s Key’. I loved this book! If you’ve not read it, I highly recommend it. The story takes place in France during WWII. While food and cooking wasn’t the topic of the book, French Cuisine was the food du jour.
French cooking brings Julia Child to mind but I was looking for something light and fresh. I was delighted to find a French Green Bean Salad that was perfect!
French Green Bean Salad
FRENCH GREEN BEAN SALAD
Kosher Salt
1 1/2 pounds fresh green beans
2 tablespoons Dijon mustard
2 tablespoon white wine vinegar
1/4 teaspoon freshly ground black pepper
1/2 cup olive oil
2 tablespoons minced fresh dill
Ingredients for French Green Bean Salad
Fill a large bowl with ice water. Bring a large pot of water to boil and add 1 tablespoon of kosher salt. Add the beans and cook for 1 minute only so the beans are crisp tender. Drain the beans and put them in the ice water until completely cool. Drain the beans again, dry on paper towels. Place the beans in a large bowl.
In a small bowl, whisk together the mustard, vinegar, 1/2 teaspoon salt and the pepper. While whisking, slowly add the olive oil to make an emulsion.
Dressing for French Green Bean Salad
Pour enough dressing over the beans to moisten them well, reserving the remaining dressing for another use. Toss with the dill, season to taste and serve at room temperature.


 Juice with lime and cinnamon")


