Losers!

Slow Cooker Brownie … a Disaster!

A few days ago I was watching the Rachael Ray show with Emeril Lagasse as her guest. He shared a recipe for a slow cooker/crockpot brownie. With a busy day coming up and the need for a birthday dessert, I decided to give it a shot.

I followed the instructions, shown below, to a ‘T’ and anxiously awaited the yummy results, enjoying the smell of chocolate in my home all afternoon.

After the allotted baking time of 3 1/2 hours, the brownies were still liquid in the middle. I have a fairly large crockpot so the brownies were probably thinner than in many smaller crockpots.  Time was running out, so what to do?  I tried baking a little while longer on low with no improvement.  Finally I resorted to turning the crockpot on ‘high’ and you can imagine the burned edges and still uncooked center.

I was NOT a happy camper and kicked myself for not making the recipe shown below but baking, old-style, in the oven.  I think this modification for traditionally baked brownies topped warm, with the chocolate hazelnut spread would be amazing. Skip the slow cooker method.

NOTE TO SELF:  Never try to ‘bake’ a cake or brownie in the crockpot EVER!

SLOW COOKER BROWNIES (NOT!)

1 box of brownie mix
1 cup chocolate chunks, a mix of milk and dark (and I used some white chocolate)
1/2 cup chocolate hazelnut spread

  • Line the bottom of the slow cooker with some aluminum foil and spray it with a little non-stick spray.
  • Prepare brownie mix according to package directions and add chocolate chunks.
  • Pour the batter into the slow cooker, set at a low temperature and cook for 3 hours.
  • Remove lid and cook for an extra 30 minutes to create a crunchy top. When cool, spread hazelnut spread on top and enjoy!

Recipe from Rachael Ray Show with Emeril Lagasse

Family Favorites · New Favorite

Hot Wing Dip…anytime

Hot Wing Dip came into my life thanks to oldest daughter Megan’s friend, Jacqui.  It was instant love for both of us, although Megan prefers Ranch dressing vs. Blue Cheese dressing.  Either way, it’s a hearty appetizer that is great to share at a potluck, tailgate, Olympics gathering, or just because! This time I split the recipe into two 8×8″ or 9×9″ casseroles to share at different events.

Hot Wing Dip has the same impact as hot wings but 1) not as messy and 2) easier to prepare. What’s not to love?

HOT WING DIP

2 bricks cream cheese, softened
16 oz. bottle Franks red-hot BUFFALO sauce
16 oz. bottle Blue Cheese dressing (or Ranch dressing)
6-8 cooked chicken breasts (depending on if you like it creamier or a bit drier)
1 bunch green onions, chopped

  • Bake or steam the chicken, cool. Cut into smaller pieces. At this point you can either shred the chicken or place in a food processor to chop.

  • Combine chicken with cream cheese, sauce, dressing and 1/2 of chopped green onions (white portion). Sprinkle top of dip with chopped green portion of onions. Place in greased 9×13″ pan. Bake at 350 degrees for 45 – 60 minutes.

Serve hot with corn or tortilla chips, Ritz crackers, and celery.

Family · Family Favorites

Chicken Divine…a family fav!

Chicken Divine is a recipe I discovered in the ’90s.  I wish I could recall where the recipe originated but it had the elements that my young children liked: chicken, rice, broccoli and, of course, CHEESE!  I made, they liked, repeat.

To this day, it is still a favorite and the aroma of the baking chicken with rosemary is wonderful. I sincerely hope your family enjoys as much as ours does!

CHICKEN DIVINE

3 whole chicken breasts
rosemary to taste
salt and pepper to taste
1 sliced onion
1 pound fresh or frozen broccoli
3/4 cup raw rice, cooked

CHEESE SAUCE:
1/4 cup butter
1/4 cup flour
2 cups milk
1/2 teaspoon salt
1/8 teaspoon pepper
1 cup grated, sharp Cheddar Cheese
1/2 cup freshly grated Parmesan cheese

  • Preheat oven to 350 degrees.
  • Sprinkle chicken with rosemary, salt and pepper. Bake chicken at 350 degrees for 1 hour. Cool. Skin, bone and slice.
  • Prepare the rice.
  • Cook broccoli in water with salt and onion. Drain.
  • Layer chicken, then broccoli, then rice in buttered casserole.
  • Prepare the cheese sauce:   Melt butter, add flour and stir until smooth. Cook 2 minutes. Gradually add milk, stirring constantly until thickened. Add cheeses and seasonings. (I have often made 1 1/2 recipes of the sauce to put on top to make it even more moist.)
  • Pour cheese sauce over entire dish. Add more grated Parmesan on top if desired.
  • Bake uncovered for 30 minutes or until bubbly.


Family · Family Favorites · Home · My Roots

Good Old Fashioned Apple Pie and a Great Book

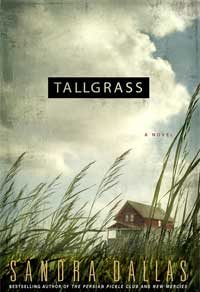
Recently our book club read and reviewed ‘Tallgrass’ by Sandra Dallas, a historical novel that addresses the life and times of the small Colorado town and the controversial internment camp that divided the townspeople.  It was an great book and spurred an excellent discussion.  We all agreed that Sandra Dallas, who lives in Colorado and has family ties to Iowa, has an excellent voice for her characters.

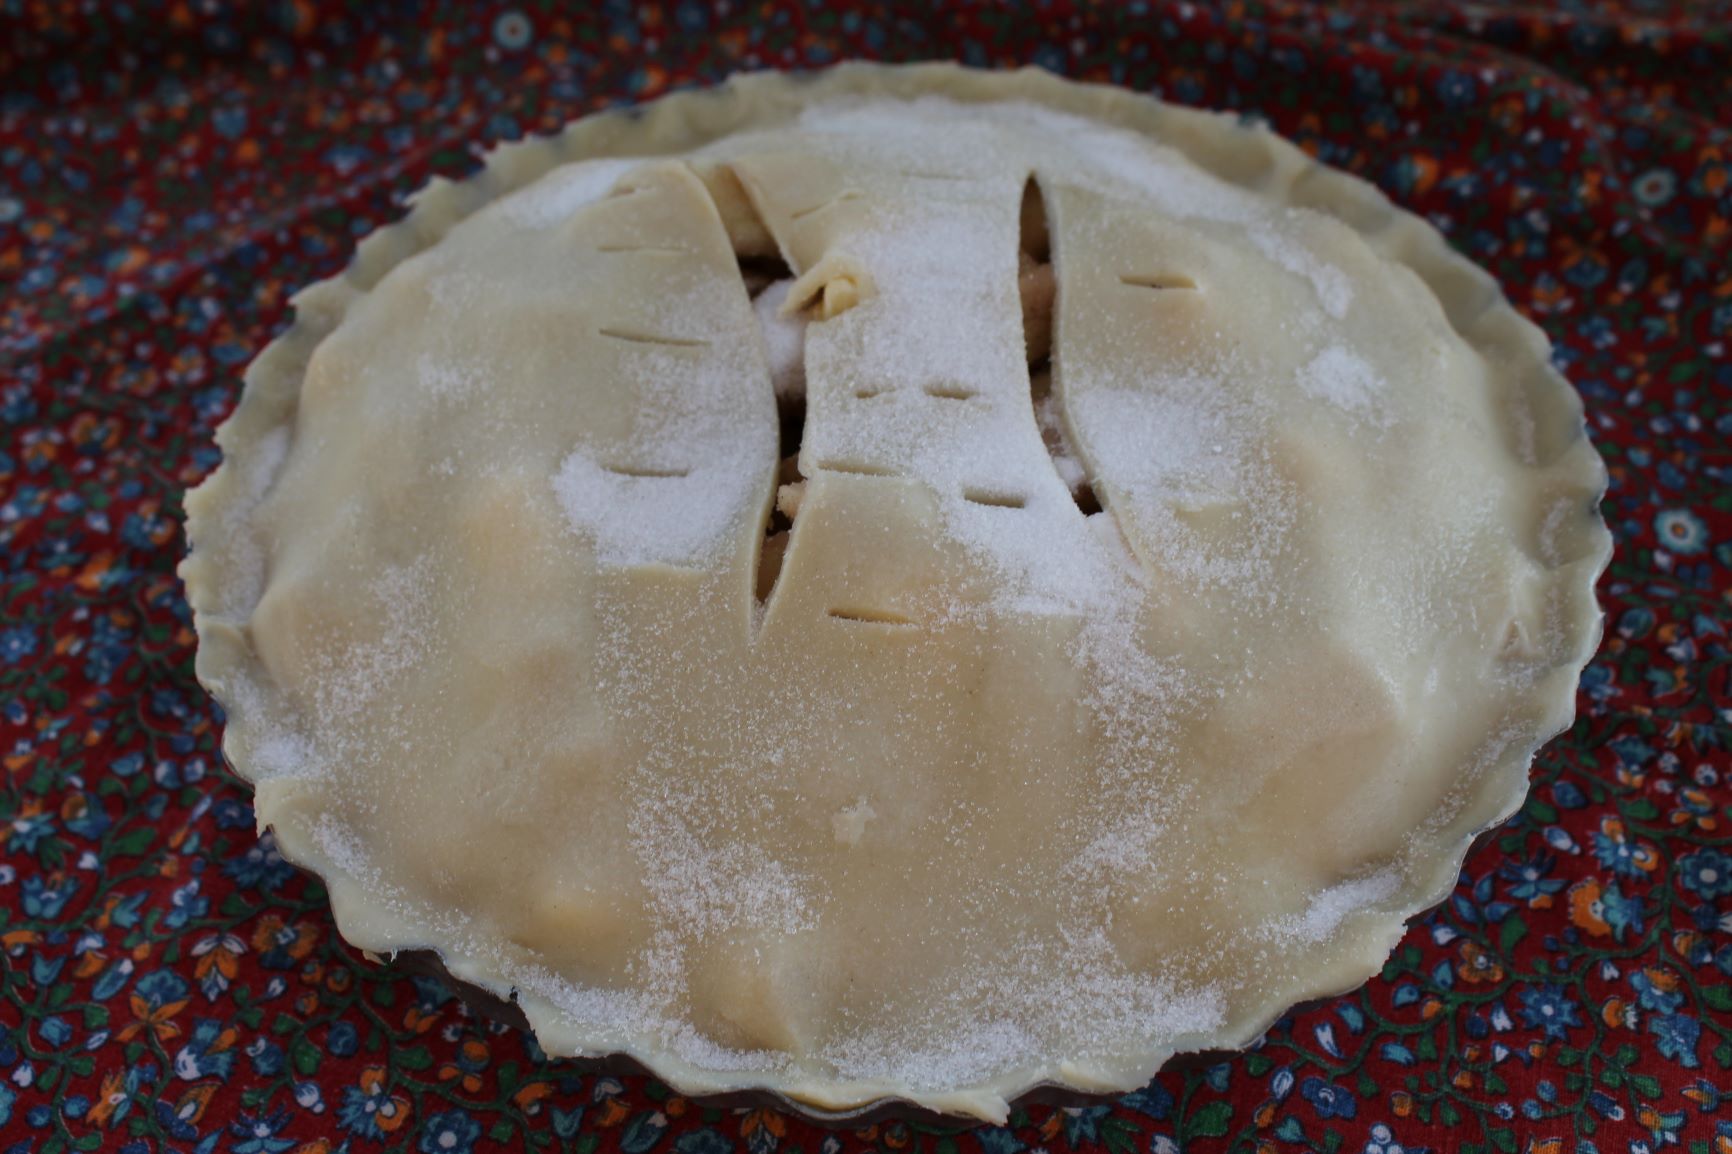
Our book club always begins our gathering with a wonderful potluck typically with a theme associated with book. This evening we enjoyed sushi, edemame salad, fried rice, salads, fruit and much more. After brainstorming with my book club buddies, I decided to make an Old Fashioned Apple Pie in honor of Mary Stroud, a key character in the book.

My favorite Apple Pie is, again, from one my all-time favorite cookbooks. I must confess that I don’t make my own pie crust.  I think the Pillsbury Refrigerated Pie Crusts are excellent and I’d rather spend time on the good part…the filling!

As I was making this pie and cutting the vents for the top crust, I couldn’t help but think of my Mother and the hundreds, if not thousands, of pies that she baked over the years. I carry on her vent design, simple but effective.

The pie is excellent on its own but always wonderful topped with vanilla bean ice cream, too!

OLD FASHIONED APPLE PIE

Pastry for 2 crust pie
1 cup sugar
1 teaspoon cinnamon
4 tablespoons flour
dash salt
6 cups thinly sliced, pared tart cooking apples
2 tablespoons butter

  • On lightly floured surface, roll out half of pastry into an 11 inch circle. Use to line 9 inch pie plate, trim. Refrigerate, with rest of pastry until ready to use.
  • Preheat oven to 425 degrees.
  • In small bowl, combine sugar, cinnamon, flour and salt, mixing well. Add to apples in large bowl, tossing lightly to combine.
  • Turn into pastry-lined pie plate, mounding high in center; dot with butter.


  • Roll out remaining pastry into an 11 inch circle. Make several slits near center for steam vents; adjust over filling; trim.

  • Fold edge of top crust under bottom crust; press together with fingertips. Crimp edge decoratively.
  • Bake 45-50 minutes, or until apples are tender and crust is golden-brown.
  • Cool partially on wire rack; serve warm.
  • Optional:  Top with vanilla bean ice cream.

Recipe from:  McCall’s Cook Book, 1963

Family · Family Favorites

Banana Bread with Banana Jam…double the flavor!

Banana Bread is an old time favorite that my Mother and the women before her made for their families. I like it plain, with a little butter, but always shared with family and friends.

This time I decided to try it with the Banana Jam we drooled over in Nicaragua and I wasn’t disappointed.  This combination is great for breakfast, coffee, or dessert. Just say BANANA!

BANANA BREAD

2 cups sifted all purpose flour (or gluten-free flour)
2 teaspoons baking soda
1 teaspoon ground cinnamon
1/2 teaspoon salt
1/2 teaspoon ground nutmeg
1/2 cup shortening
1 cup sugar
2 eggs
1 teaspoon vanilla
1 cup mashed bananas
1/2 cup chopped pecans or walnuts (optional)
1 teaspoon flour

  • Preheat oven to 350 degrees.
  • Sift together 2 cups flour, baking soda, cinnamon, salt and nutmeg.
  • Cream together shortening and sugar.
  • Blend in eggs and vanilla; mix well.
  • Add dry ingredients alternately with bananas, mixing just until blended.
  • Combine pecans and 1 tsp. flour; stir into batter. Pour into greased 9″ tube pan.
  • Bake for 45-50 minutes or until bread tests done. Cool in pan on rack 10 minutes. Remove from pan; cool on rack.

Yield: 1 loaf

Family Favorites · Holidays

Dutch Apple Pie

Autumn inspires me to bake, especially the traditional Apple Pie. Don’t get me wrong, I love traditional, 2 crust apple pie but I LOVE a Dutch Apple pie with its delectable crunchy topping. This recipe, from McCall’s Cook Book 1963 has been in my recipe box for a L-O-N-G time and always a winner. It’s a crowd-pleaser and the aroma of the baking pie fills the house with baked love!

DUTCH APPLE PIE

9 inch unbaked pie shell

TOPPING:
2/3 cup sifted all-purpose flour
1/3 cup light brown sugar, firmly packed
1/3 cup butter

FILLING:
1 pound tart cooking apples
1 tablespoon lemon juice
2 tablespoons flour
3/4 cup sugar
dash salt
1 teaspoon cinnamon

  • Prepare pie shell; refrigerate until used.
  • Preheat oven to 400F.
  • Make Topping: Combine flour and sugar in medium-sized bowl. Cut in butter, with pastry blender or 2 knives, until mixture is consistency of coarse cornmeal. Refrigerate.
  • Make Filling: Core apples, and pare; thinly slice into large bowl. Sprinkle with lemon juice. Combine flour, sugar, salt and cinnamon,mixing well. Toss lightly with apples.
  • Turn filling into unbaked pie shell, spreading evenly. Cover with topping.
  • Bake 40-45 minutes or until apples are tender.
  • Serve warm.  Options:  top with whipped cream or ice cream

Desserts · New Favorite · New Traditions · Vegan · Vegetarian

Cherry Crisp (Gluten and Dairy Free)

Sour cherry desserts are a big favorite. While trying to avoid gluten, I was craving a cherry something, crisp…pie…cobbler. I decided to try a Cherry Crisp with almond (instead of wheat) flour using applesauce instead of butter. The result is a gluten and dairy free dessert. The girls likened the Cherry Crisp to a really good cherry granola bar.

If you prefer to skip the whole gluten and dairy free scene, substitute all-purpose flour for almond flour and margarine instead of applesauce.

Cherry
Cherry (Photo credit: Wikipedia)

CHERRY CRISP

2 cups cherry pie filling (gluten-free)
1/2 cup quick-cooking oats
1/2 cup almond flour
1/2 cup packed brown sugar
1/8 teaspoon baking powder
1/8 teaspoon baking soda
1/4 cup unsweetened applesauce

  • Preheat oven to 350 degrees F.
  • Spray 8×8 baking dish with non-stick cooking spray.  Spread the cherry filling in the bottom of the baking dish.
  • Combine the oats, almond flour, brown sugar, baking powder, baking soda and applesauce together.
  • Crumble evenly over the cherry mixture.
  • Bake for 30 minutes.


Garden · Vegetarian

Zucchini…today it’s a boat!

Zucchini is the vegetable that keeps on giving, except in my garden.  Daughter Megan has several plants and shares the wealth with family and friends.

Zucchini
Zucchini (Photo credit: Farmanac)

Zucchini can be a blessing or a curse.  I’ve read a quote online that supposedly came from Garrison Keillor that made me laugh.  ‘July is the only time of year when country people lock our cars in the church parking lot, so people don’t put squash on the front seat.’

We’ll be wishing for garden fresh zucchini this winter so we’ll, again, get creative with the zucchini recipes.

ZUCCHINI BOATS

3 small (or 2 medium) zucchini
Cherry or Sun Gold tomatoes (sliced in half)
Olive oil
salt and pepper
Bread crumbs (plain or seasoned)
Mozzarella cheese

  • Preheat oven to 350 degrees. Slice the zucchini in half lengthwise and slice a bit off the back side so the zucchini will lie flat on the baking pan.  Scoop out the centers of the zucchini halves with a spoon.
  • Brush the surface of each zucchini half with olive oil.  Sprinkle with salt and pepper. Slice tomatoes in half, and arrange them into the grooves.
  • Lightly sprinkle with bread crumbs. Sprinkle with mozzarella cheese or parmesan cheese (or both) and bake for about 30-40 minutes until tender.

  • Optional:  Set your oven to broil, and continue to cook another minute or two until cheese is golden and bubbly.

Recipe adapted from: http://sinfullytempting.com/2013/09/01/zucchini-boats/

New Favorite

Blackberry Peach Coffee Cake

Fresh fruit…pies, cakes, coffee cakes or naked is my favorite dessert or breakfast treat.  This recipe, from Southern Living, caught my eye and with more beautiful peaches and a box of fresh blackberries, I had to try it.

My oven bakes a little hot, so the bottom is quite brown but still delicious.  This recipe will stay in my recipe box and perhaps a straight peach coffee cake will be in the plan for next summer!

BLACKBERRY PEACH COFFEE CAKE

Streusel Topping

1/2 cup butter, softened
1/2 cup granulated sugar
1/2 cup firmly packed light brown sugar
2/3 cup all-purpose flour
1 teaspoon ground cinnamon
1/2 teaspoon ground nutmeg

  • Beat butter at medium speed with an electric mixer until creamy; gradually add granulated sugar and brown sugar, beating well. Add flour, cinnamon, and nutmeg; beat just until blended.

Cake:

1/2 cup butter, softened
1 cup granulated sugar
2 large eggs
2 cups all-purpose flour
2 teaspoons baking powder
1/2 teaspoon salt
2/3 cup milk
2 teaspoons vanilla extract
2 cups peeled and sliced fresh firm, ripe peaches (about 2 large peaches, 7 oz. each)
1 cup fresh blackberries

  • Preheat oven to 350°. Prepare Streusel Topping.
  • Beat butter at medium speed with an electric mixer until creamy; gradually add granulated sugar, beating well. Add eggs, 1 at a time, beating until blended after each addition.
  • Combine flour, baking powder, and salt; add to butter mixture alternately with milk, beginning and ending with flour mixture. Beat at low speed until blended after each addition. Stir in vanilla. Pour batter into a greased and floured 9-inch springform pan (I used a small oblong pyrex baking dish).
  • Top with sliced peaches and blackberries. Pinch off 1-inch pieces of Streusel Topping, and drop over fruit.


  • Bake at 350° for 1 hour and 10 minutes to 1 hour and 20 minutes or until center of cake is set. (A wooden pick inserted in center will not come out clean.) Cool completely on a wire rack (about 1 1/2 hours). Dust with powdered sugar. Garnish, if desired.

  • Peach Coffee Cake: Omit blackberries. Increase peaches to 3 cups sliced (about 3 large peaches, 7 oz. each). Proceed with recipe as directed.
Family · Family Favorites · Gluten Free · New Traditions

Peach Blueberry Crumble

Peaches are in season and I love a peach dessert.  I adapted a recipe from Barefoot Contessa to be gluten-free. It was delicious. The rice flour is lighter, therefore, you need to add about 25% more rice flour that the all-purpose flour called for in a recipe.  I’ve shown the rice flour and the all-purpose flour proportions in the recipe below. I also sprinkled sugar on top of the crumble to give it a little extra sweetness.


The Crumble served warm with good vanilla ice cream…it’s what I wish I were having for dessert tonight!

PEACH AND BLUEBERRY CRUMBLE

GF=Gluten-Free

2 pounds firm, ripe peaches (6 to 8 peaches)
2 teaspoons grated lemon zest
2 tablespoons freshly squeezed lemon juice
1/2 cup granulated sugar
3/8 cup rice flour (GF) OR 1/4 cup all-purpose flour (non GF)
1 cup fresh blueberries

Crumble:

1.25 cups rice flour (GF) OR 1 cup all-purpose flour (non GF)
1/3 cup granulated sugar
1/4 cup light brown sugar, lightly packed
1/2 teaspoon kosher salt
1/4 teaspoon ground cinnamon
1/4 pound (1 stick) cold unsalted butter, diced

  • Preheat the oven to 350 degrees F.
  • Immerse the peaches in boiling water for 30 seconds to 1 minute, until their skins peel off easily. Place them immediately in cold water. Peel the peaches, slice them into thick wedges, and place them in a large bowl. Add the lemon zest, lemon juice, granulated sugar, and flour. Toss well. Gently mix in the blueberries. Allow the mixture to sit for 5 minutes. Spoon the mixture into buttered ramekins or baking dish.

  • For the topping, combine the flour, granulated sugar, brown sugar, salt, cinnamon, and the butter in the bowl of an electric mixer fitted with a paddle attachment. Mix on low speed until the butter is the size of peas. Rub the mixture with your fingertips until it’s in big crumbles, then sprinkle evenly over the fruit.
  • Place the ramekins on a sheet pan lined with parchment paper and bake for 40 to 45 minutes, until the top is browned and crisp and the juices are bubbly. Serve warm or at room temperature.

Recipe Adapted From Food Network, 2006 Barefoot Contessa