Breakast for dinner is a thing. I fondly remember my Mother making pancakes and sausage for dinner on occasion and we loved it. My oldest grandson loves breakfast for any meal and typically requested breakfast for all three meals on his birthday. One day he was at my house and asked for breakfast for dinner and what to make? I found this easy, yet delicious recipe, and we both enjoyed our unusual dinner. Eggs in Hole it is!
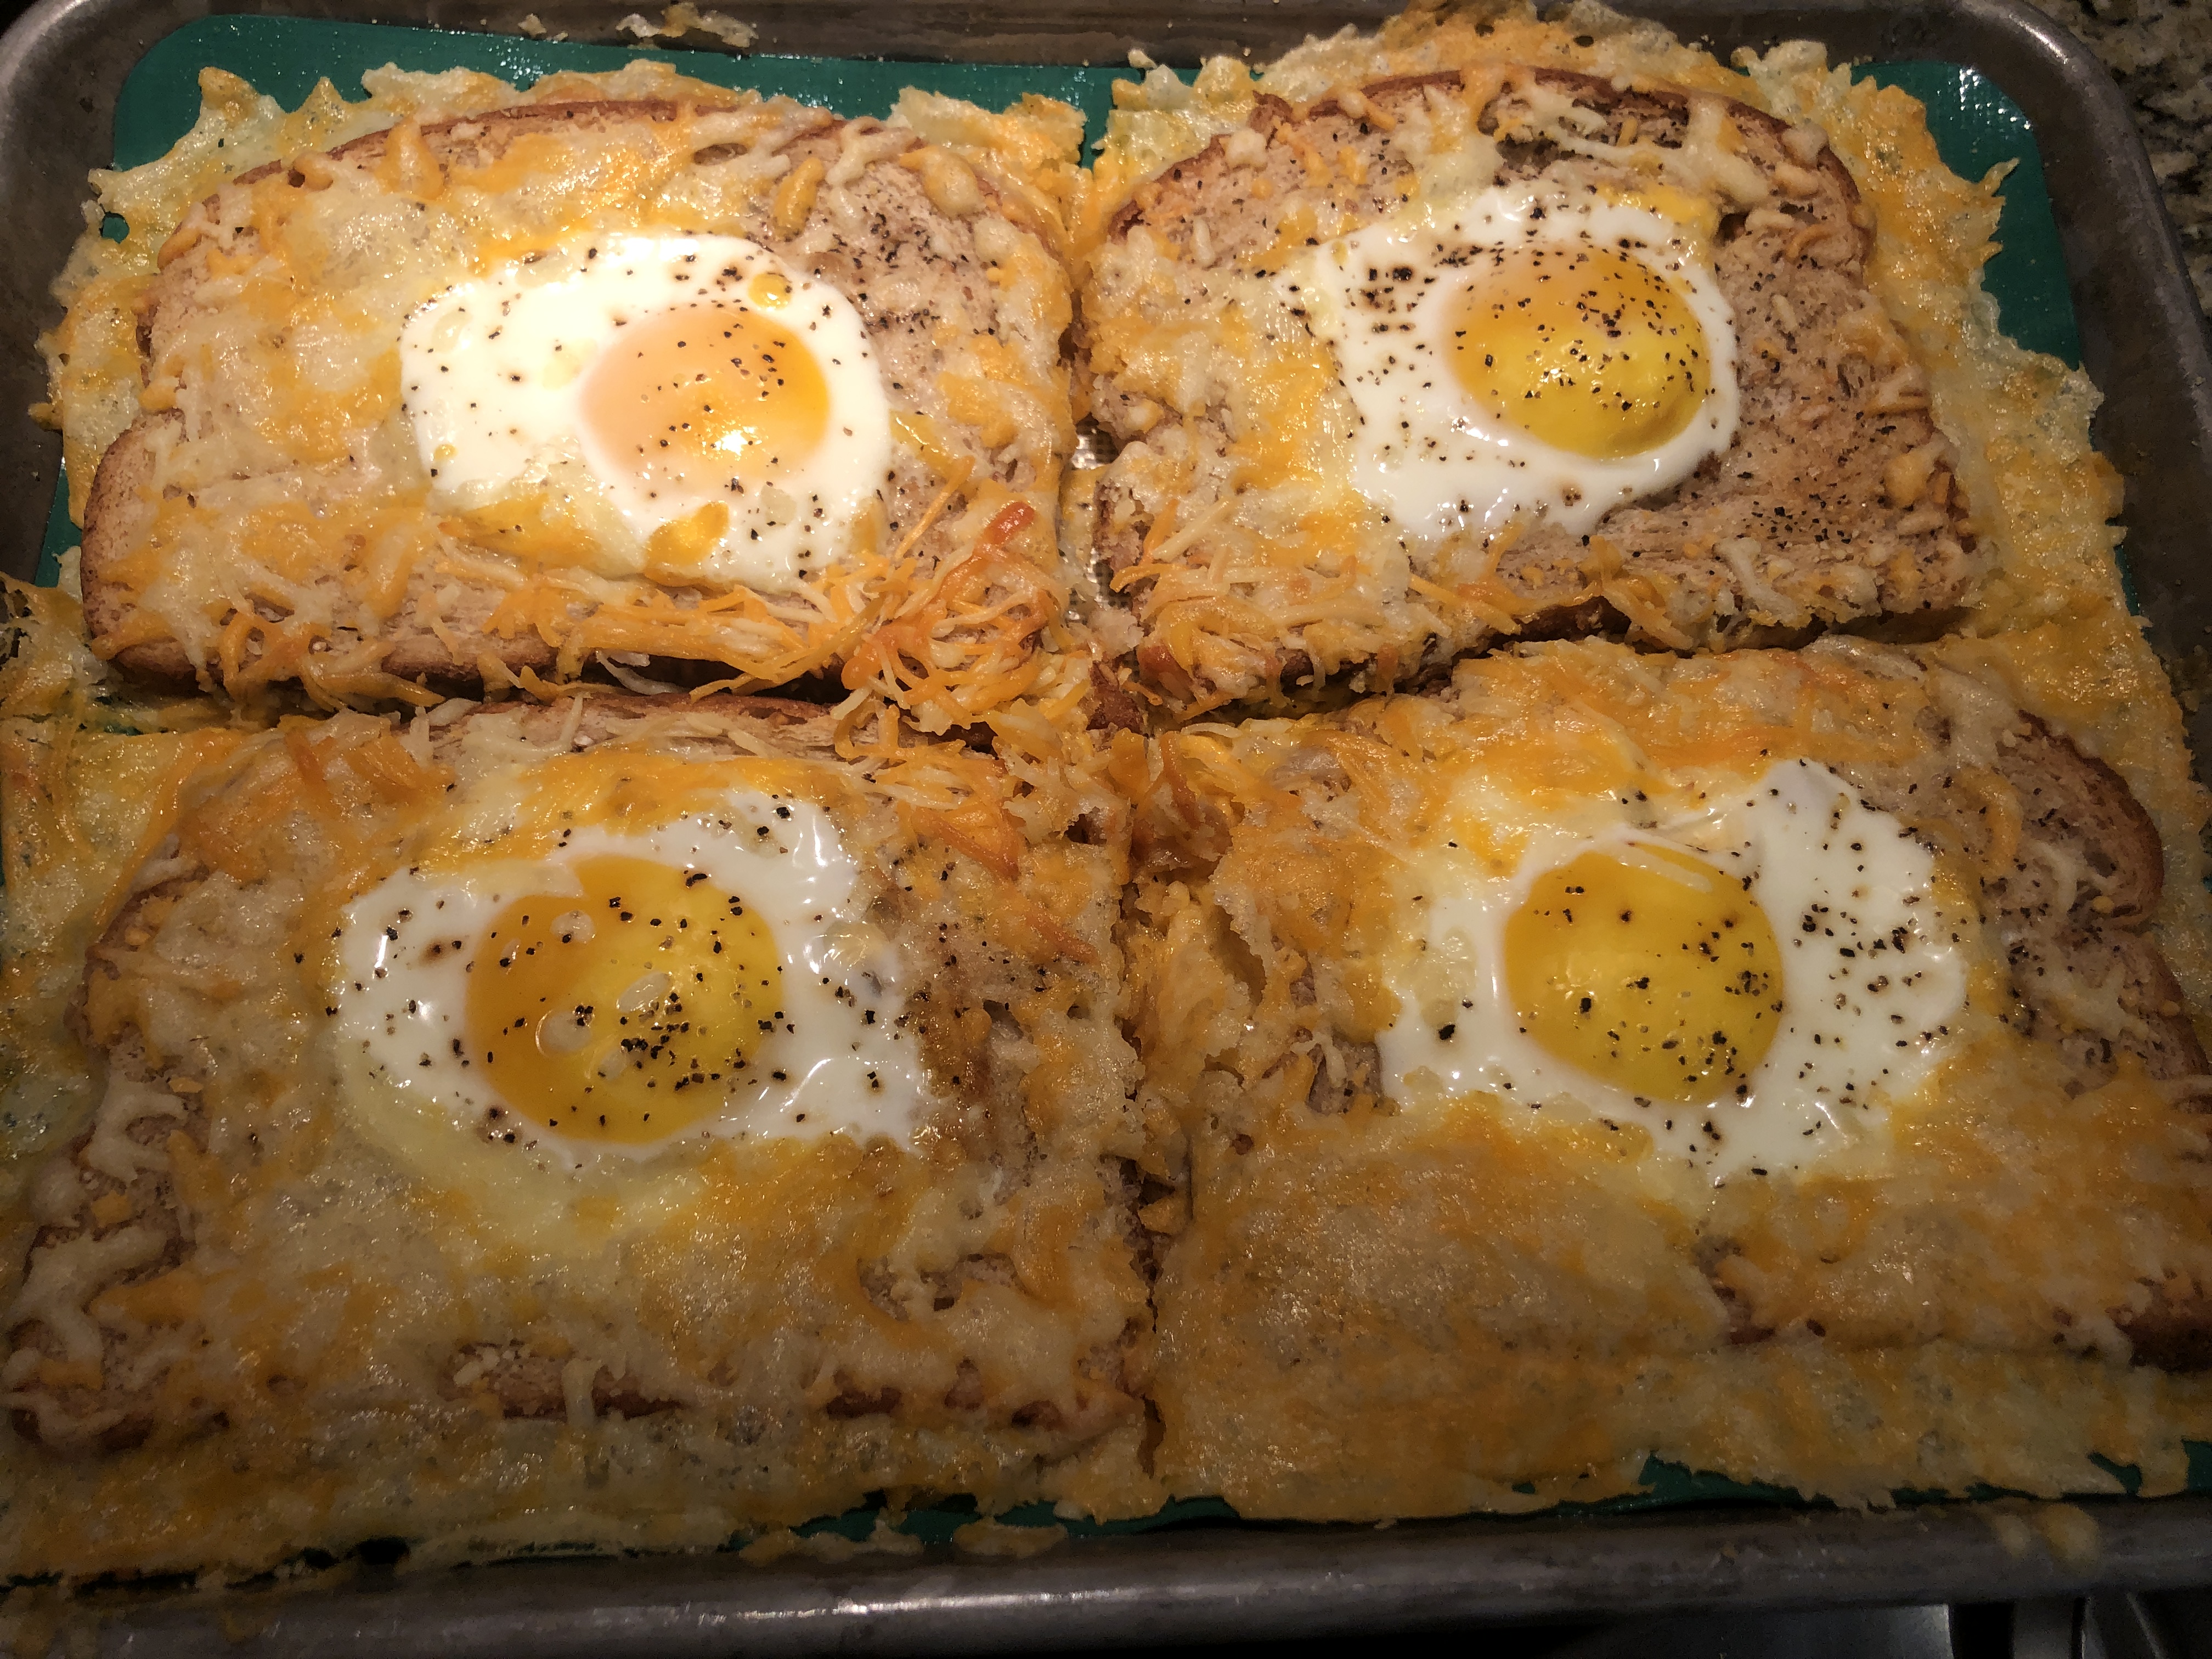
Sheet Pan Egg in a Hole
INGREDIENTS:
- 1 dozen eggs (I made 1/4 of a recipe)
- 12 slices bread
- softened butter
- seasoning like fresh-ground salt, pepper, onion powder, garlic powder
- 1 bag shredded cheese
DIRECTIONS:
- Preheat your oven to 350 degrees.
- Lay the non-stick silicone baking mat in your large baking sheet and spray the edges of your baking sheet with cooking spray (as the bread and cheese will touch the ends).
- Lay your slices of bread on the silicone baking mat and puzzle piece so they fit tight and nicely.
- Use the edge of your teaspoon to make a rectangle in the bread, pressing down hard to create a “well” where the egg will lay once cracked. Press down in the well to ensure the bread is as flat as possible, providing the egg as much room as it needs.
- Using a small basting brush, spread softened butter on the bread edges that weren’t pressed. The butter adds a wonderful flavor and helps the cheese stay on the bread.
- Season your bread all over.
- Crack an egg into each well for every piece of bread.
- Season lightly over top.
- Generously add the shredded cheese to all the buttered parts of the bread.
- Bake in the preheated oven on the top rack for 15-20 minutes.
- Place the pan on the bottom rack for 5-10 more minutes depending upon how you’d like your egg cooked.
- Slice and serve with your favorite spatula.
Recipe from CrazyAdventuresinParenting