Family Favorites · My Roots

Fresh Gooseberry Cobbler…worth the effort once a year

Gooseberry…a prickly bush with hard green fruit, very sour to the taste.  These green gems were not in my fruit repertoire growing up in Iowa.  When I moved to St. Joseph, MO after college, I was introduced to them but not a big fan. When I met my husband, and his Mother (referred to as Gamma), I was quickly educated on the value of the meager gooseberry.  They coveted a rare can of gooseberries at the grocery store for a pie or cobbler, toting a few cans back to relatives in North Carolina.

When we bought our home several years ago, we HAD to plant a gooseberry bush. Little did I know how prickly these bushes were, until our first harvest.  My arms looked like I had been attacked by a herd of cats.  Now it was time to clean the gooseberries. Holy smokes…it took flippin’ forever!  Each gooseberry has a stem and a brown beard (my term) that need to be removed from the berry. I LOVED it when Gamma visited during gooseberry season. She was content to sit in the shade and do ‘the dirty work’ of cleaning these little devils.  Missin’ you Gamma and not just at Gooseberry time!

I was happy to take it from here and make the gooseberry pie or cobbler, drowning the filling in white sugar to mask the very sour gooseberry flavor. The end result is a very tasty, unique, seasonal dessert.  The fresh gooseberry cannot be matched by a can of gooseberries, but will do if you are having tremendous gooseberry cravings.

This year, I decided to tackle the gooseberry harvest alone.  My 9-year-old Golden Retriever, Joe, decided to help.  His idea of ‘help’ is to guard the berries and then help himself to a gooseberry or two from the harvest.  I truly thought one bite of gooseberry would quickly send him off to another part of the yard.  I was wrong.  Joe LOVES fresh, sour, crunchy, gooseberries.  Silly boy!

For the two quarts of gooseberries needed to make the cobbler, it took over 2 hours of cleaning. Good thing I had a movie to watch!  Cleaning is the hard part, but making the cobbler itself is easy, peasy.  I split the recipe into two smaller pans so I could share one pan with others and save one pan for family.

Gooseberries…worth the effort…once a year (or so)!

GOOSEBERRY COBBLER

FRUIT FILLING

1 1/2 cups sugar
1/2 cup flour
1 teaspoon salt
2 quarts Gooseberries
3 tablespoons lemon juice
3 tablespoons butter

TOPPING

2 cups flour
2 tablespoons sugar
4 teaspoons baking powder
1 teaspoon salt
1/2 cup shortening
2/3 cup milk
1 egg, slightly beaten

  • Mix sugar, flour and salt; combine with berries and lemon juice. Pour into a greased 13x9x2″ baking pan; dot with butter.


  • Place in a preheated hot oven (400 degrees) about 15 minutes; be sure that mixture is hot and bubbling.
  • In the meantime, mix the topping. Sift together 2 cups flour, baking powder, sugar and salt. Cut in shortening until mixture resembles coarse meal.  Add milk and slightly beaten egg to dry ingredients. Stir with fork to blend well.
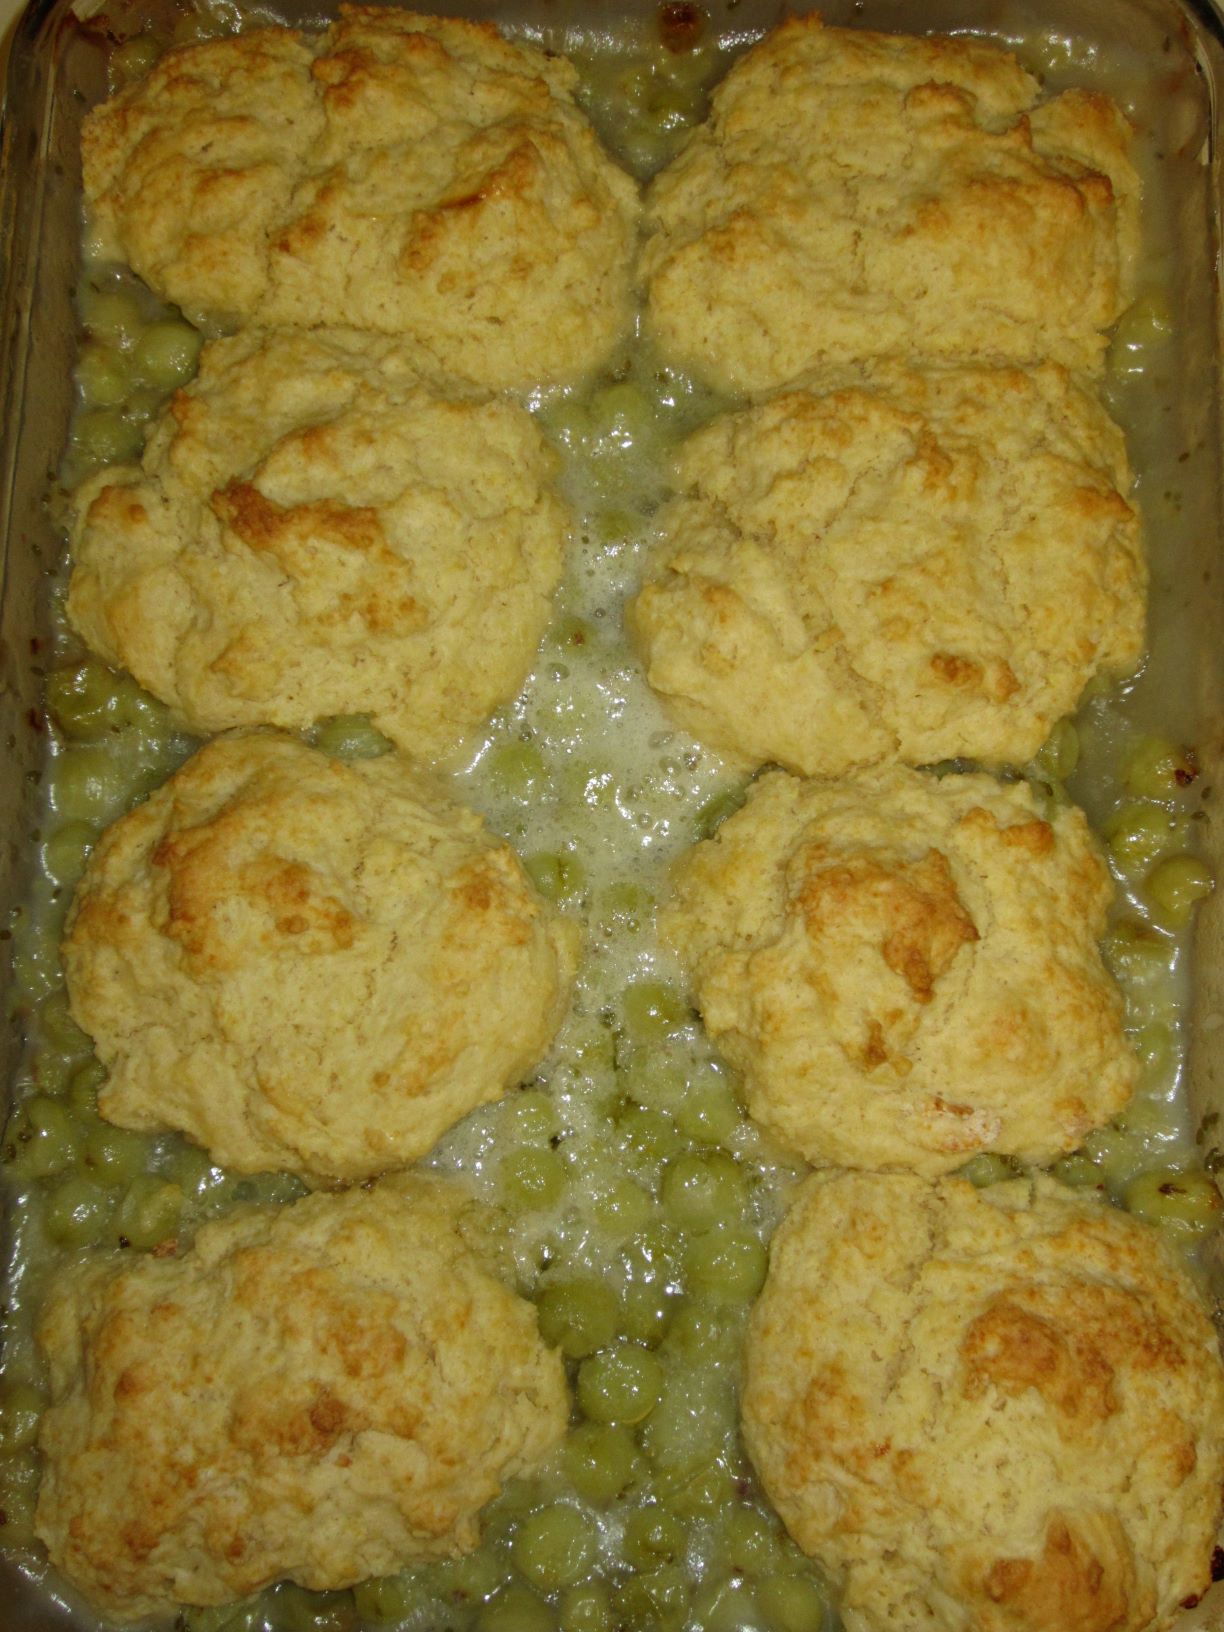
  • Remove hot fruit mixture from oven. Drop topping mixture onto hot berries, making 12 biscuits.

  • Return to hot oven (400 degrees); bake about 20 minutes, or until biscuits are browned.  Serve warm with ice cream.

Nicaragua · Vegetarian

Nicaragua…Introduction to Banana Jam…YUM!

What a delight to get up in the morning, dress and not worry about applying cosmetics or blow-drying my hair.  At least that is what I thought until I looked at my pictures when I returned home. YIKES!  That is why you are seeing more photos of food and scenery than of me.

Bananas and Poinsettas growing at FEV

I would wander to the dining area in the morning to enjoy a fresh banana (craving one now) and a hot cup of that coffee!  I take a moment to soak in the beautiful morning view while my travel buddies wander in, one by one, to convene for breakfast.

Morning view of the cloud forest from Tucan Lodge

This particular morning, we were served wonderful pancakes with fresh jams.  My absolute favorite was the banana jam.  Again, I wonder how I’ve never tasted banana jam.  Genius!

Pancakes with jams

When I returned home, I searched for Banana Jam recipes and found the following recipe in the Jamlady’s cookbook.  I made it.  I liked it.  We served it at daughter Sarah’s bridal shower along with scones and clotted cream.  It’s a cherished member of my growing collection of recipes.

Ingredients for Banana Jam

BANANA JAM

3 1/2 pounds of peeled bananas
3 cups sugar
1 1/2 cups fresh lemon juice
1 teaspoon butter
1/4 teaspoon cinnamon

l
Cooking Banana Jam

Mash the bananas and cook with the rest of the ingredients for 20 minutes. Stir continuously so the jam does not stick or burn. Cool. Jam will thicken. Optional: use food processor to blend.

I did not freeze or can the jam but ate it all fresh! My next experiment will be to use banana jam in homemade ice cream. YUM!

IMG_1391

Recipe adapted from Jamlady, ‘Jellies, Jams, and Preserves’

Family Favorites · New Favorite · New Traditions

Refrigerator Crock Salad…a slaw with many faces

My Mother occasionally made this salad, often with fresh ingredients from her garden.  The last time I made this recipe was 15+ years ago for a Christmas party.  This week I resurrected the recipe and tried it out in several ways.  Each combination was wonderful.

Refrigerator Crock Salad

1)  Side dish to barbecue ANYTHING

2)  Pairs very well with fish and would be GREAT on fish tacos

3)  On a sandwich (daughter Sarah’s fiancé, Kyle, put it on a turkey, cheese, and ham salad combo sandwich).  Sounds incredibly weird, but delicious!

Besides being delicious, this salad keeps in the refrigerator for several days.  In fact it just keeps getting better and better.

REFRIGERATOR CROCK SALAD

1 head green cabbage
2 green sweet bell peppers
2 red or orange sweet bell peppers
4 carrots
2 onions
2 teaspoons celery seed
2 cups white cider vinegar
2.5 cups sugar

  • Shred cabbage, peppers, carrots, onions in a large bowl.  Soak in salt water for 2 hours.  Drain well.
  • In a separate bowl, combine the vinegar and the sugar.  Pour over shredded ingredients and refrigerate.  Let sit for a minimum of 3-4 hours before serving.
Family Favorites · My Roots

Sugar Cookies…for your special Valentine

This was my Mother’s favorite sugar cookie recipe.  She made them every Christmas and frequently during the year.  They are melt-in-your mouth yummy!

I decided this would be a wonderful Valentine’s treat to share with friends and family. The traditional chocolates would have been nice, but nothing beats homemade cookies!

Wishing you a Valentine’s Day full of love and friendships!

SOFT SUGAR COOKIES

2 cups powdered sugar
2 cups white sugar
2 cups margarine
4 eggs
2 cups vegetable oil
1 teaspoon lemon extract
3 teaspoons vanilla
8 cups flour
8 heaping tablespoons flour
2 teaspoons salt
2 teaspoons baking soda
2 teaspoons cream of tartar
1/4 teaspoon nutmeg

  • Mix sugars, margarine, eggs, oil, and extracts together until well blended.
  • Sift together flour, salt, baking soda, cream of tartar and nutmeg and add to sugar mixture. Blend well and mix with hands when it gets too stiff to continue with mixer.
  • Roll dough into balls the size of a walnut. Put on cookie sheet and press with a glass dipped in sugar or press with glass and sprinkle with colored sugar.
  • Bake at 350 degrees until very light brown, about 8-9 minutes. Do not leave until brown or overbake. Cool.
Fresh baked sugar cookies

These cookies freeze wonderfully. I have often made for the holidays and freeze.