Our baby shower treats of last Saturday focused on baby-sized treats, including Mini Snickerdoodle Cupcakes. Who doesn’t love a Snickerdoodle cookie…so why not a cupcake? They could easily be adapted to a full-size cupcake without a problem. They are yummy, yummy in the tummy as I will soon say to my first Grandbaby.
MINI SNICKERDOODLE CUPCAKES
1 1/2 cups flour
1 1/2 cups cake flour (not self-rising), sifted
1 tablespoon baking powder
1/2 teaspoon salt
1 tablespoon ground cinnamon, plus 1/2 teaspoon for dusting
1 cup (2 sticks) unsalted butter, room temperature
1 3/4 cups sugar, plus 2 tablespoons for dusting
4 large eggs, room temperature
2 teaspoons pure vanilla extract
1 1/4 cups milk
Cinnamon Frosting
6 cups powdered sugar
2 teaspoons ground cinnamon
2/3 cup butter or margarine, softened
1 tablespoon vanilla
2 to 4 tablespoons milk (or more to achieve desired consistency)
Garnish
2 teaspoons granulated sugar
1/2 teaspoon ground cinnamon
Makes 98+ mini muffins.
Preheat oven to 350 degrees. Line standard muffin tins with paper liners. Sift together both flours, baking powder, salt and 1 tablespoon cinnamon.
With an electric mixer on medium-high speed, cream butter and sugar until pale and fluffy. Add eggs, one at a time, beating until each is incorporated, scraping down sides of bowl as needed. Beat in vanilla. Reduce speed to low. Add flour mixture in three batches, alternating with two additions of milk, and beating until combined after each.
Divide butter evenly among lined cups, filling each three-quarters full.
Bake rotating tins halfway through, until a cake tester inserted in centers comes out clean, about (10-15 minutes). (Cathy’s Note: Each oven varies greatly with mini cupcakes, so do a test run.)
Transfer tins to wire racks to cool completely before removing cupcakes. Cupcakes can be stored up to 2 days at room temperature, or frozen up to 2 months in airtight containers.
Frost mini cupcakes and sprinkle with cinnamon sugar.
Cupcakes are best eaten the day they are frosted. Keep at room temperature until ready to serve.
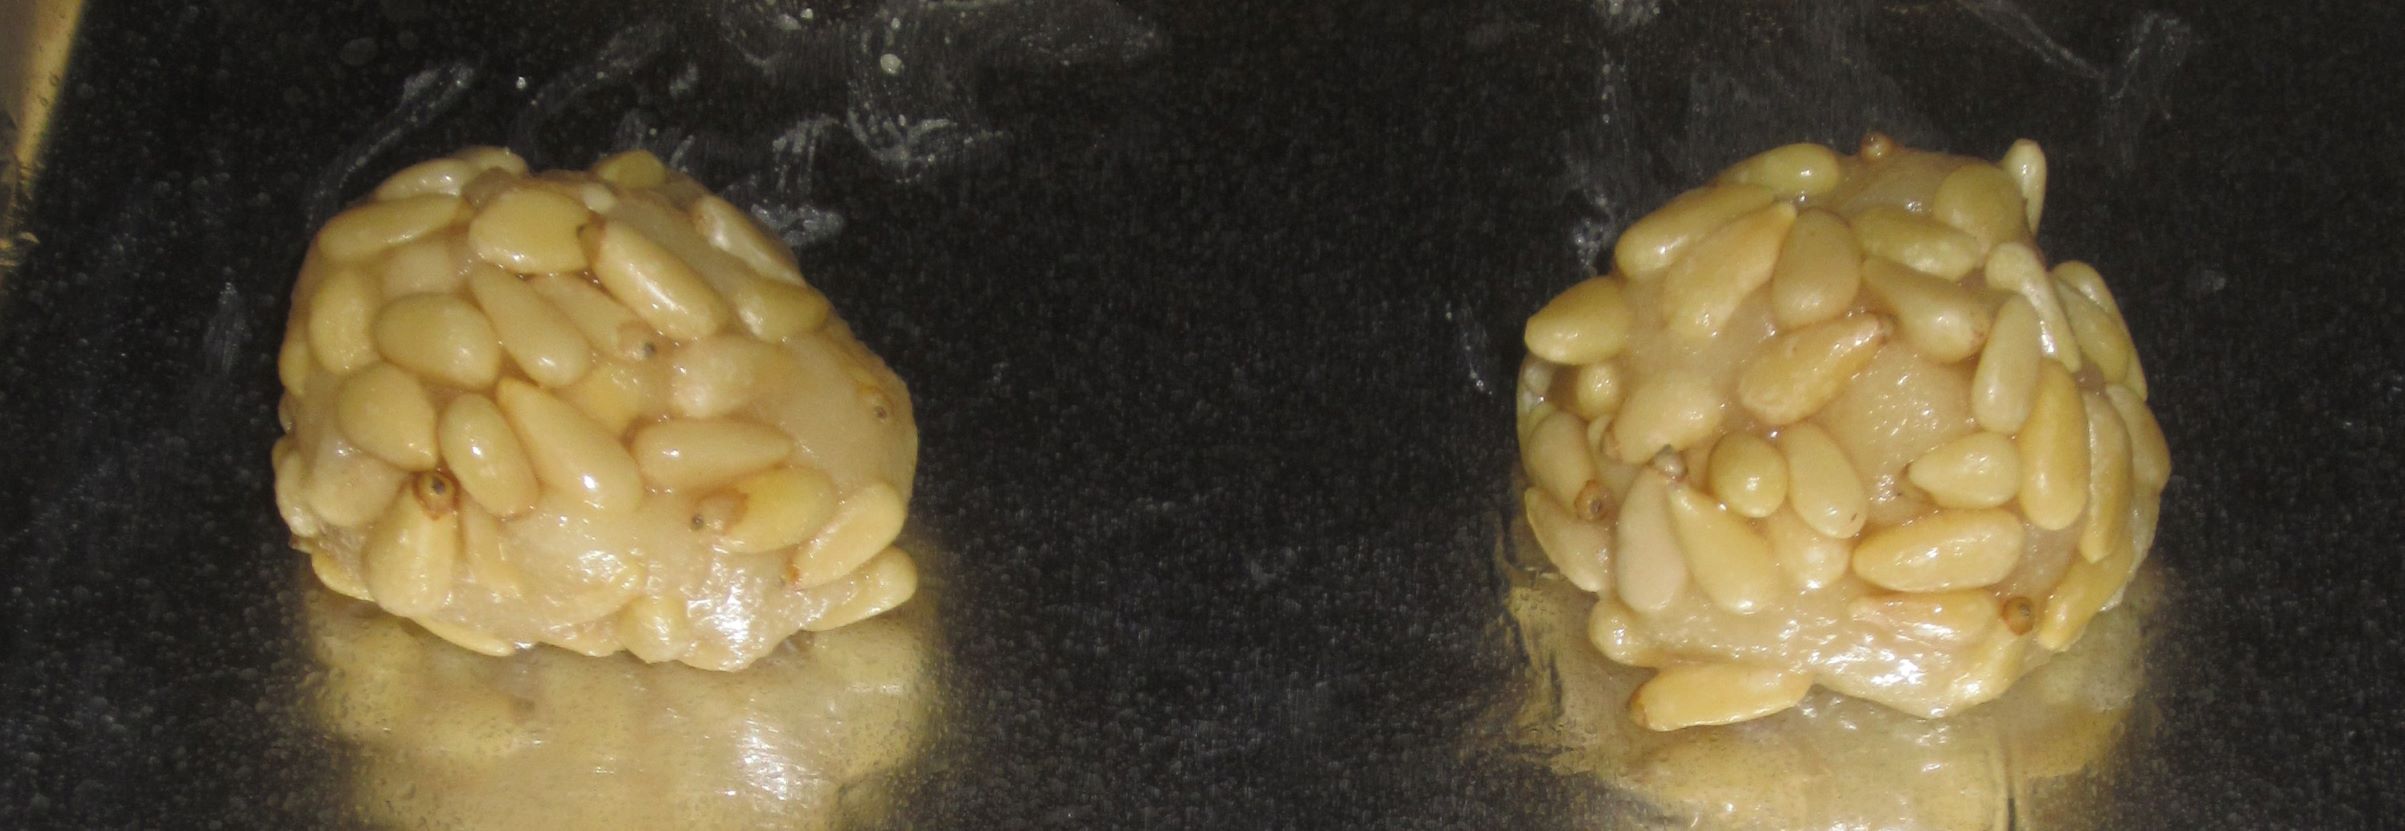
Italian Tony’s Market in the Denver area makes wonderful Pignoli. Pignoli cookies are an Italian American confection, similar to a macaroon and topped with pine nuts. This week I was in search of a recipe I could make them at home. There were many wonderful recipes but this recipe was my final choice. They were fantastic!
PIGNOLI COOKIES
12 ounces almond paste
1/2 cup white sugar
1 cup confectioner’s sugar
4 egg whites
1 1/2 cups pine nuts
Preheat oven to 350 degrees. Line 2 cookie sheets with foil; lightly grease the foil.
Mix almond paste and granulated sugar in food processor until smooth.
Add confectioner’s sugar and 2 egg whites; process until smooth.
Whisk remaining 2 egg whites in small bowl.
Place pine nuts on shallow plate. With lightly floured hands roll dough into 1 inch balls. Coat balls in egg whites, shaking off excess, then roll in pine nuts, pressing lightly to stick to dough.
Arrange balls on cookie sheets, and flatten slightly to form a 1 1/2 inch round.
Bake 15 to 18 minutes (watch carefully because each oven and baking pan is different) until lightly browned. Let stand on cookie sheet 1 minute. Transfer to wire rack to cool.
Peanut Blossoms have been a family favorite since I was a child. I loved them, my children love them and the tradition continues. What beats the combination of peanut butter and chocolate! It seems fitting to make a batch of peanut blossoms for your sweetheart with the famous Hershey KISSES as Valentine’s Day approaches.
I was curious about the origin of Hershey’s Kisses. Per Wikipedia, Hershey’s Kisses milk chocolates were introduced in 1907. The candy got its name because the machine made kiss sounds as the chocolate kiss is created.
These cookies are good anytime of year. What is sweeter than a Valentine’s ‘kiss’!
PEANUT BLOSSOMS
1/2 cup white sugar
1/2 cup brown sugar
1/2 cup shortening
1/2 cup peanut butter
2 tablespoons milk
1 egg
1 3/4 cups flour
1 teaspoon baking soda
1/2 teaspoon vanilla
1/2 teaspoon salt
chocolate stars or chocolate kisses
Combine all ingredients in a bowl (except chocolate) and mix on low speed until well blended. Shape in round balls and roll in sugar.
Bake on ungreased cookie sheet for 10-12 minutes at 375 degrees.
Remove cookies and press in chocolate star or kiss in each cookie while cookies are still hot.
Pear Cake made with seasonal pears is a true treat. This recipe, from http://www.usapear.com was a great find and delicious as a morning coffee treat or as a seasonal dessert.
PEAR CAKE
10 tablespoons unsalted butter
1/2 cup brown sugar
4 pears, peeled, cored and wedged
1 tablespoon lemon juice
1 1/2 cups flour
1 1/2 teaspoons baking powder
1/2 teaspoon salt
1/2 teaspoon cinnamon
1/2 cup sugar
2 eggs
1 teaspoon vanilla
1/2 cup milk
Preheat oven to 350 degrees.
Grease a round baking pan with 2 tablespoons of butter. Sprinkle with brown sugar.
Brush the pear wedges with lemon juice and arrange in the bottom of the baking pan.
Combine flour with baking powder, salt and cinnamon, Set aside.
Using a mixer, beat the remaining butter with sugar until fluffy. Stir in eggs and vanilla.
Add flour mixture and milk alternating the ingredients slowly. Continue to beat on low-speed after each addition.
Spoon batter evenly over pears in pan.
Bake for 30 minutes OR until toothpick inserted in the middle comes out clean. (My oven required a longer baking time.)
Cool before inverting onto serving platter. Decorate with walnuts or serve with whipped cream as coffee cake or dessert.
Salted Caramel is a taste bud extravaganza! Combining salted caramel with chocolate has to be a winner.
A few weeks ago I discovered this recipe on Pinterest and, of course, had to try it. I made a batch to give as gifts but stashed a few servings away for me, too. It’s delicious. Add the sea salt to your taste and…BONUS…you have to try it to assure that the combination is absolutely perfect.
A cup of salted caramel hot chocolate mix for a long winter’s night…mmmm!
SALTED CARAMEL HOT CHOCOLATE MIX
2 1/2 cups granulated sugar
3 tablespoons pure vanilla extract
1 1/2 cups good quality Dutch cocoa powder
1 to 3 tablespoons good sea salt (I used 1 1/2 tablespoons)
1 cup dry milk powder
3/4 cup packed light brown sugar
10 ounces good quality bittersweet chocolate or chocolate chips
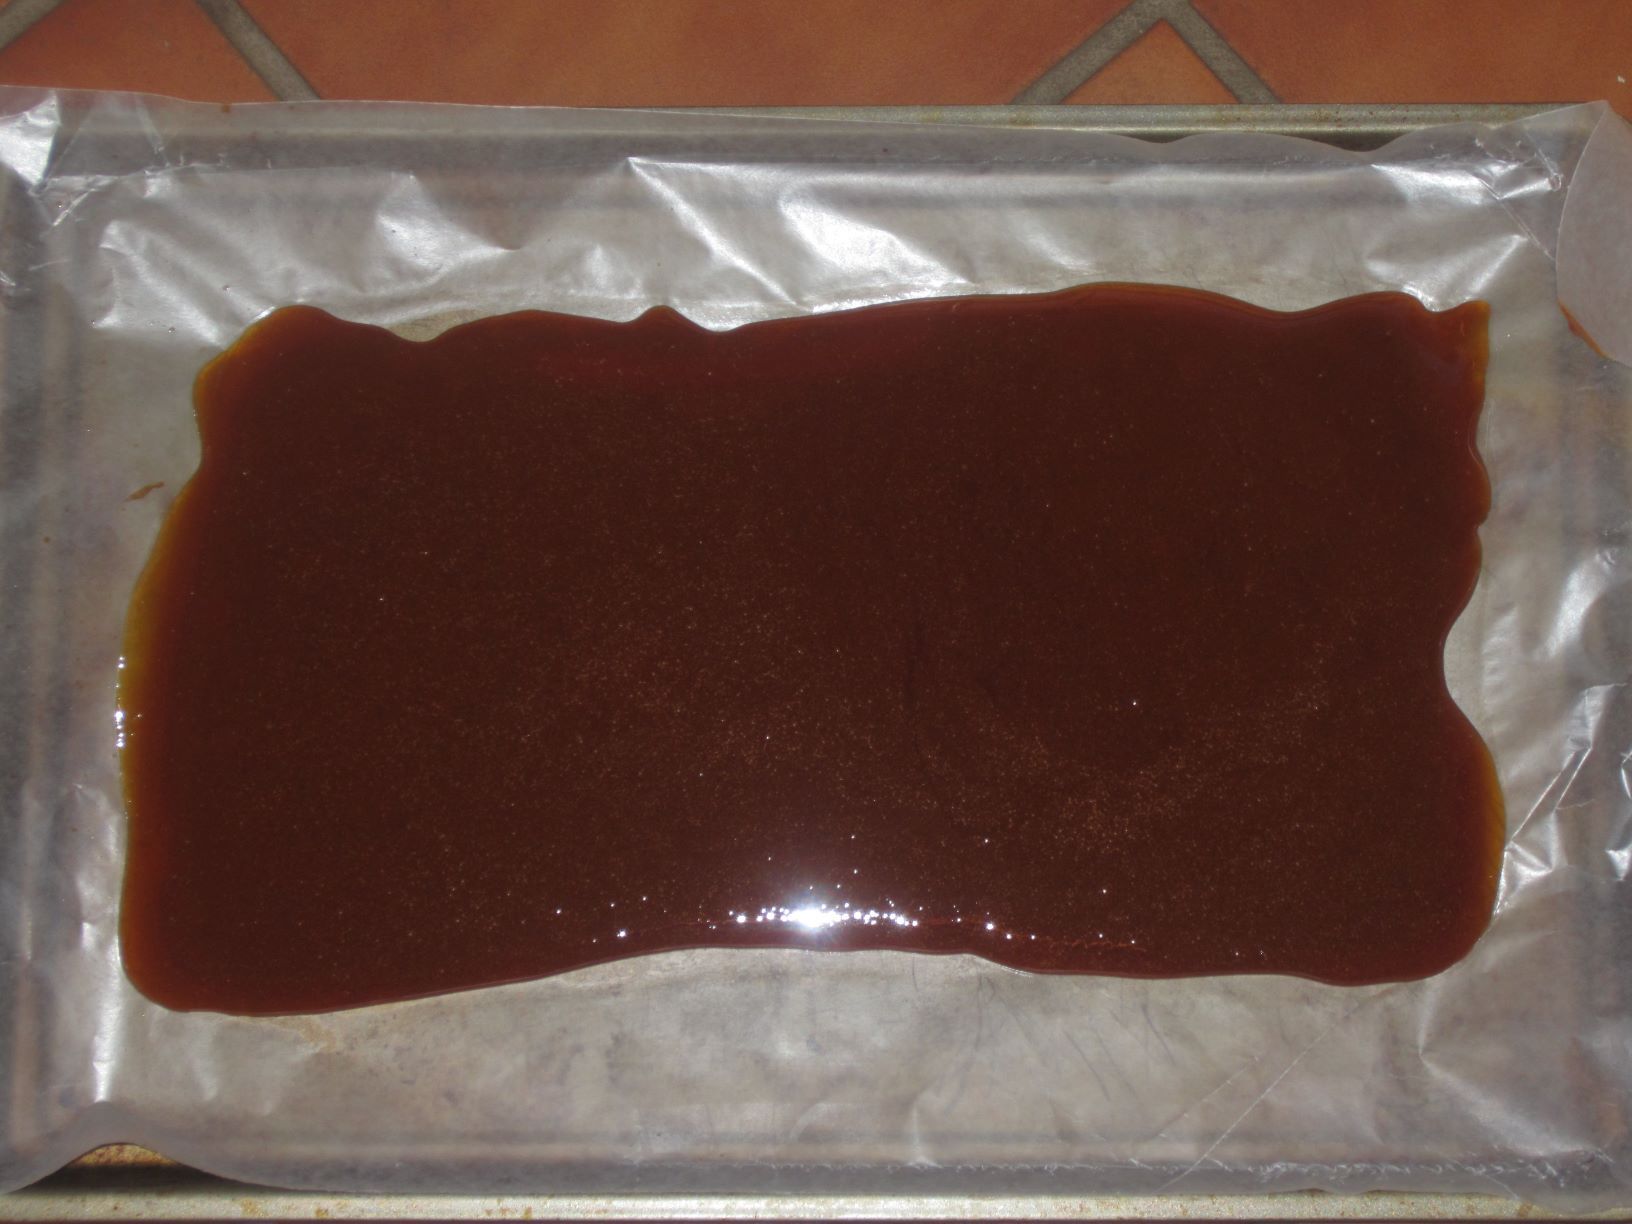
Line a rimmed baking sheet with parchment paper; set aside.
Heat the 2 1/2 cups sugar in large, heavy pan, over medium heat. Stir often.
When the sugar begins to melt, continuous stir (or swirl the pan) to melt without burning. The sugar seems to crystallize but it will melt to a deep amber color after 15-20 minutes.
Remove the pan from the heat and carefully add the vanilla (it will spatter). Whisk the caramel until smooth again, then immediately pour in the lined baking sheet. Allow it to spread without touching the sides. Set aside and let the caramel harden, at least 1 hour.
When ready to make the mix, use the back of a large spoon to tap the caramel several times into small broken pieces that can fit into the feeding tube of a large food processor.
Turn the processor on, and while running, feed the caramel pieces into the tube so the processor pulverizes the caramel into a fine powder. Continue to add the pieces, a few at a time, until it is completely powder (a cloud of caramel dust will float out of the tube). Turn the processor off and follow the next steps to complete the mix.
Add the rest of the ingredients, except the chocolate, into the food processor with the caramel powder. Replace the lid and process until smooth.
Add the chocolate to the bowl and process again until the mixture is a fine powder.
At this point, I made a cup to taste to assure I added enough sea salt. Originally, I started with 1 tablespoon and after tasting, I added another 1/2 tablespoon to the mixture.
Store in an airtight container in a cool, dry place, for up to one month. To serve, stir 3 tablespoons mix into 1 cup hot milk.
Adapted from Pennies on a Platter 2007; Adapted from Mom It Forward
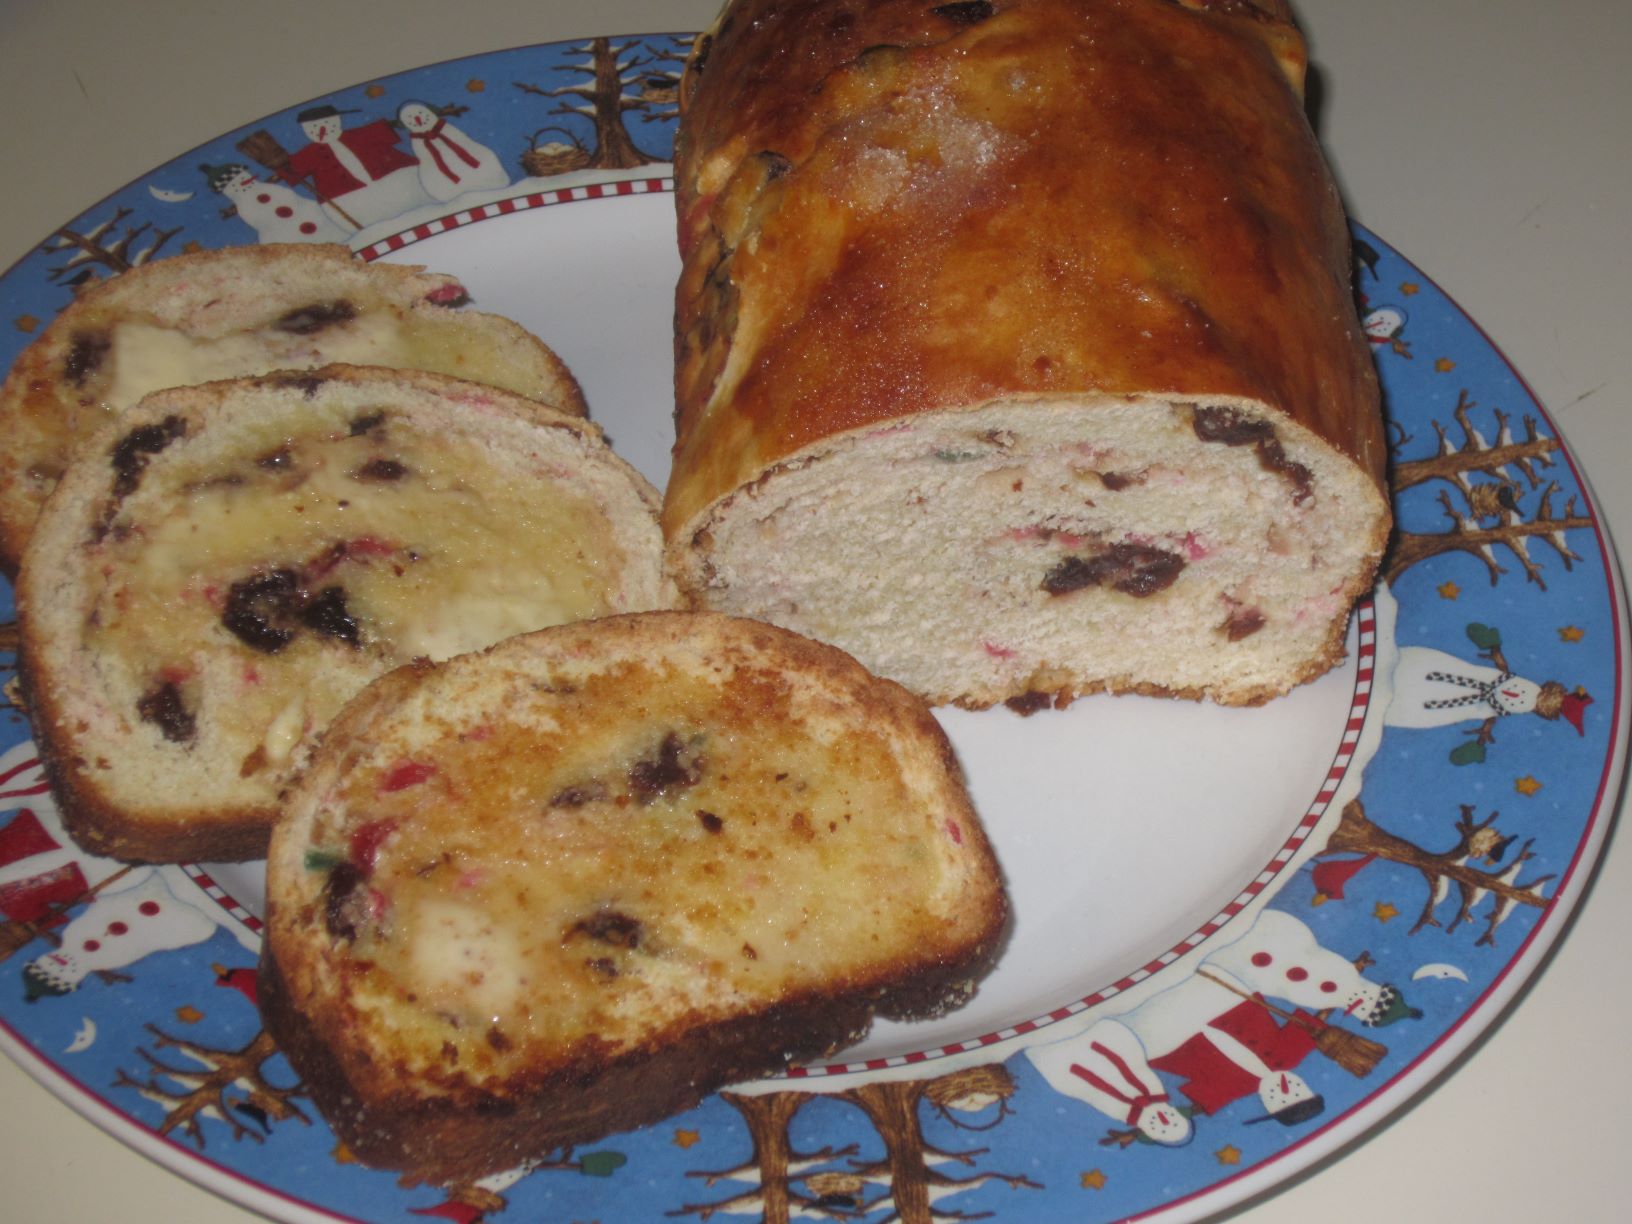
Norwegian Christmas Bread (Julekake) brings back fond memories of our elderly Iowa friends, the Butlers. Growing up, Anna would bake Julekake, Kringla, and Lefse to share with friends. She would brew a strong cup of coffee for adults and children to enjoy with the seasonal treats. A cup of hot coffee with a toasted slice of Julekake and butter, at Anna’s oak table was the best. Today, I sit at the same oak table in my dining area thinking of the wonderful stories and memories created in that small farm-house so many years ago.
Kringla is an annual tradition with Julekake only every few years. Kneading bread dough is hard for me so I’ve included, along with the traditional recipe, my version for the bread machine. This year I borrowed daughter Sarah’s Kitchen Aid mixer to make the traditional recipe, which I split into two parts to accommodate the smaller size of the mixer.
NORWEGIAN CHRISTMAS BREAD
This is the original Christmas bread recipe from Norwegian family friend, Anna Butler
2 packages dry yeast
2 teaspoons salt
1/2 cup lukewarm water
1/2 cup chopped citron or candied pineapple
3 cups scalded milk
1/2 cup butter
2 cups raisins
1 cup sugar
1/2 cup chopped candied cherries
2 beaten eggs
1/2 teaspoon crushed cardamom
10 to 11 cups flour
Dissolve yeast in warm water.
Scald milk and then add butter, salt and sugar. Cool to lukewarm. Add to yeast mixture and add 1/2 flour and eggs. Beat well.
Add fruit and cardamom and remaining flour to make light dough. Knead and place in a greased bowl. Let rise until light.
Knead and let it rise again.
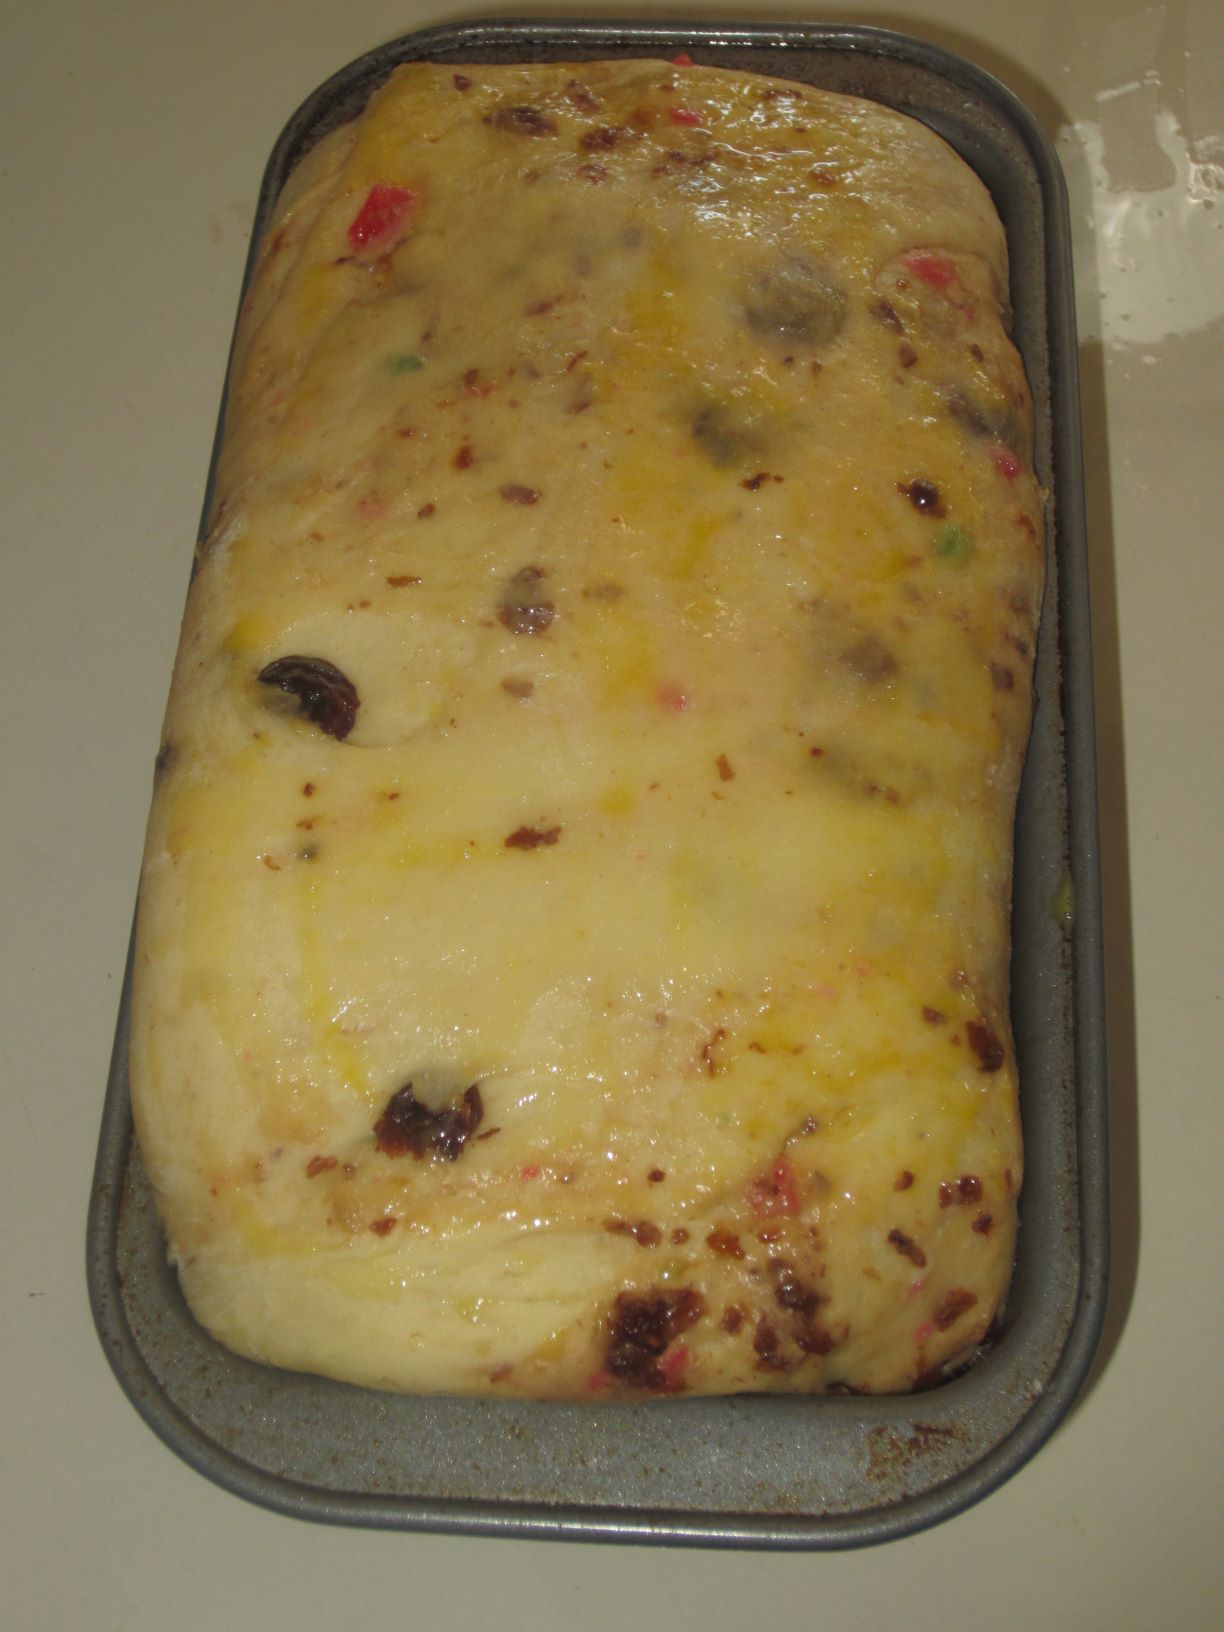
Shape into 5 loaves and place in greased bread pans. Let rise 1 hour or until light. Brush tops with egg yolk mixture of beaten egg yolk and water.
Bake at 375 degrees for 40-45 minutes or until toothpick comes out clean. After removing from oven, brush top with melted butter and sprinkle with cinnamon and sugar
NORWEGIAN CHRISTMAS BREAD (ADAPTED FOR THE BREAD MACHINE)
This is a conversion of the original Christmas bread recipe from Anna Butler
1/6 cup lukewarm water
1 cup scalded milk (cooled to lukewarm)
1/3 stick melted margarine
1 small beaten egg
1/3 cup sugar
1/2 teaspoon salt
1/6 teaspoon cardamom
3 to 3.3 cups flour
1 package yeast
2/3 cup raisins
1/6 cup citron
Place ingredients in bread machine in the order given but put raisins and citron aside.
Start bread dough in knead mode and add raisins/citron when your bread machine prompts for add-ins.
Peanut Brittle was a Christmas tradition for my Mother. As a matter of fact, she would make so many candies to share with the neighbors, family and friends. Her home-made candy traditions included the peanut brittle, divinity, chocolate fudge, peanut butter fudge, and caramels. I’ve gained 10 pounds just thinking about it…and this doesn’t even include the list of cookies and breads she would make! She would decorate a box and include a sampling of all of her wonderful goodies.
While I wish I could do the same, I know that I would be sampling everything a little too much so only make a few of my favorites this year. Peanut Brittle is a favorite and at least it has ‘some’ protein, right?
Whatever your traditions, continue and share the memories or your childhood with your children and encourage them to create their own traditions.
PEANUT BRITTLE
1 cup corn syrup
1 1/2 cups raw peanuts
1 tablespoon butter
1 cup white sugar
3/4 teaspoon salt
1 teaspoon baking soda (added after candy has cooked)
Combine everything but peanuts and baking soda, and cook over medium heat until sugar is dissolved.
Add raw peanuts. Boil and stir constantly with wooden spoon about 15-20 minutes.
Cook to hard crack stage (300 degrees). Remove from heat and add 1 teaspoon baking soda.
Don’t stir much after you add the baking soda.
Pour in large buttered cookie sheet and spread out to corners fast with hands while hot and place quickly on cold table, cement or surface until foam disappears and candy hardens.
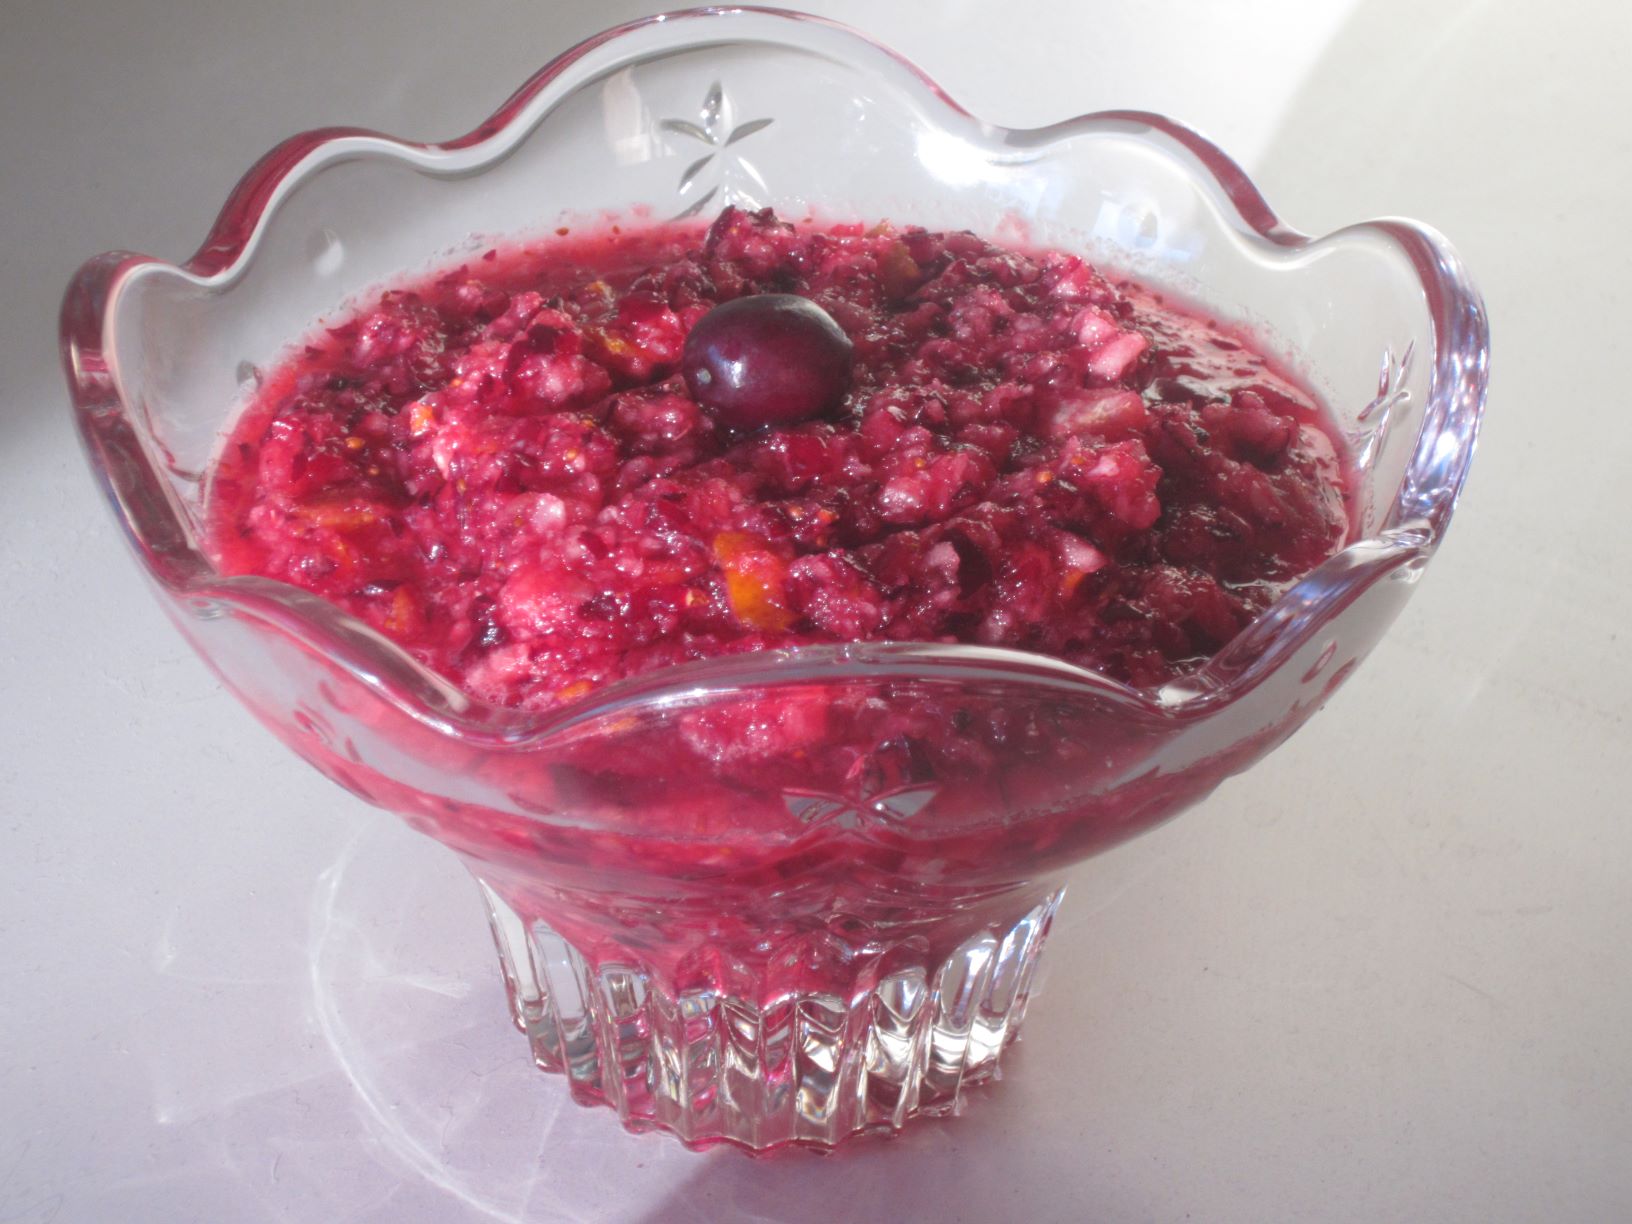
Cranberry relish is Thanksgiving tradition. My Mother always served fresh cranberry relish and I have continue the tradition. The relish is tart and crisp, a nice contrast to the savory turkey, gravy, and dressing. If you prefer a sweeter relish, add more sugar to taste.
As I prepare the relish, I wondered how my Mother chopped the ingredients without our Food Processors and the I remembered…she used the cast iron food grinder…which I still have. It worked beautifully AND helped build those arm muscles. If only I had a place to attach the grinder so I could use it!
This Thanksgiving, as always, be thankful for our families, our health, our friends and that we have the joy of sharing Thanksgiving with loved ones!
FRESH CRANBERRY RELISH
1 bag fresh cranberries
1 red apple
1 orange
1/2 to 1 cup sugar (to taste)
A day or two before serving, rinse the cranberries. Remove any soft or blemished cranberries.
Wash and core red apple and chop into large chunks.
Wash and halve and orange. Remove white membranes and slice off top and bottom peel of orange. Chop into large chunks.
Place cranberries, apple, orange and sugar in food processor and chop until coarsely ground. Chill for a day or more and serve.
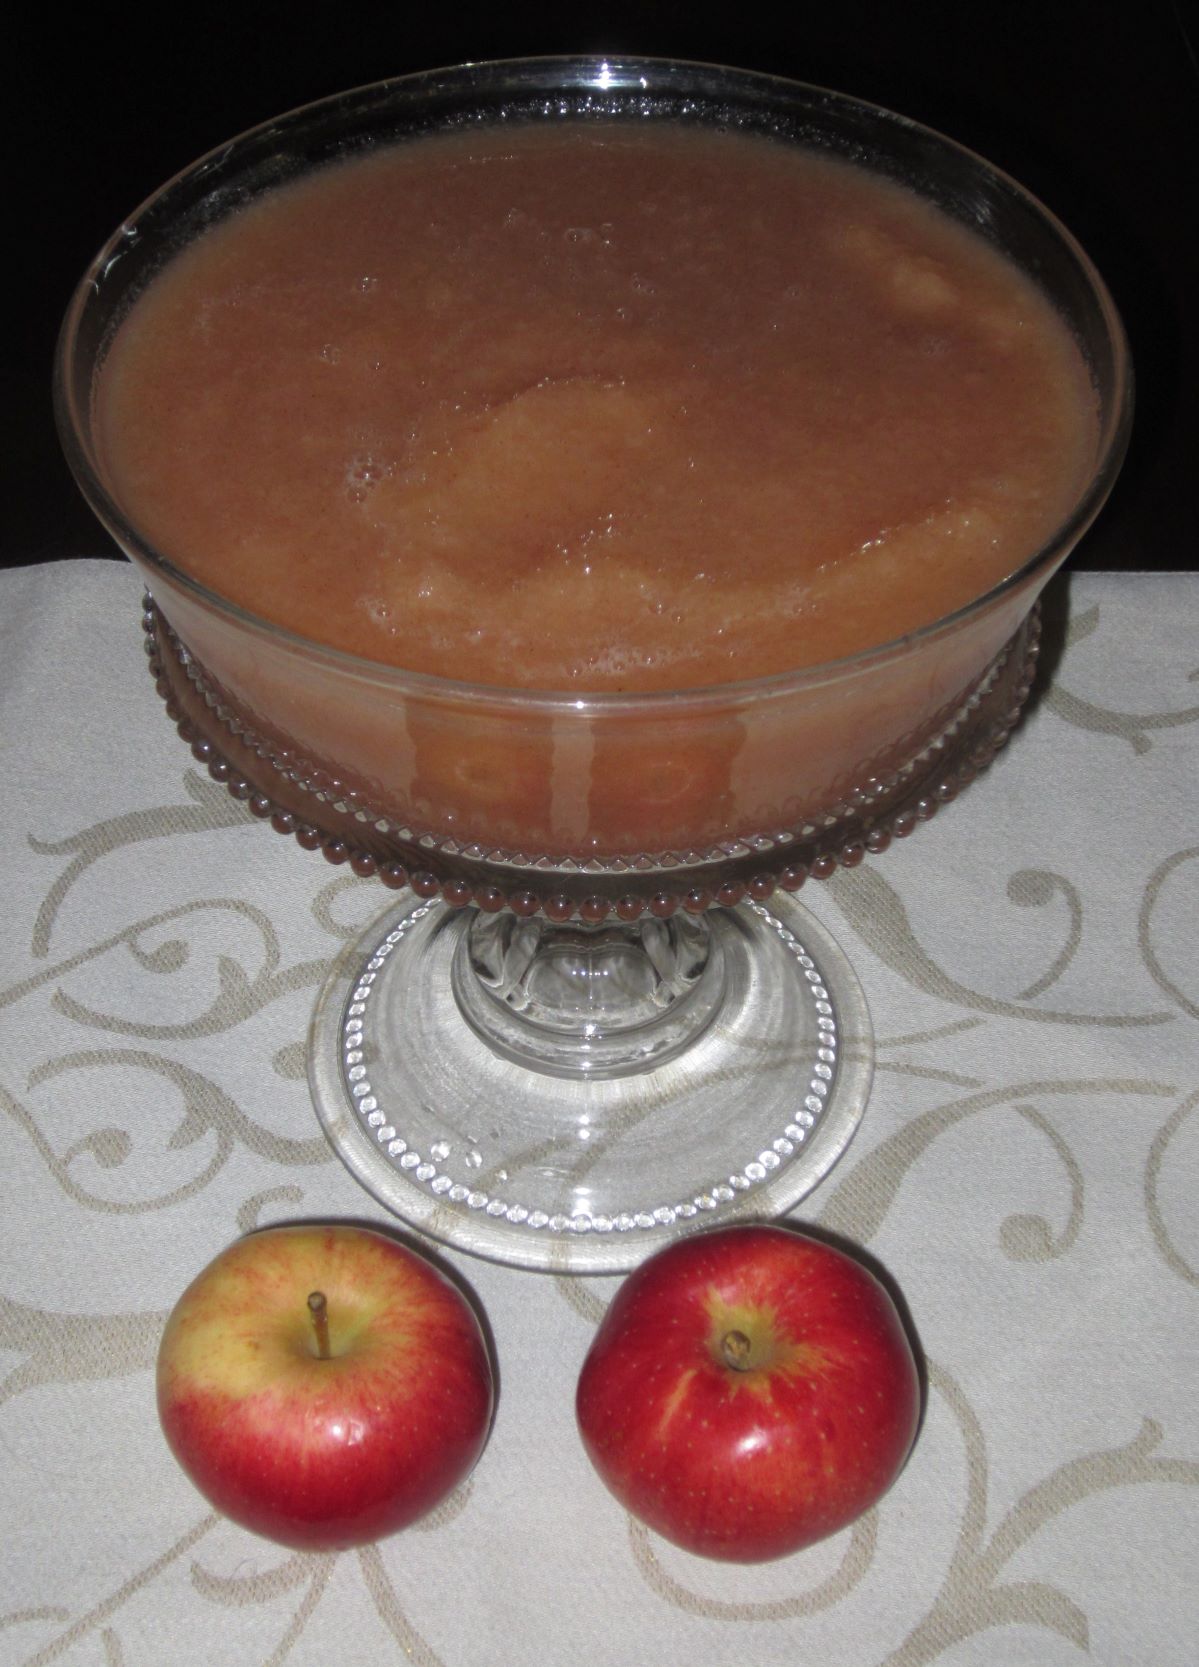
Fall is in the air and the apples are fantastic. What a perfect time to make fresh applesauce just like Mom used to make. I’m honored that this tradition continues as older daughter, Megan, made this year as well.
A trip to the Farmer’s Market for fresh apples and a little time and you’re ready to go.
I’m fortunate enough to still have the vintage colander sieve with wooden pestle my Mother used for many years, making quick work of making ultra-smooth applesauce. I have even cooked the apples with the skin on (and sometimes with the seeds) knowing that the colander/sieve will strain out the skin and seeds.
FRESH APPLESAUCE
8 apples (Granny Smith’s work well–but use what you have)
1 cup cold water
1 teaspoon cinnamon
sugar to taste (or none if you prefer)
Wash the apples under cold water. Peel and core each apple and cut into smaller pieces. Put apples, water, and sugar in saucepan.
Cook over medium heat. When the water begins to boil, turn down heat to medium low to simmer and add cinnamon. Cover with lid and lower heat again to keep from sticking. Stir often while cooking about 40 minutes. Add more water if needed.
Use a vintage sieve and pestle, potato masher (or food processor) to mash apples into smooth, thick sauce.
Serve warm or chill in refrigerator. Freezes well.
My sister-in-law, Betty, gets all the credit for making my trip to Nicaragua a reality. Betty has kindly shared the following information about her Mother’s (Gamma’s) Fudge Recipe and her introduction of the recipe to Nicaraguan families in San Ramon, using local, ground cocoa beans.
Cocoa Beans in Nicaragua
————————————–
My Mother had a way with Hershey’s cocoa powder. It was a cupboard staple, allowing a host of unique concoctions to be served in our family kitchen. There was chocolate gravy, made in a skillet from a roux of flour, sugar, and cocoa powder laced with milk and butter. It had a certain satin sheen when ready to be served for our before-school breakfast. Yikes! There was also an ugly chocolate pie, made with cocoa powder, sugar and butter pats folded simply into pastry and baked. Yum! Nothing, however, competed with her five-ingredient fudge, ready in 20 minutes if one of the family developed an after-dinner sweet tooth. We didn’t often have layered cakes or fruit pies, but we had fudge to die for.
Gamma’s Fudge in Nicaragua
Family legend says that during the Depression and the rationing of sugar, that the prized candy was coveted – so much so that a sad tale is told that while “beating the mixture” the sauce pan capsized into the dirty kitchen sink while Mother attended to a baby’s wailing – only to have the cry equaled by the disappointed older brother, Karl, who awaited the prized fudge.
Most of the family still loves Gamma’s Fudge, especially thinking of it and Buttermilk Fudge at Christmas-time when she carefully rationed it among families. I’ve made it for kids and grandkids. I even made it with Nicaraguan women when we recently visited, with Cathy, in the small town of San Ramon. Processed chocolate candy is not affordable to the locals, so I taught three different households how to make fudge using their own ground cocoa beans, their local sugar and dairy and butter or margarine. Thankfully, vanilla extract was for sale, a spoonful at a time, at one of the many tiny shops lining the four streets of San Ramon. The fudge was a big hit – and I am hoping some were able to make it into a cottage industry – or maybe just into a new family tradition.
Teaching Fudge Making in one Nicarguan home
Teaching Fudge Making in a second Nicaraguan Home
GAMMA’S FUDGE (Spanish)
In a saucepan, combine:
2 C. sugar
1 C. milk
4 T. cocoa
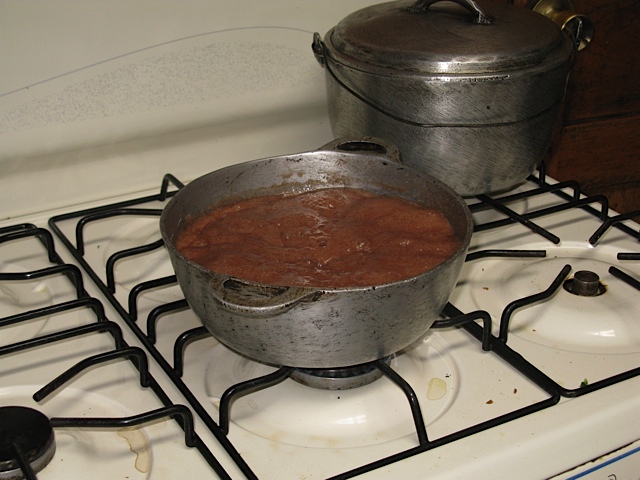
Heat over medium-high heat, stirring to blend until the mixture reaches a boil. Then adjust heat to maintain a low boil. Check mixture frequently until it begins to thicken, but do not stir too vigorously as the mixture will turn grainy. After about 15 minutes, check to see if the mixture forms a ball when a teaspoonful is dropped into a glass or cool water. When you are sure the chocolate ball is forming and there is loss of brightness to the mixture, turn off heat, then add:
4 T. butter or margarine
1 T vanilla or vanilla extract
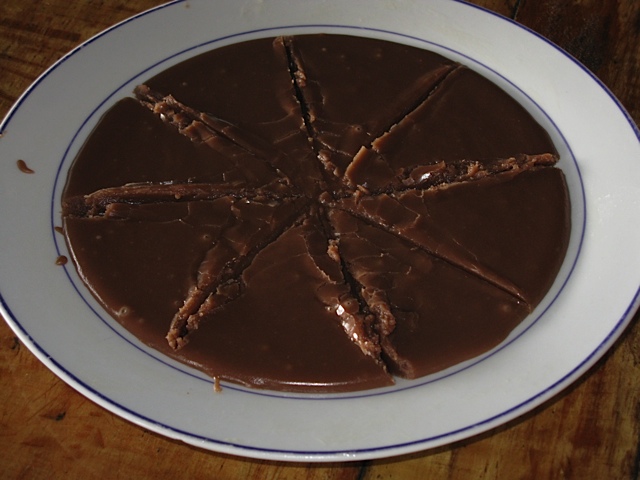
Hand beat the mixture within the tilted saucepan until it thickens and forms folds when dropped from spoon back into the mixture. When very hard to beat, pour the mixture on a plate that has been greased with a little margarine. Let stand for 30 minutes before cutting into 1-inch squares.
If for some reason the fudge does not harden, use the crumbles as chips in cookies or as sprinkles on top of ice cream. This recipe can also be used to make a fudge sauce when reheated with a little milk or cooking stopped before the mixture is at hard-stage.
Delicious!
DULCE DE AZUCAR DE GAMMA
Simple ingrediente de 5 Fudge
En una cacerola, combine
2 C. azúcar
1 taza de leche
4 T. cacao
Calienta a fuego medio-alto, revolviendo ocasionalmente para mezclar, hasta que la mezcla llegue a hervir. A continuación, ajuste de calor para mantener a fuego bajo, para comprobar si la mezcla de chocolate, cuando cayó en el agua, forma un grupo de bolas. Asegúrese de no mezclar con demasiada frecuencia, sin embargo, como se puede convertir en dulces granulada.
Cuando uno está seguro de que el chocolate es la combinación de una pelota, así como la pérdida de su brillo, apagar el fuego, añadir
4 T. mantequilla o margarina
1 T de vainilla o esencia de vainilla
Mano batir la mezcla hasta que espese y forma pliegues cuando se deja caer por cucharada de nuevo en su mezcla. Cuando muy difícil de batir, vierta la mezcla en una placa que ha sido untada con un poco de margarina.
Deje reposar durante 30 minutos, luego se corta en cuadrados de 1 pulgada.
Si por alguna razón no se endurecen, se derrumba como el uso de las cookies o en helados. También se podría utilizar como una salsa de recalentamiento con un poco de leche.
Sin embargo, esta consta de 5 ingredientes simples y la clave es cómo late el tiempo suficiente que sólo “establece” una vez que se vierte en el plato.