In 2020 I planted golden beets for the first time in my garden. I love a fresh beet and goat cheese salad but the big surprise for me was how delicious beet greens are.
My friend, Jan, told me about a Swiss Chard with Tahini recipe, referenced below, which I adapted to use with beet greens, minus the extra sauce. I made it several times last year and will be making it every year that I grow beets or can purchase beets with greens. Out of this world!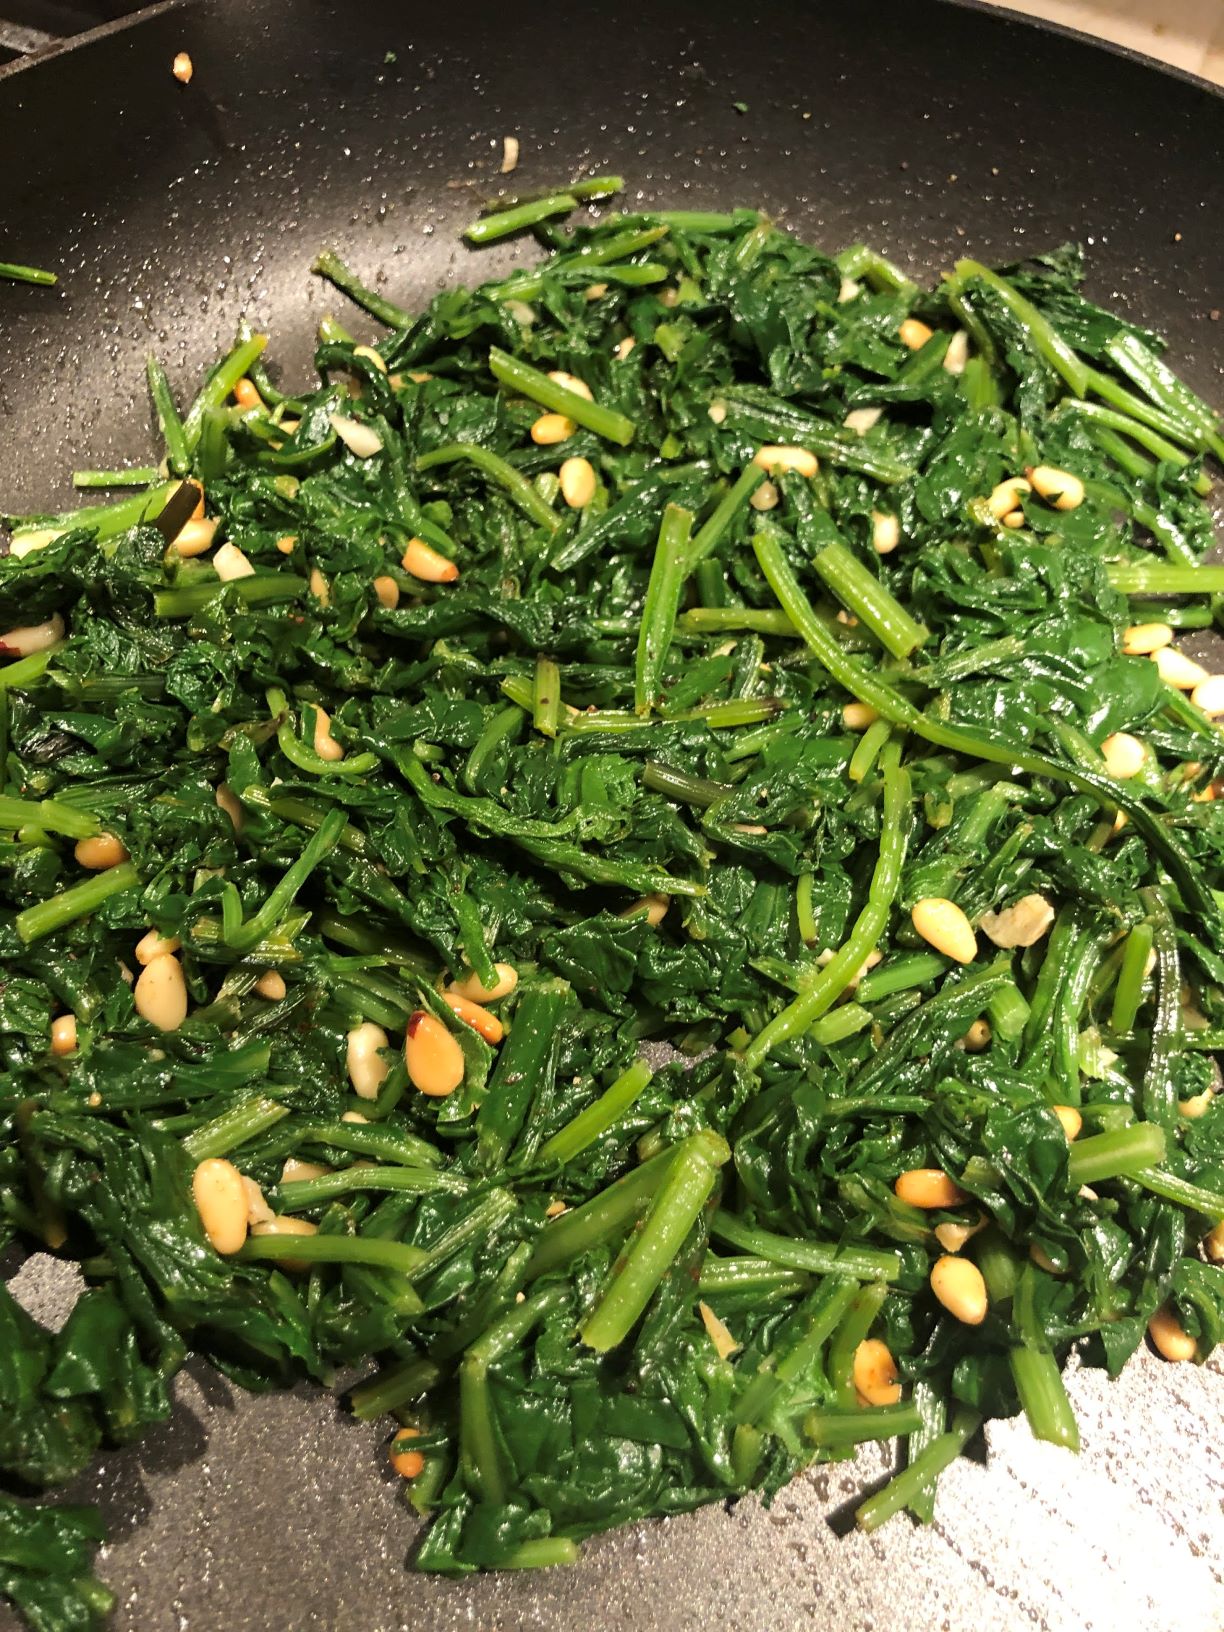
BEET GREENS WITH PINE NUTS
2 3/4 lb. beet greens or Swiss Chard
2.5 tbsp. unsalted butter and 2 tbsp. olive oil
scant 5 tbsp. pine nuts
2 small cloves garlic, sliced very thin
1/4 cup dry white wine
sweet paprika, to garnish (optional)
salt and pepper
- Clean the beet greens or Swiss Chard. Chop into strips.
- Put half of the butter and the 2 tablespoons of olive oil in the large frying pan and place over medium heat. Once hot, add the pine nuts and toss them in the pan until golden, about 2 minutes. Using a slotted spoon, remove them from the pan.
- Throw in the garlic. Cook for about a minutes until it starts to become golden
- Carefully pour in the wine. Leave for a minute or less, until it reduces to about one third. Add the chopped beet greens and the rest of the butter and cook for 2-5 minutes, until the beet greens are wilted.
- Season with salt and black pepper. Divide the greens among the individual serving bowls, and scatter with pine nuts. Drizzle with additional olive oil and paprika, if you desire.
Adapted from Jerusalem Cookbook
Full recipe for Swiss Chard with Tahini, Yogurt & Buttered Pine Nuts from the Dallas News